Hobart Photos and Maps Unrestored
Step back in time with our collection of raw historic pieces, each one a potential candidate for digital restoration, printing, and framing. Should you find something captivating for your home, simply place the custom order through our Custom Order Product with our online store. Just copy the title below the desired item, and the listed prices already include the restoration fee. For further inquiries and customisation options, don't hesitate to reach out to us via our Contact form.
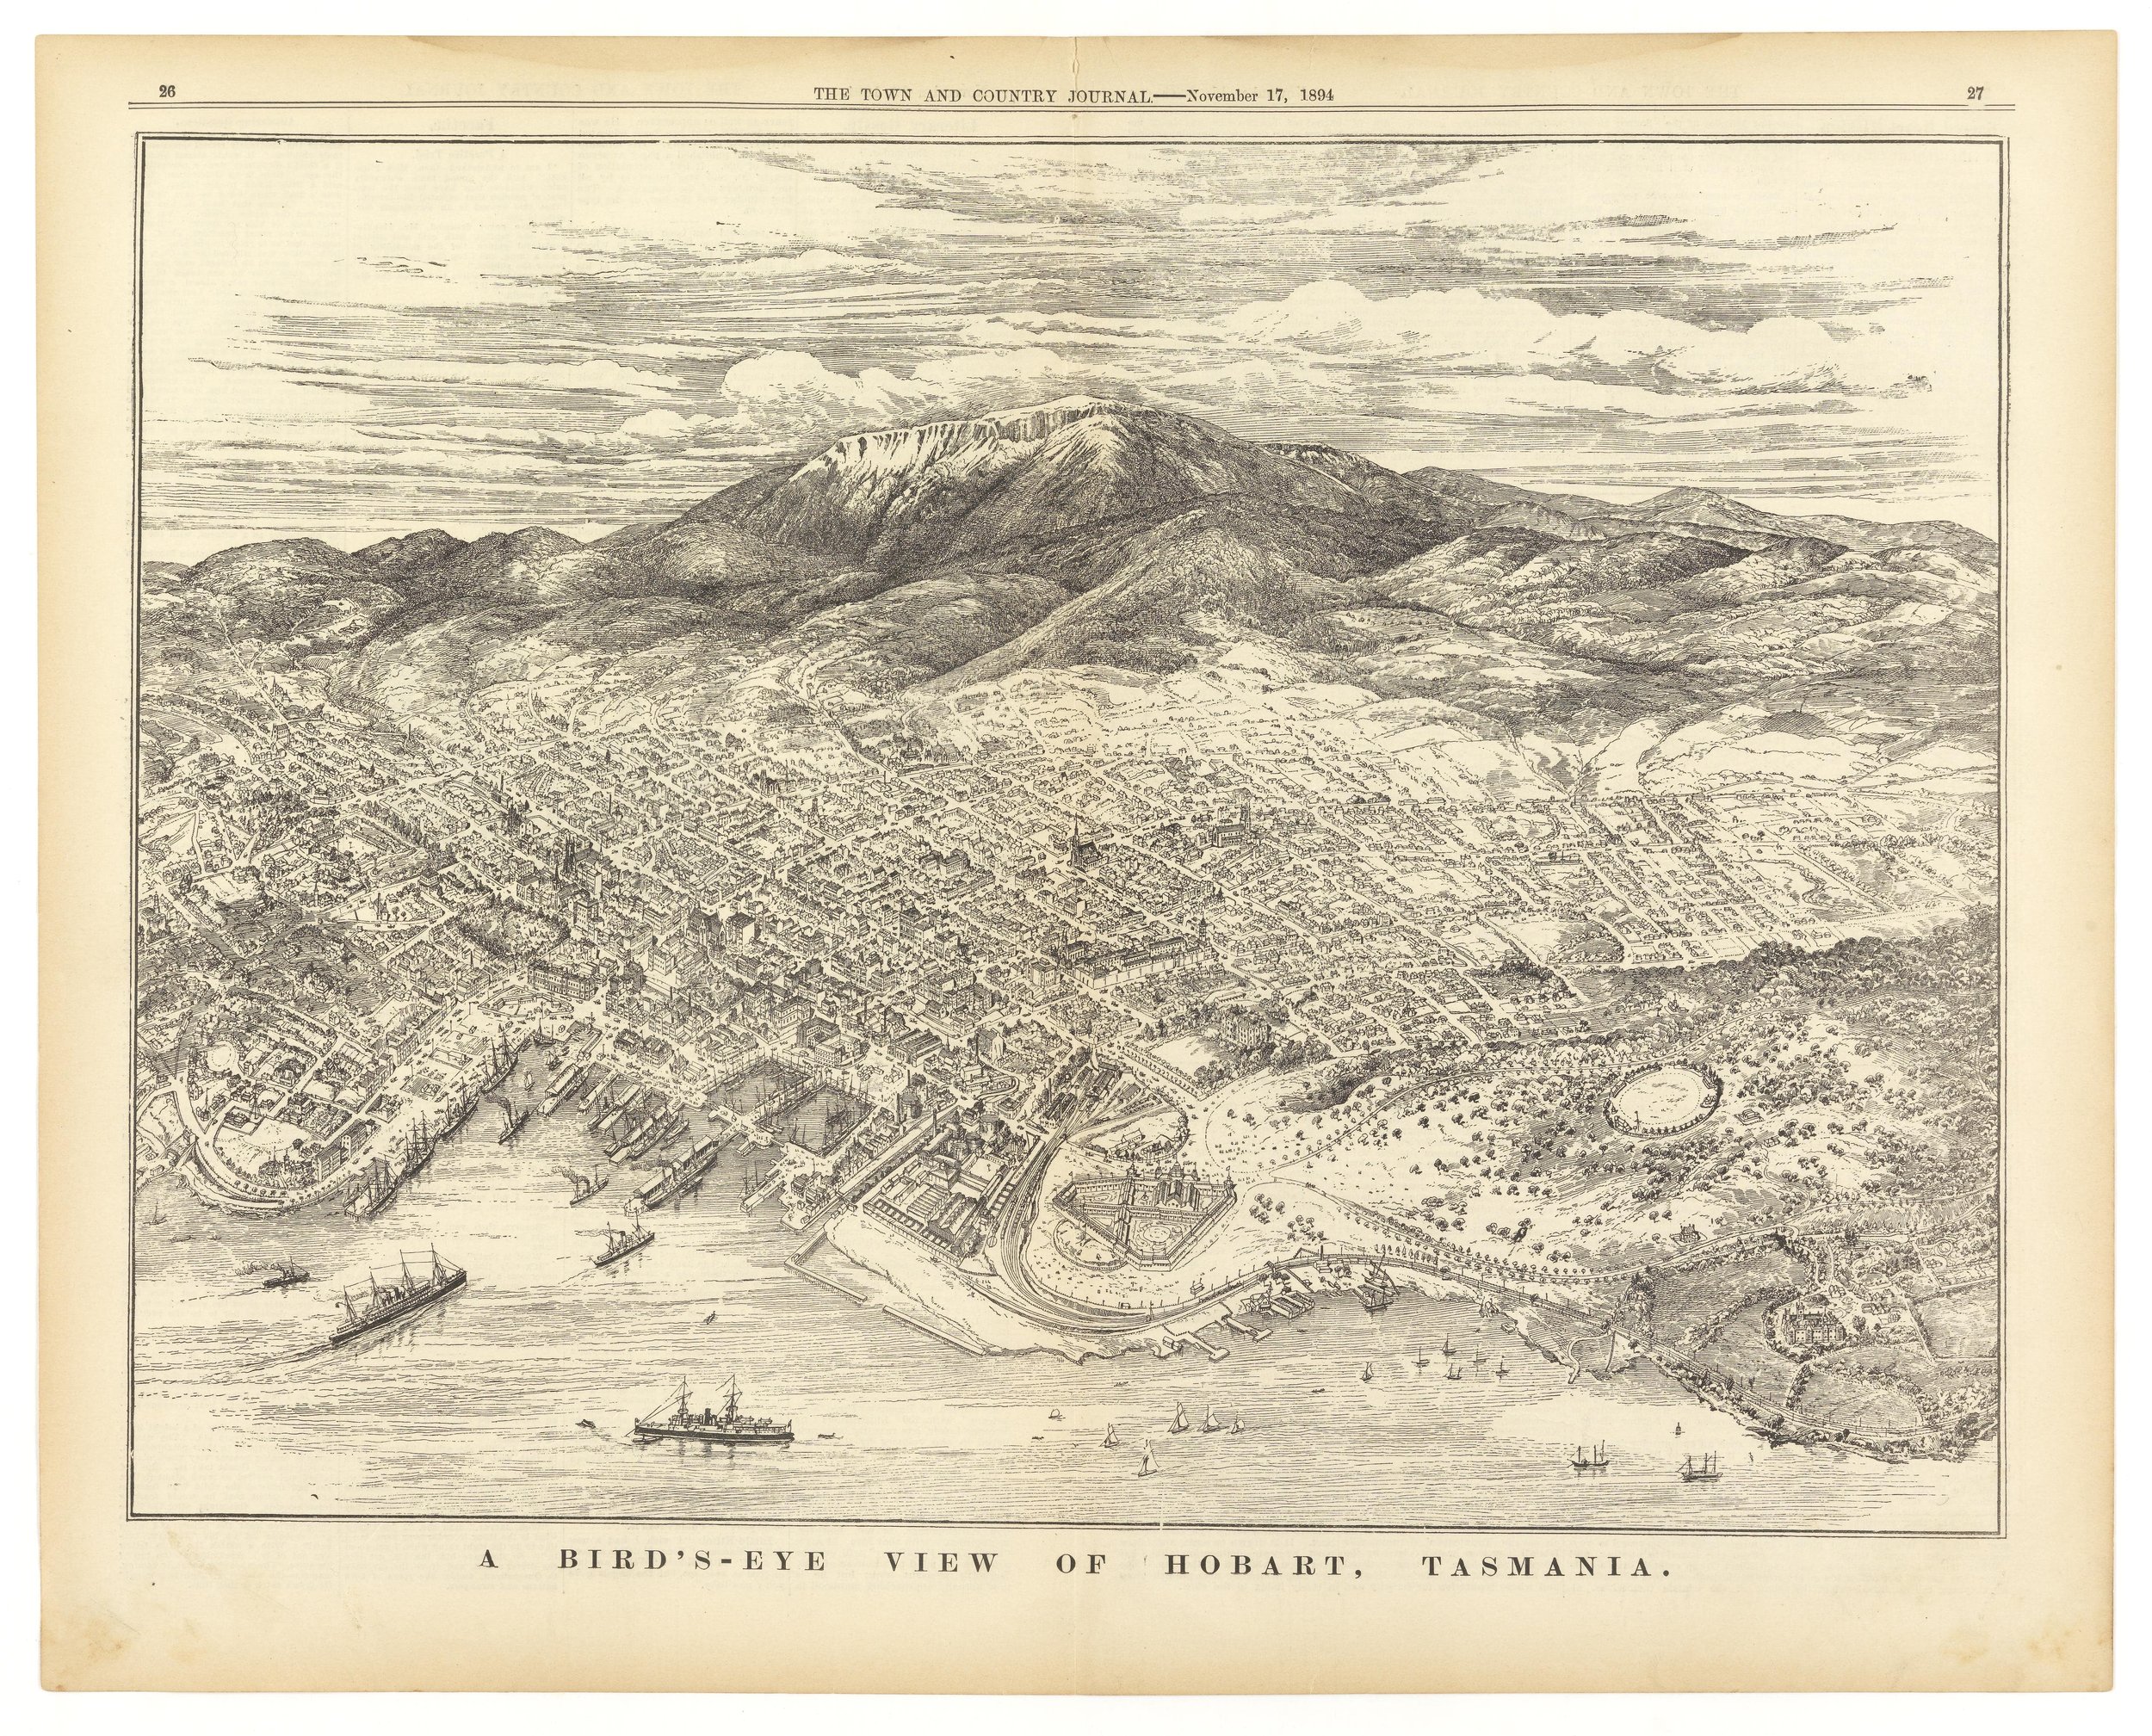
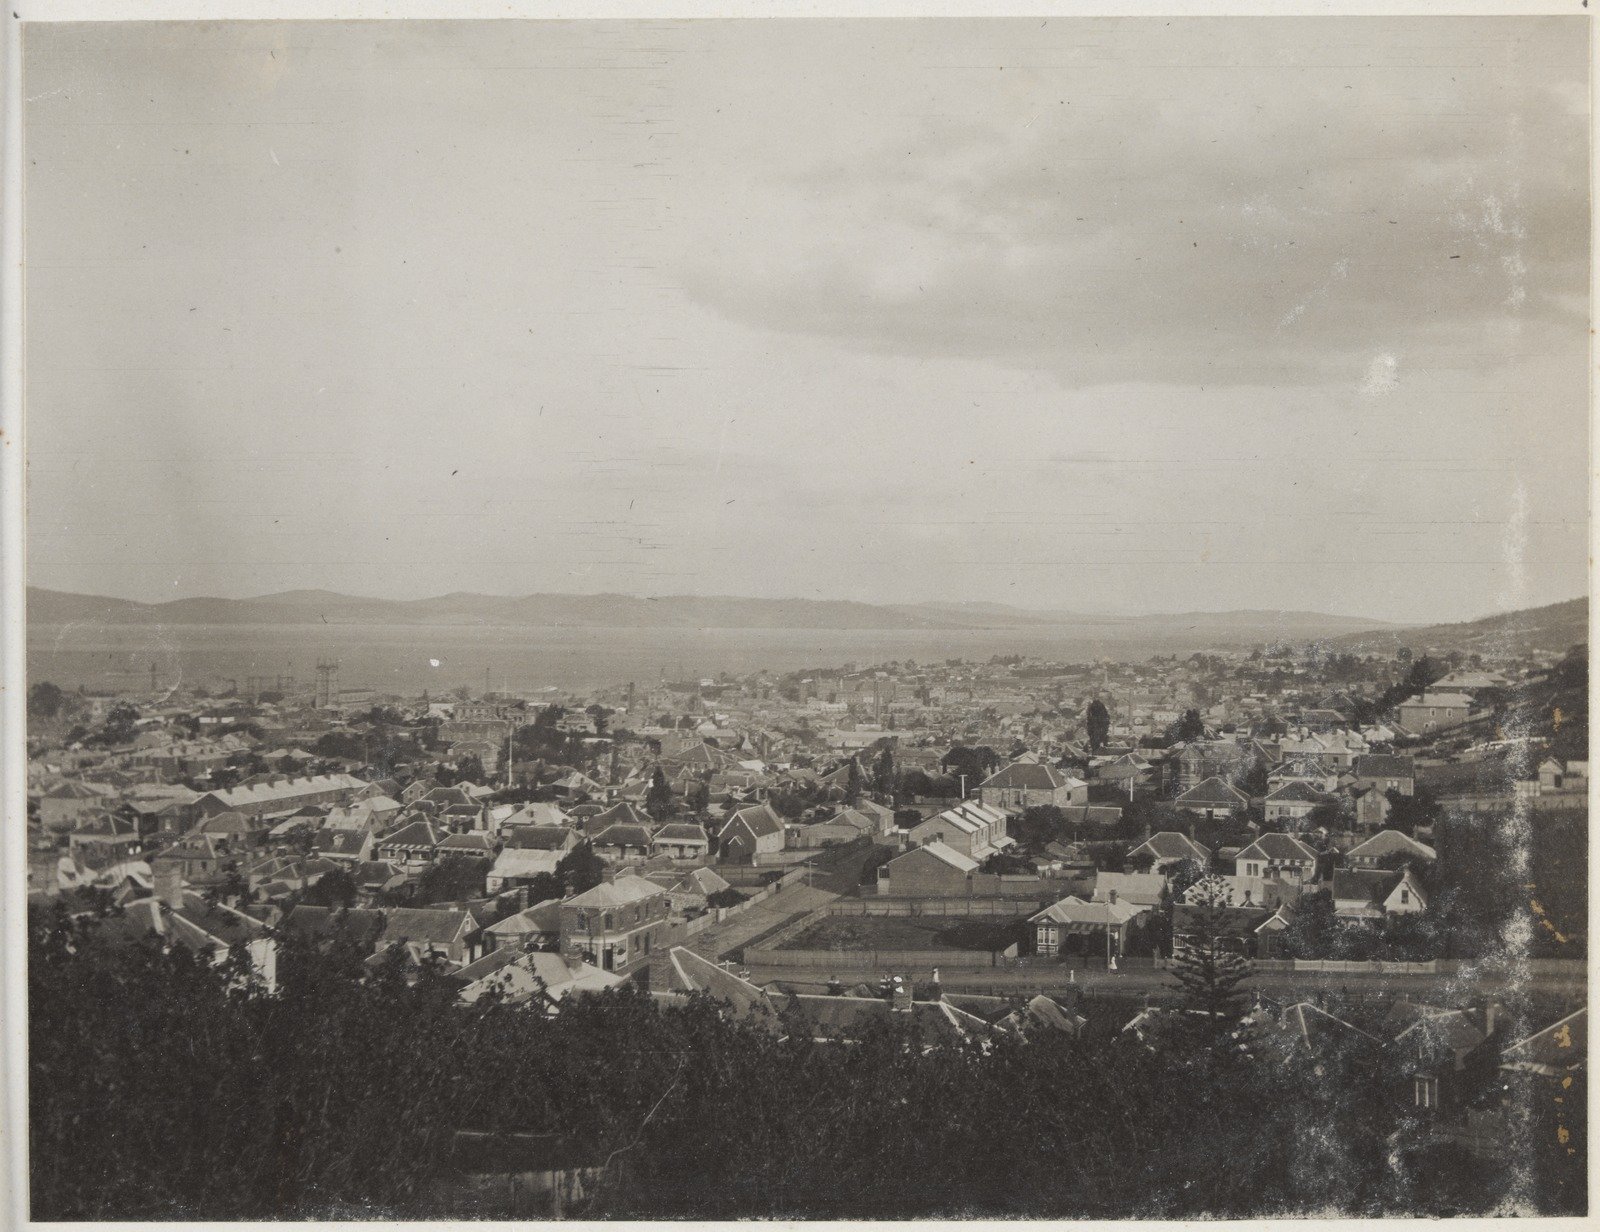
A bird's eye view of Hobart, Tasmania 1894
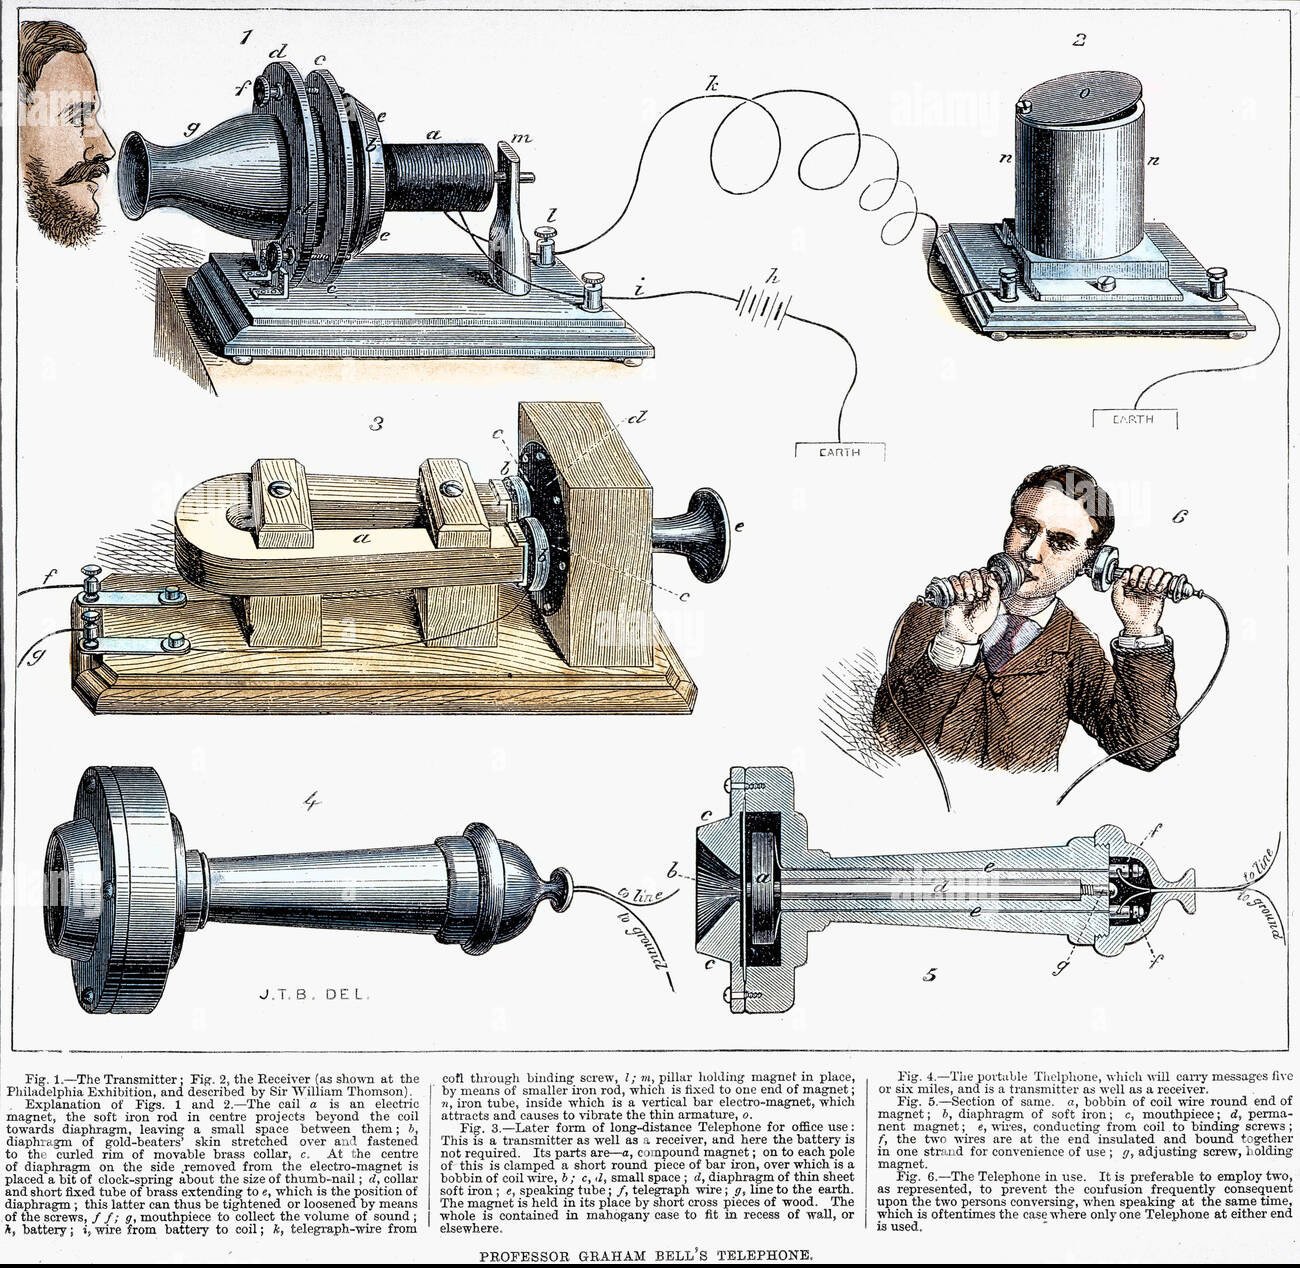
bell-telephone-1877-the-telephone-alexander-graham-bells-invention
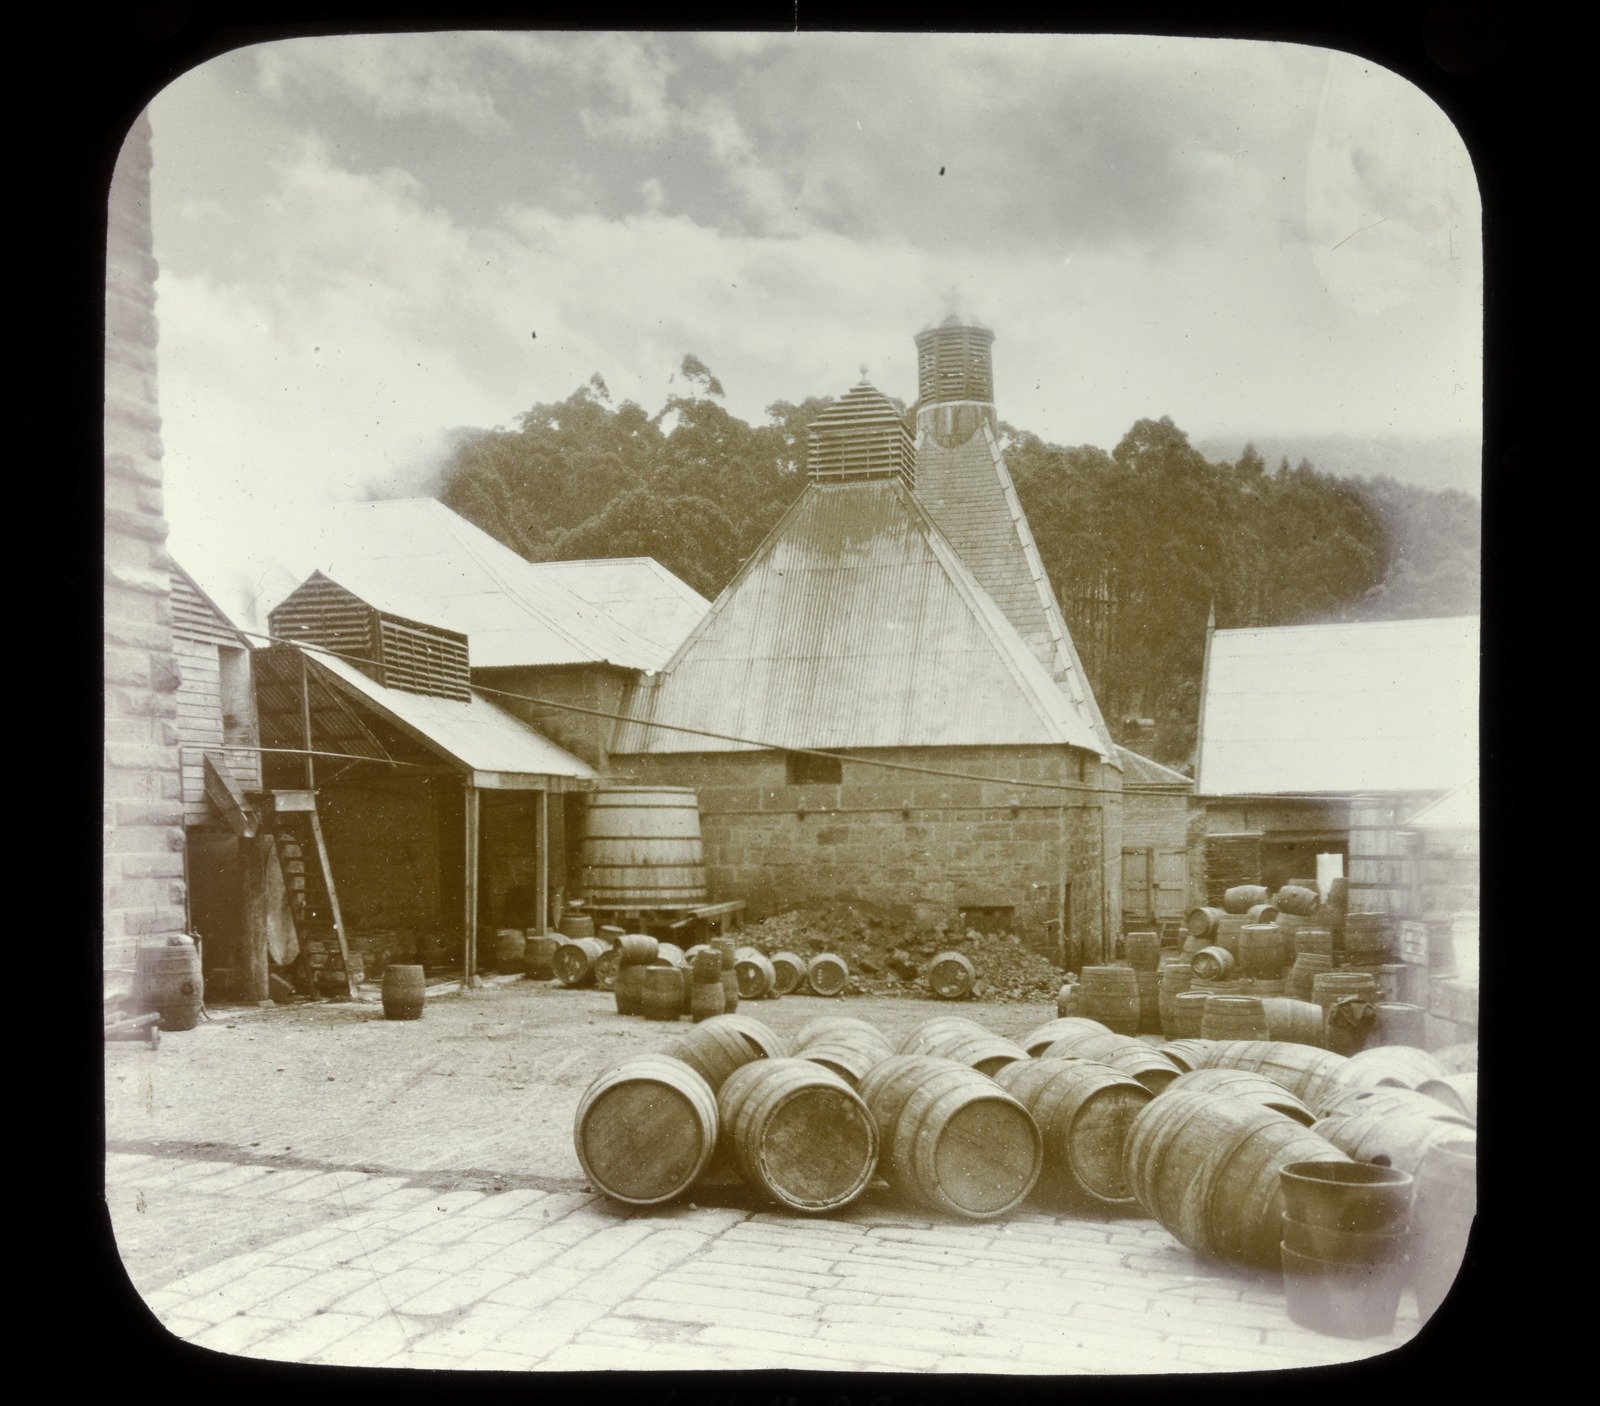
Cascade Brewery Hobart 1875
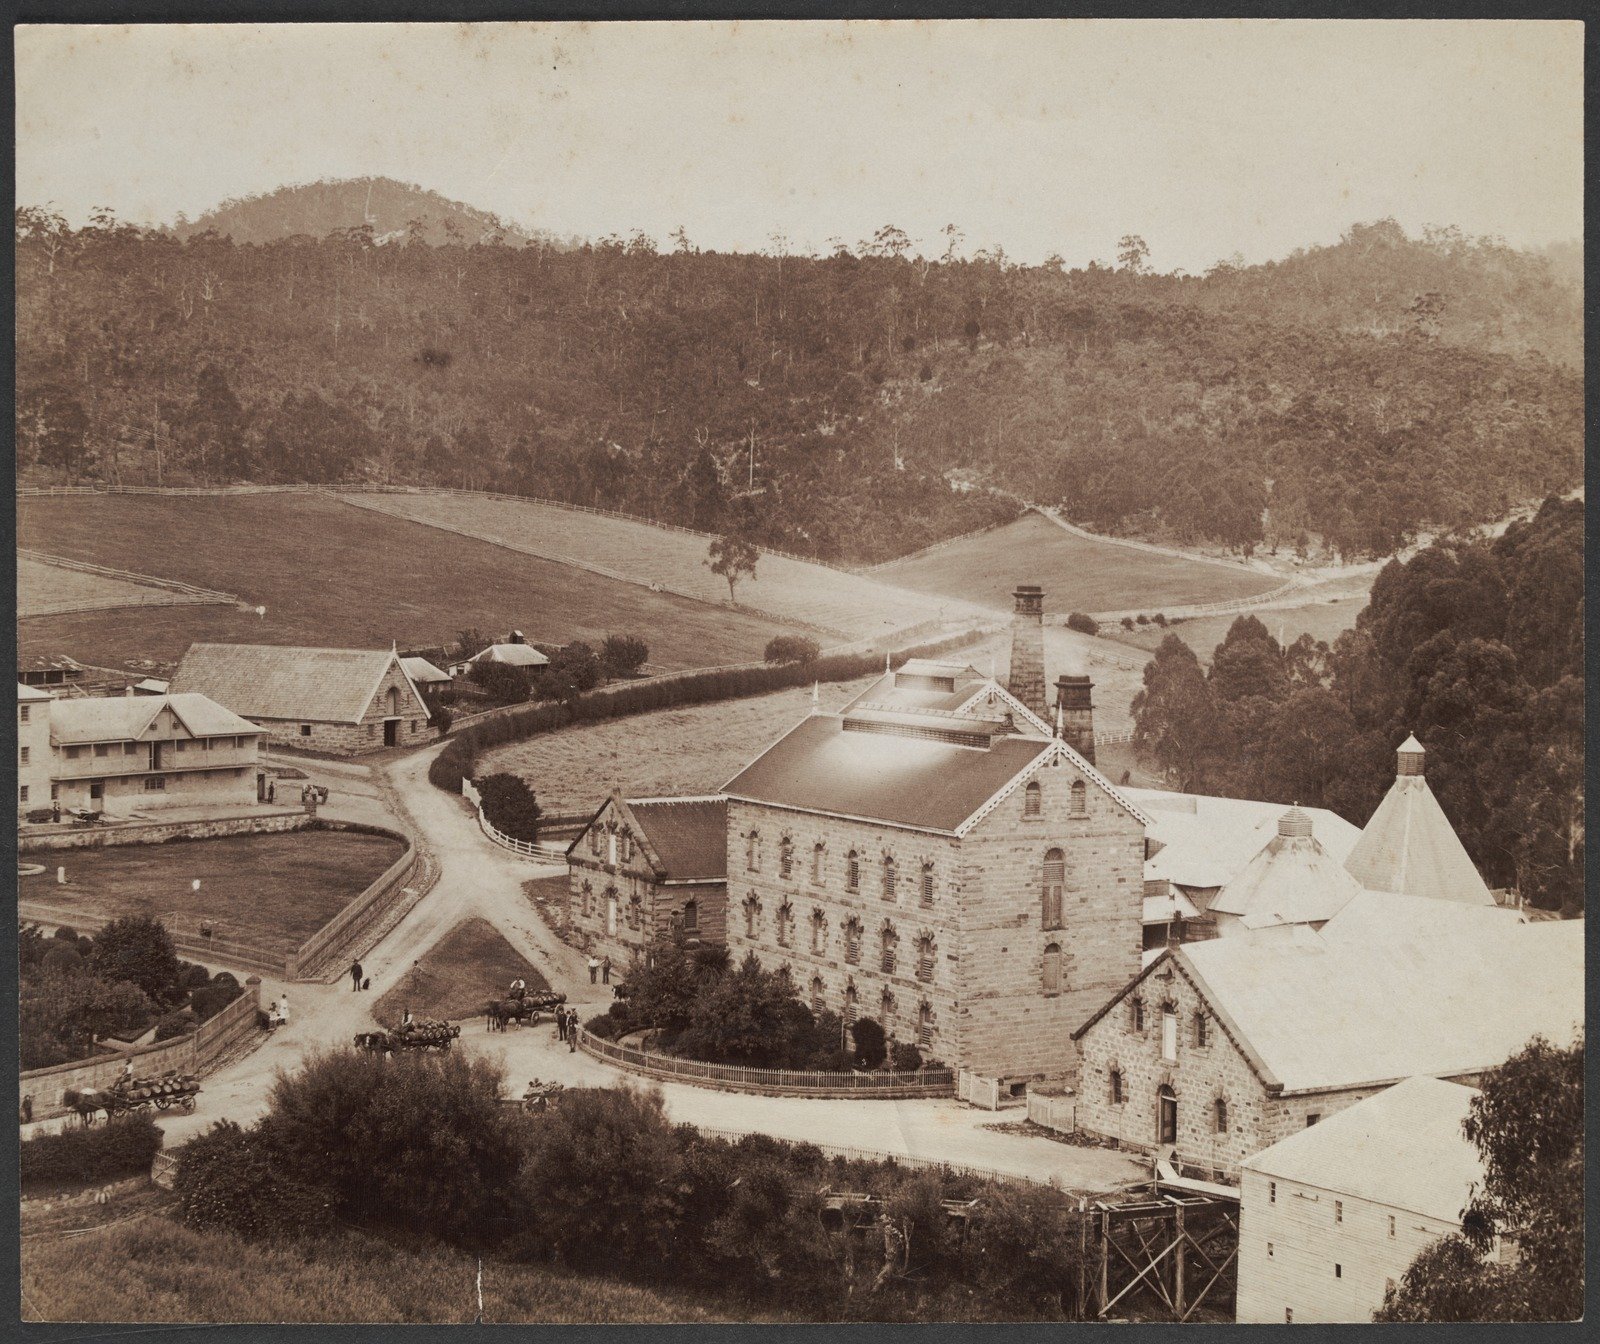
Cascade Brewery Hobart 1885
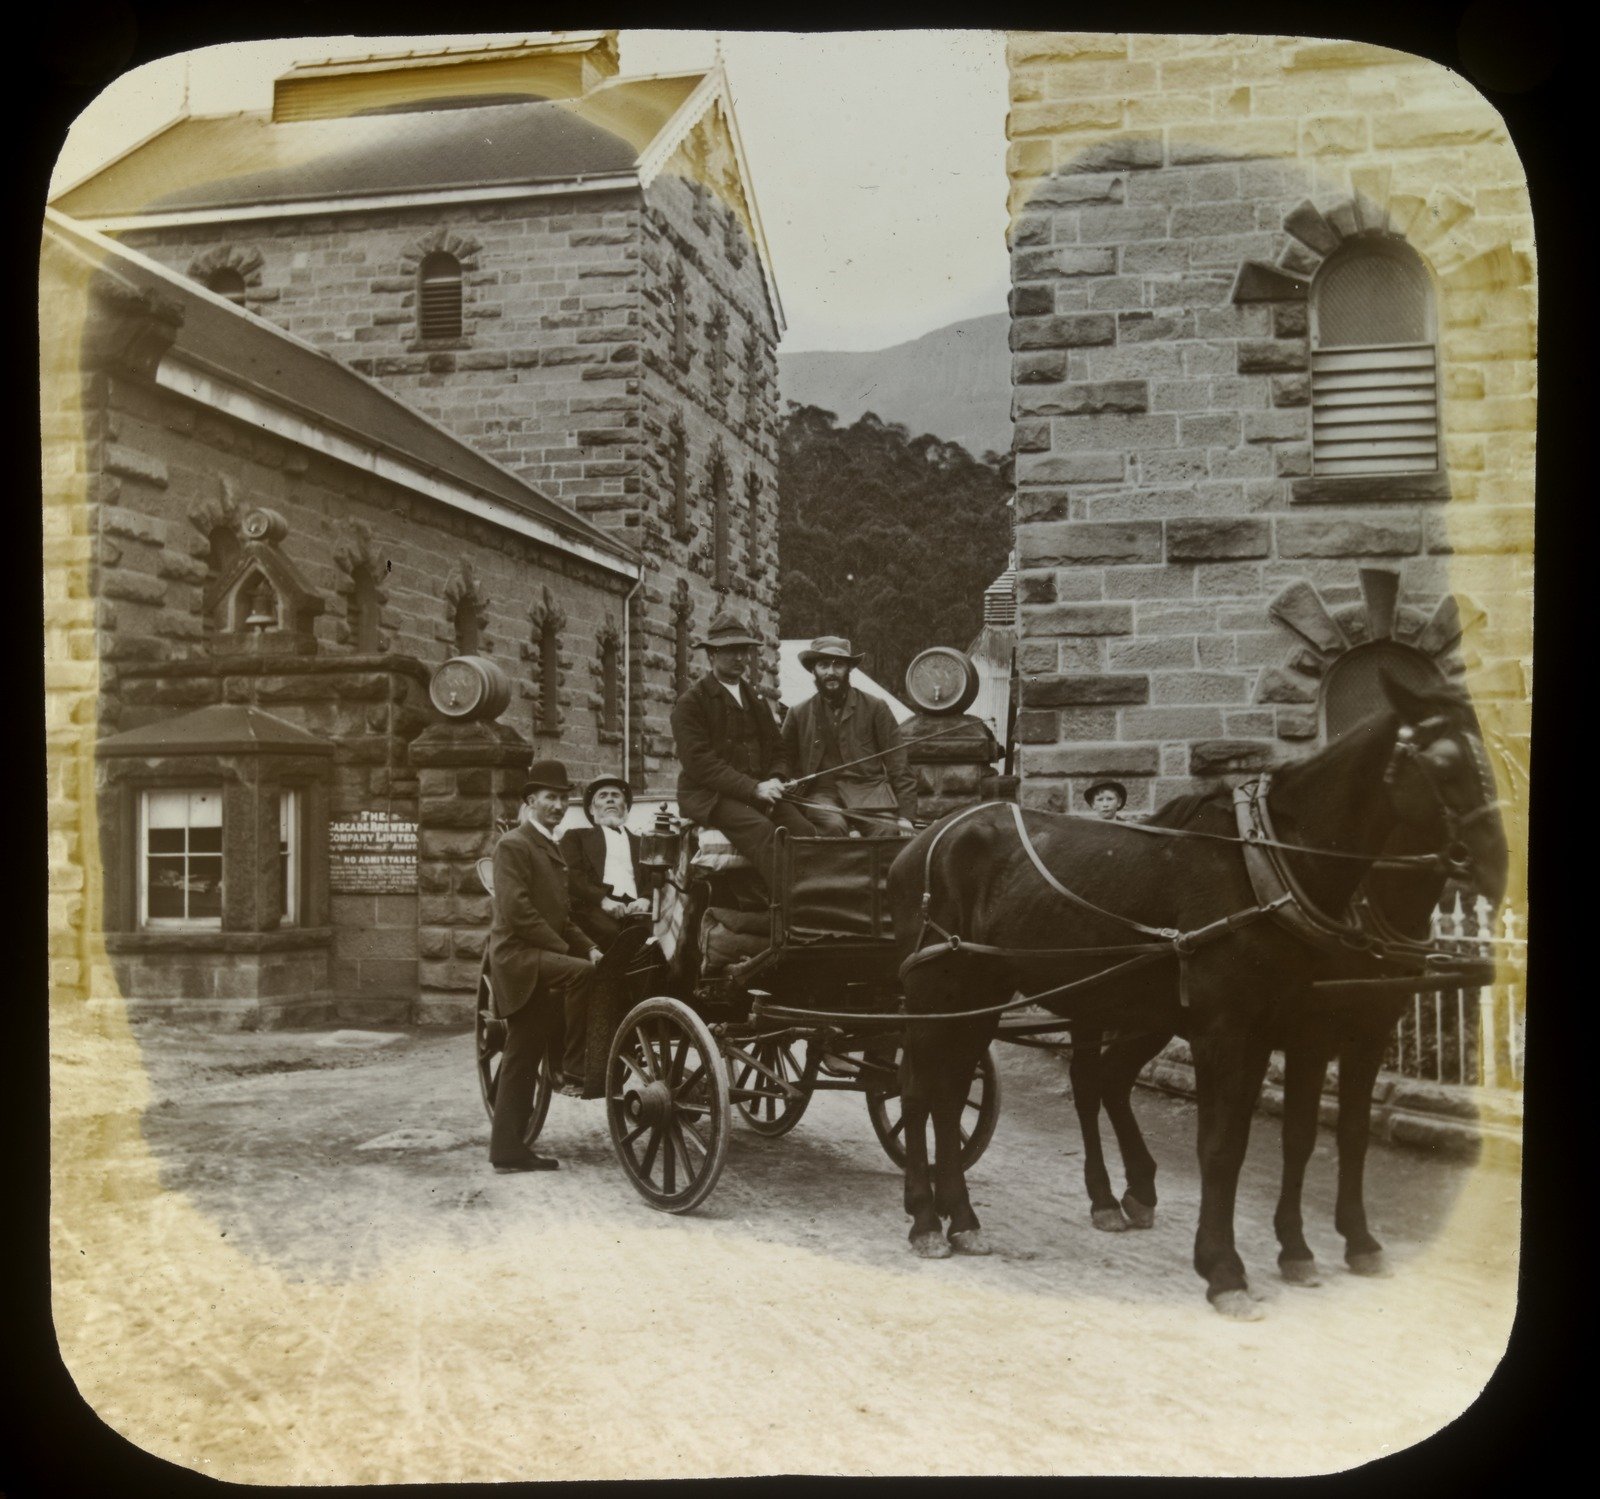
Cascade Brewery Hobart 1928 2

Cascade Brewery Hobart 1928
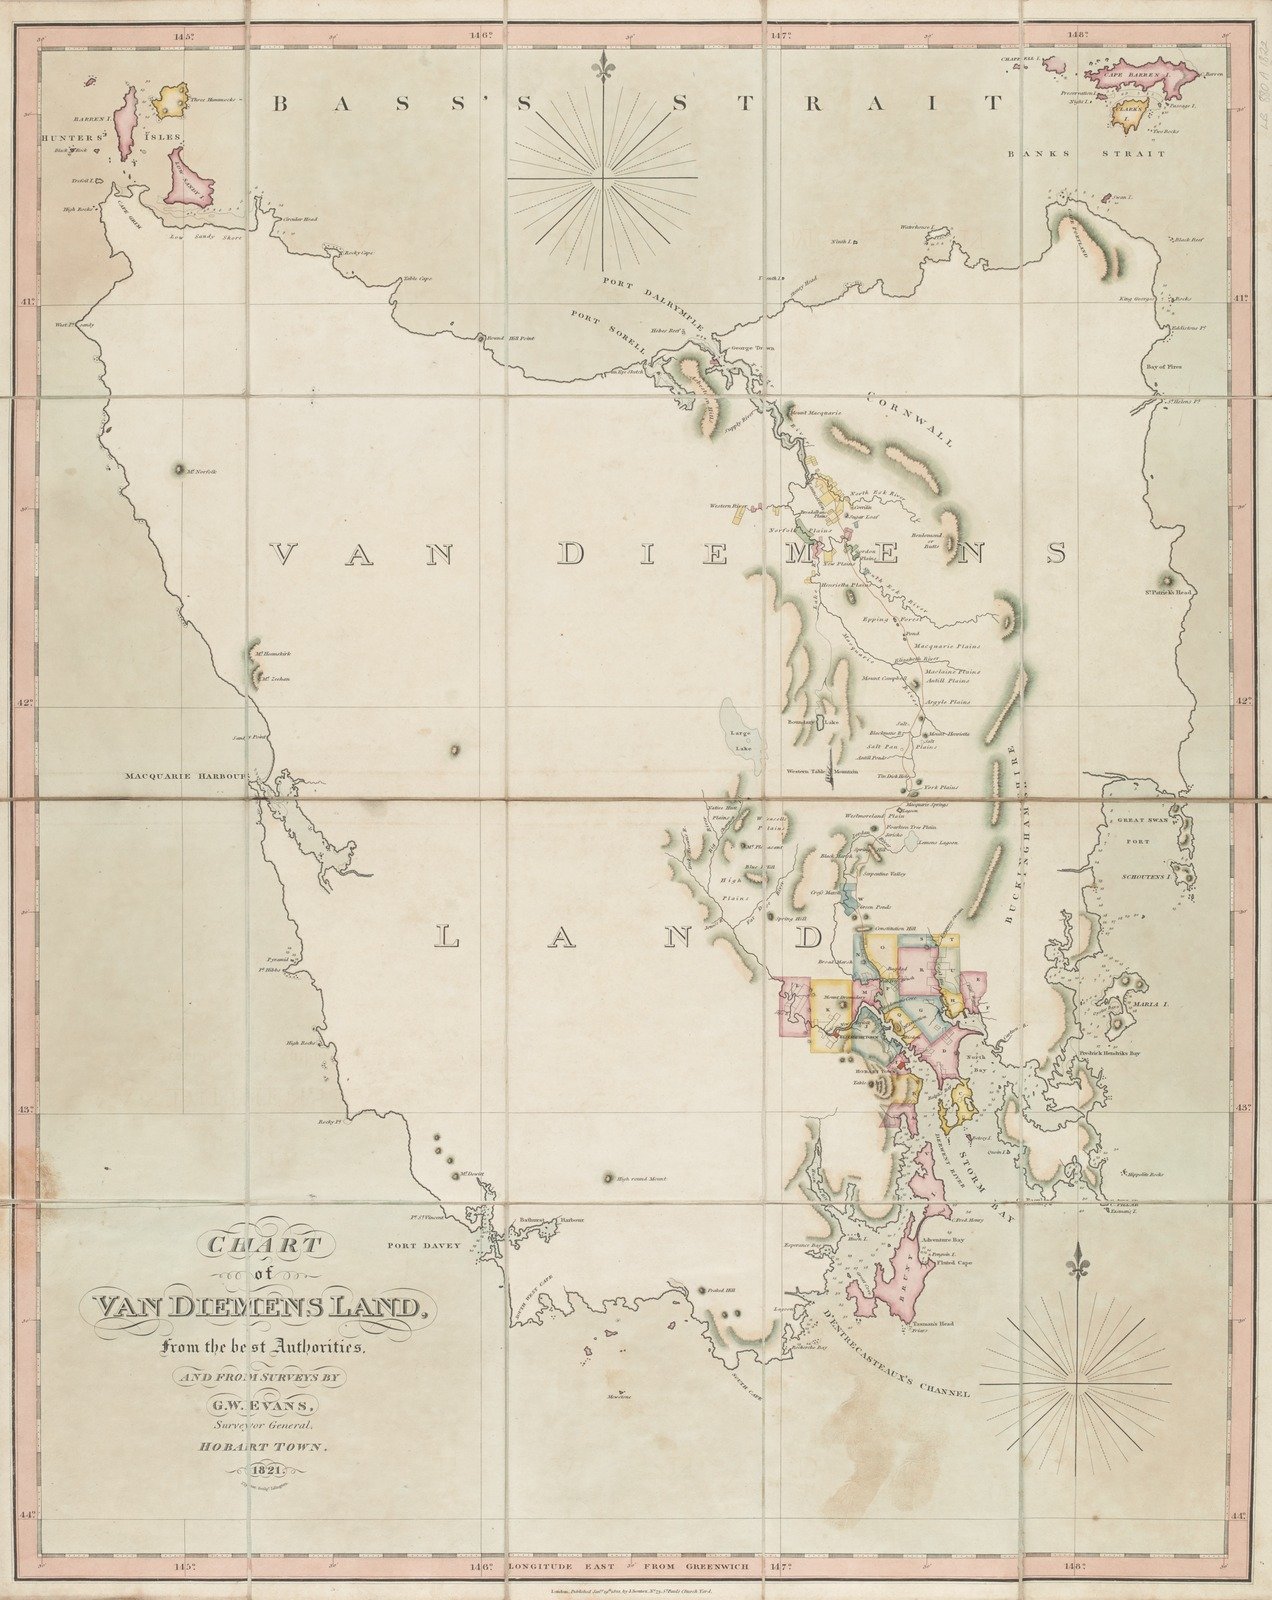
Chart of Van Diemens Land 1822
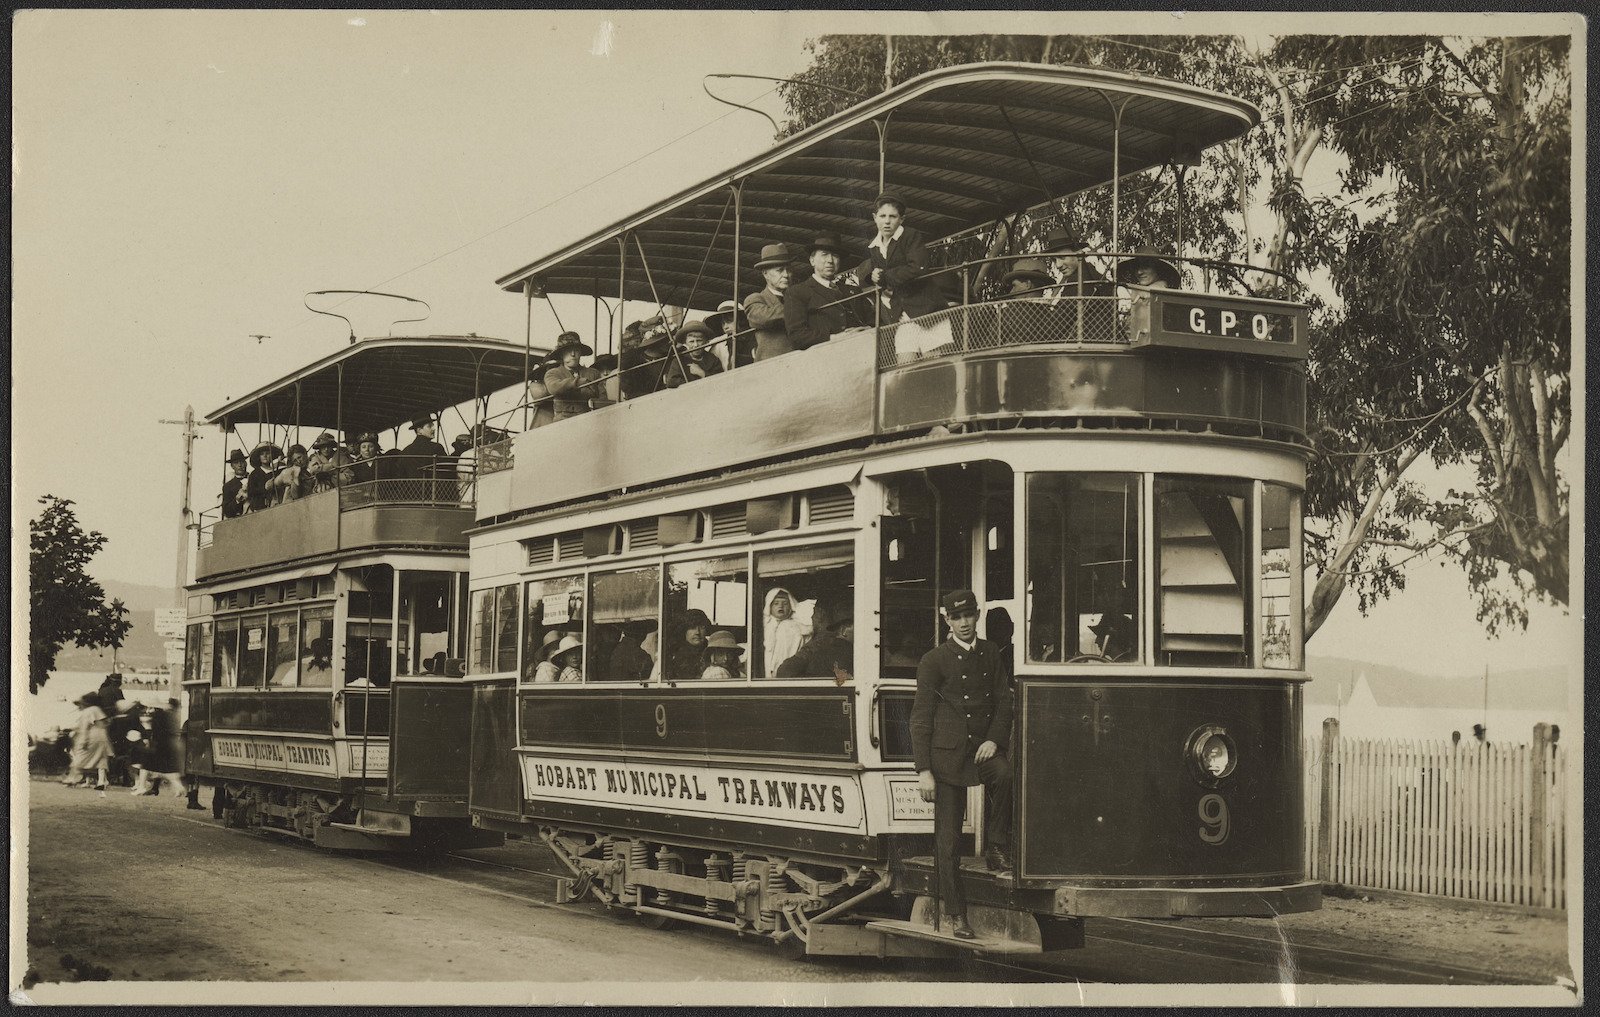
Double decker tram 1934
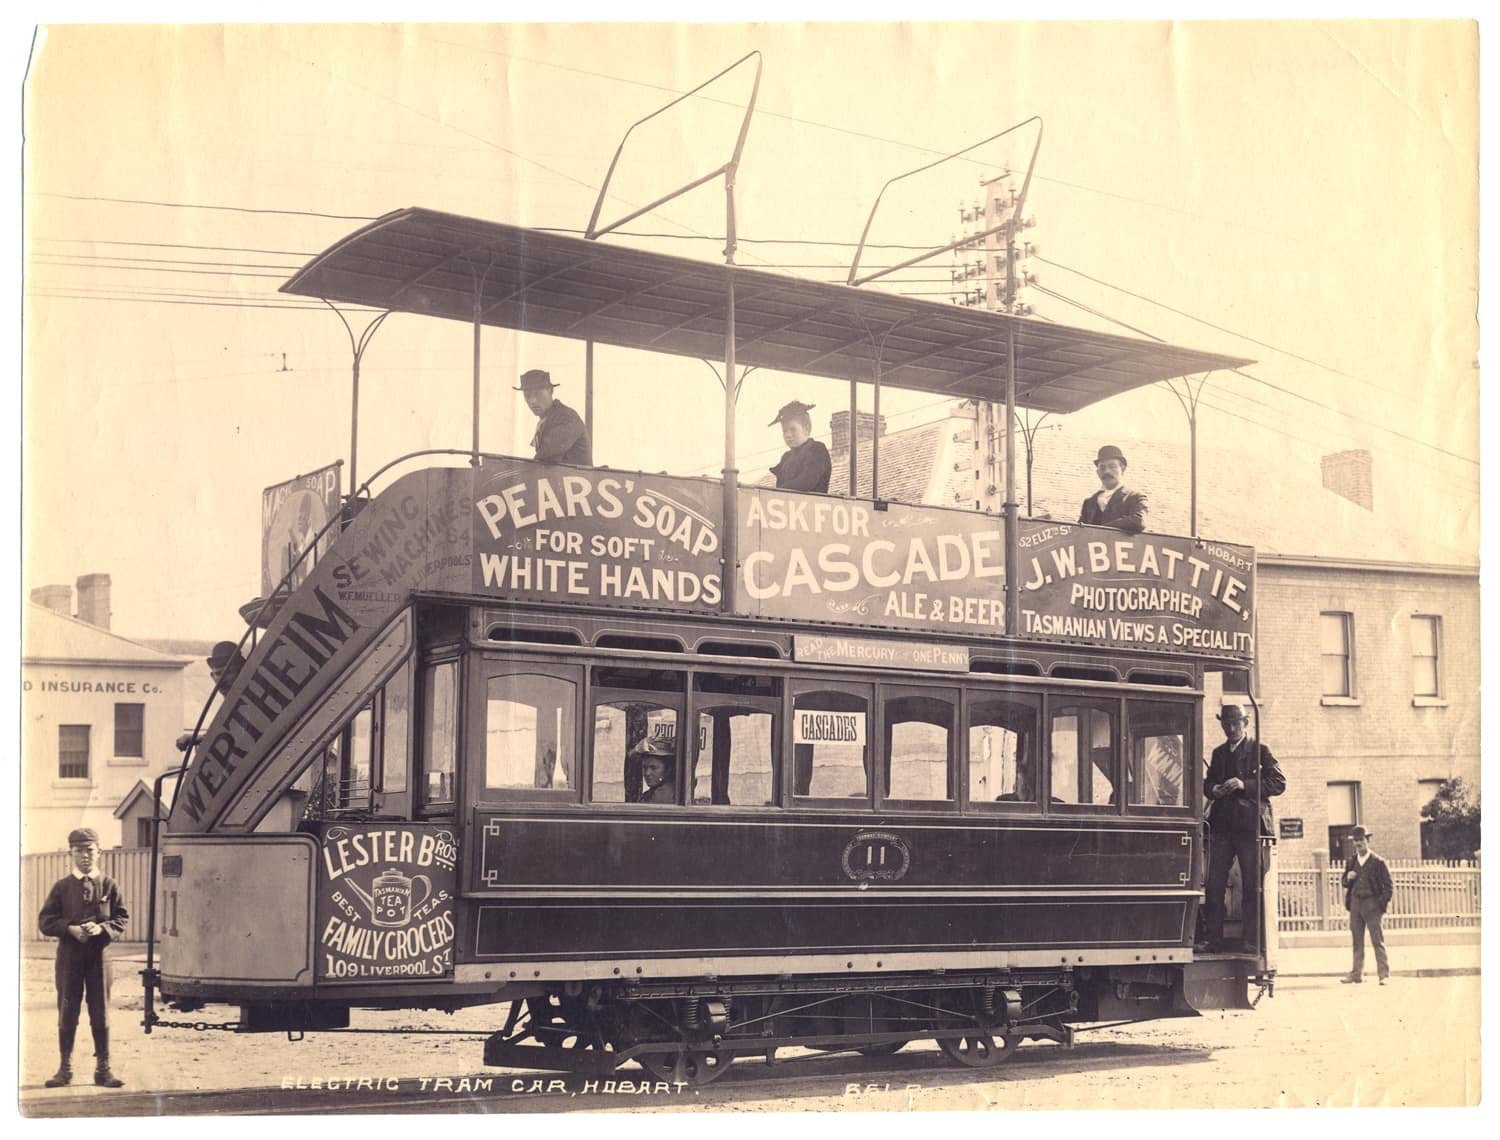
electric tram car, Hobart, Tasmania c.1893
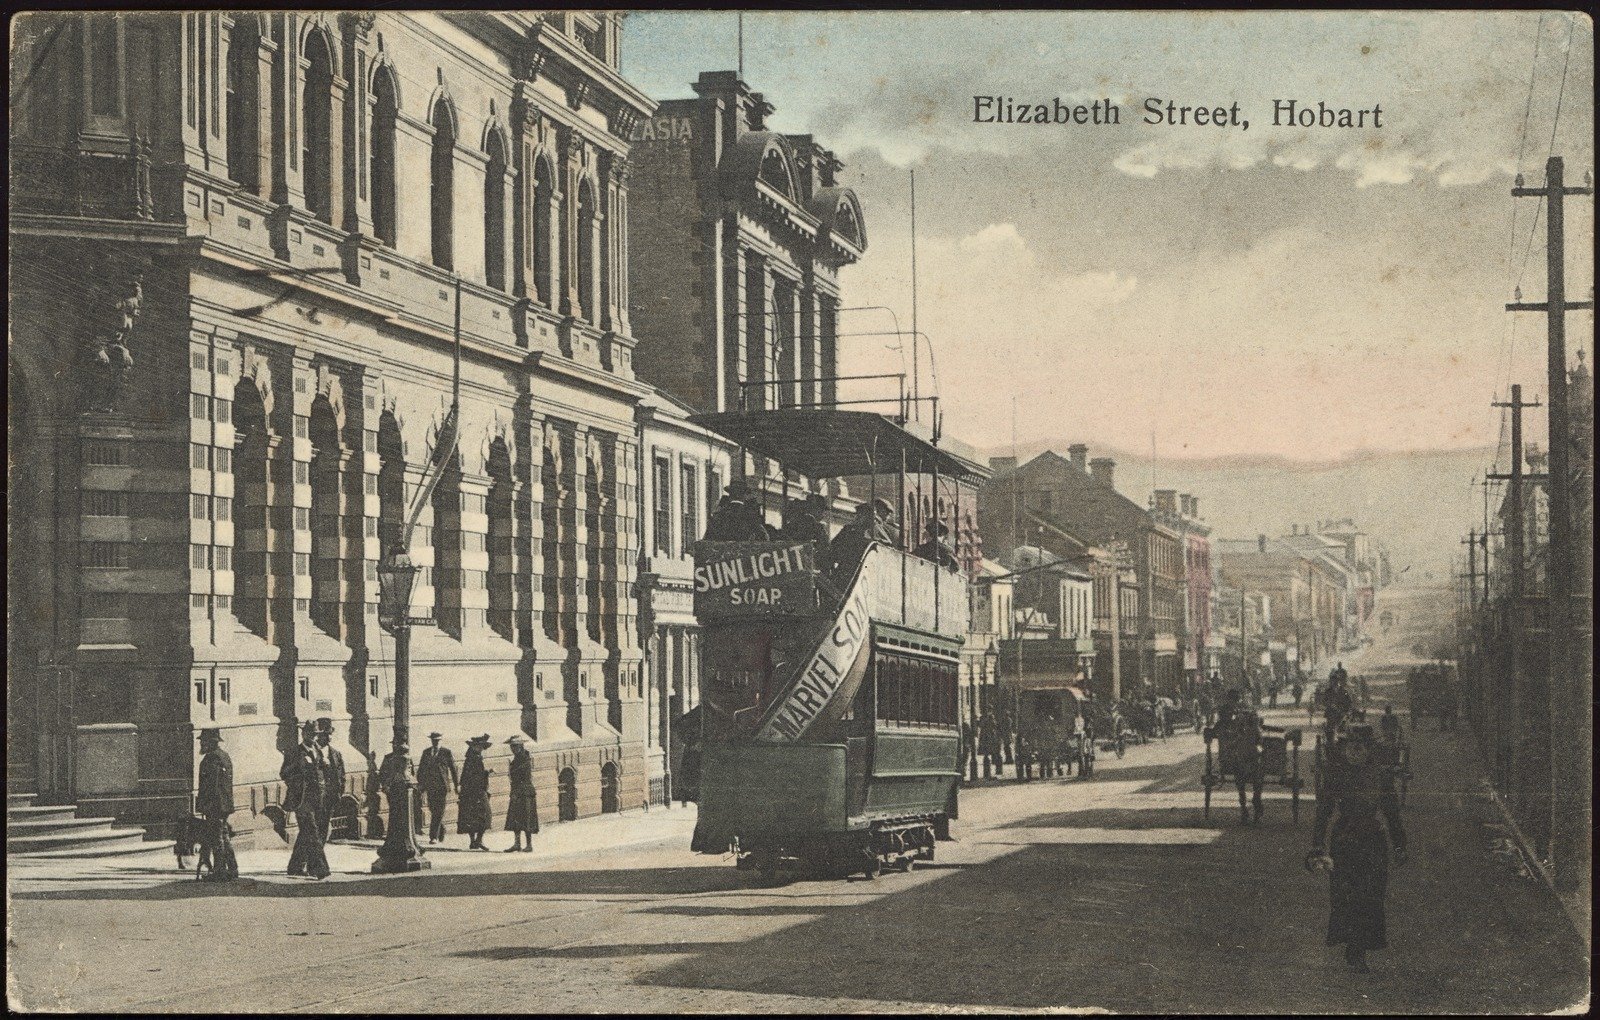
Elizabeth Street, Hobart 1920
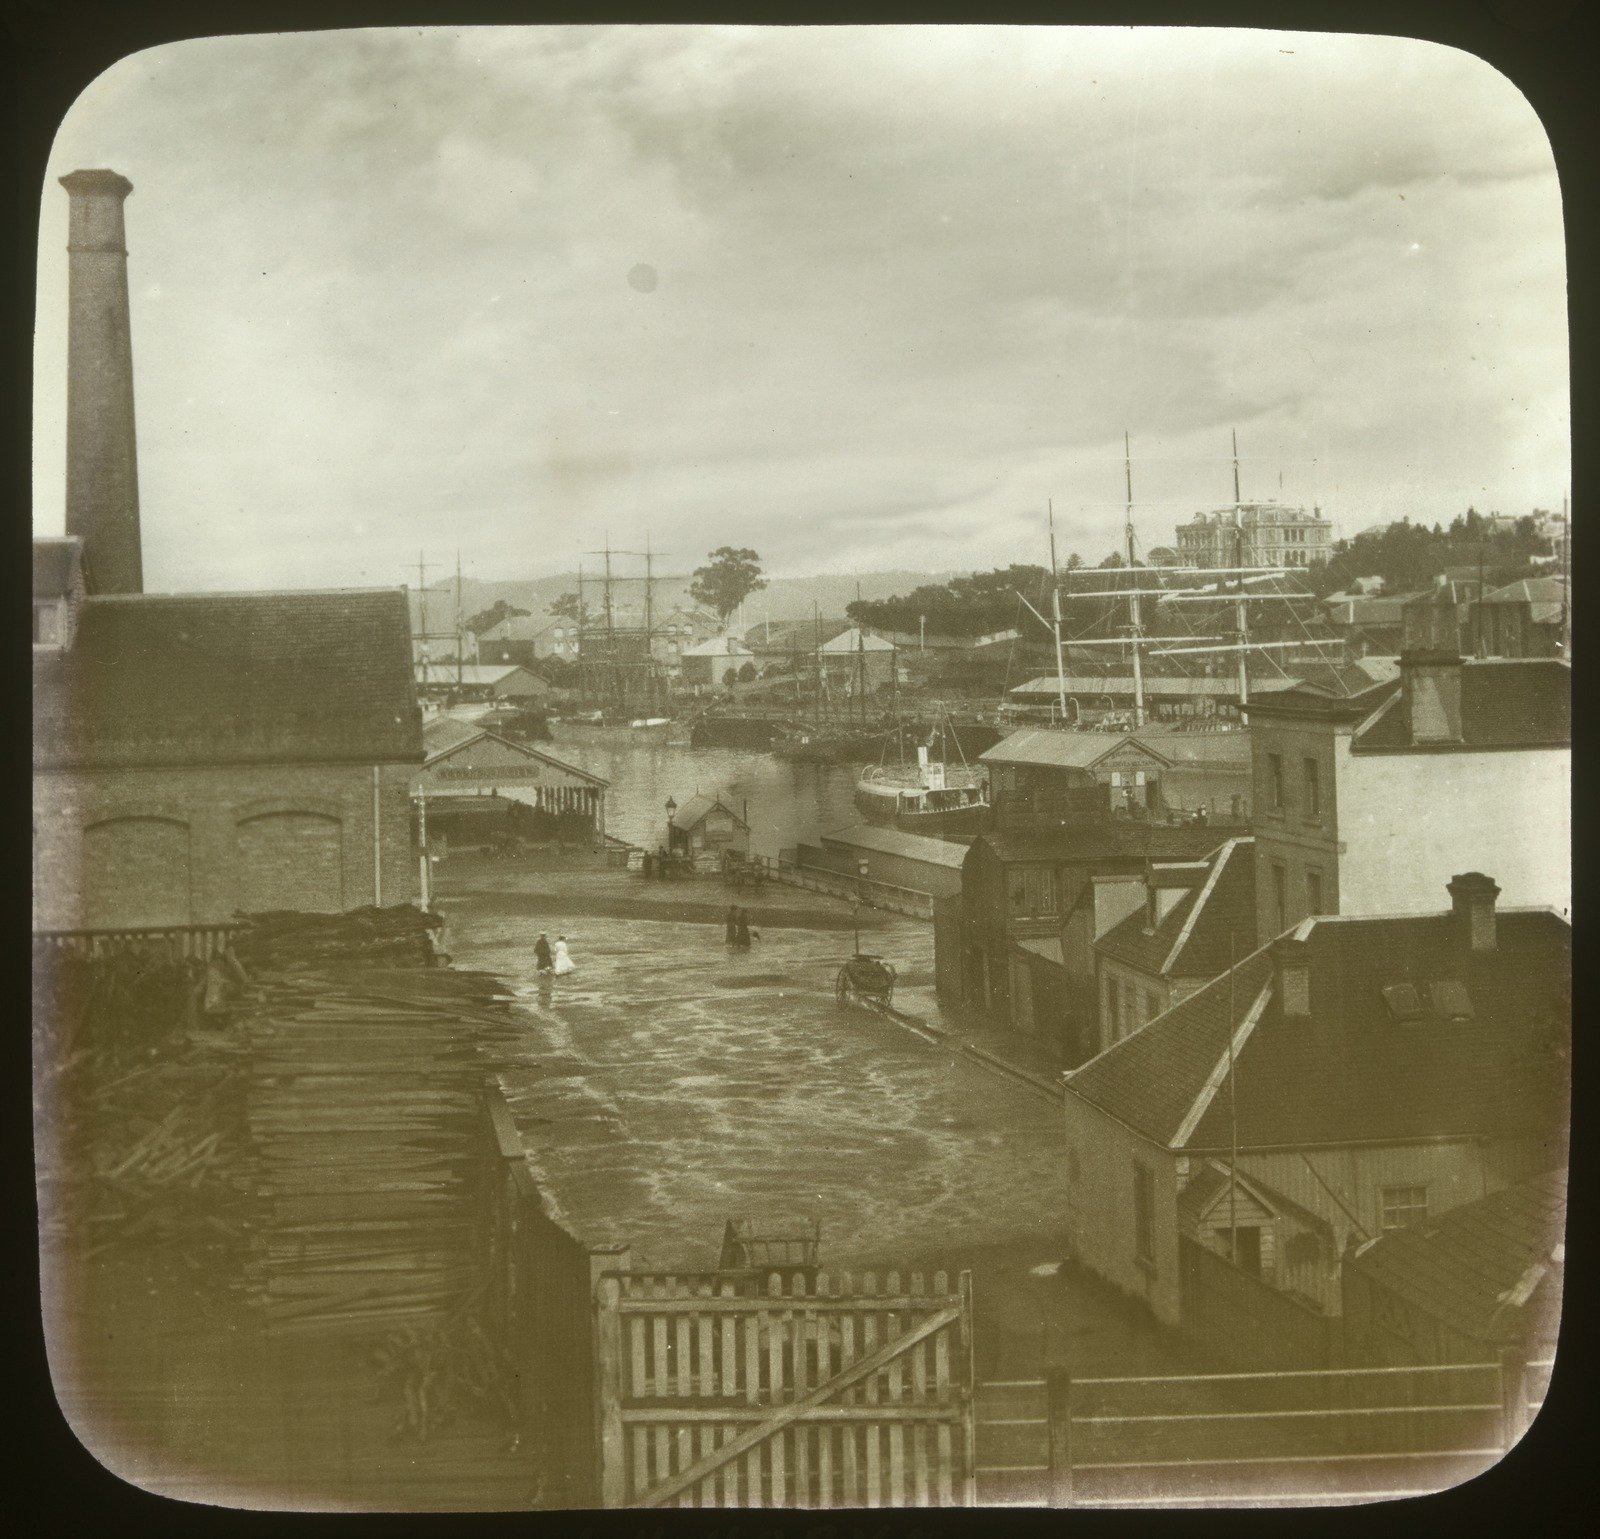
Franklin Wharf, Hobart 1880-1900
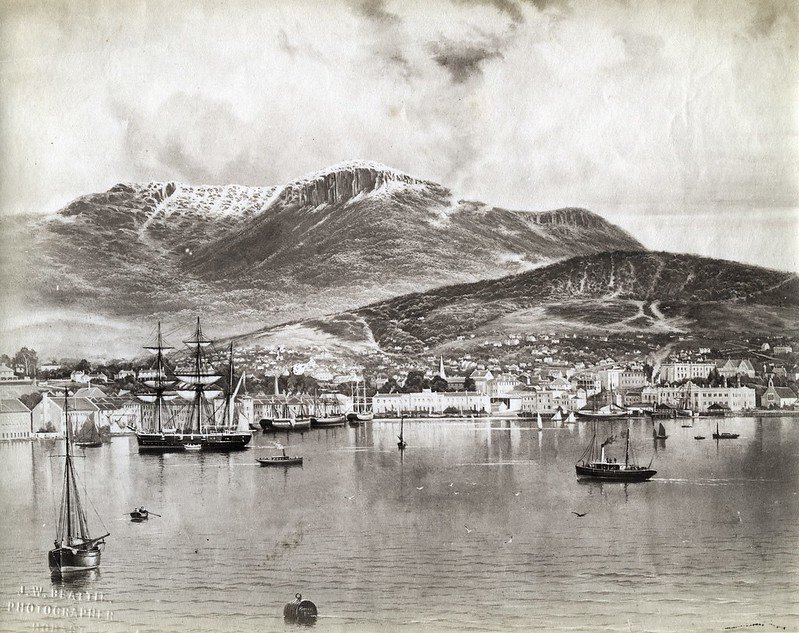
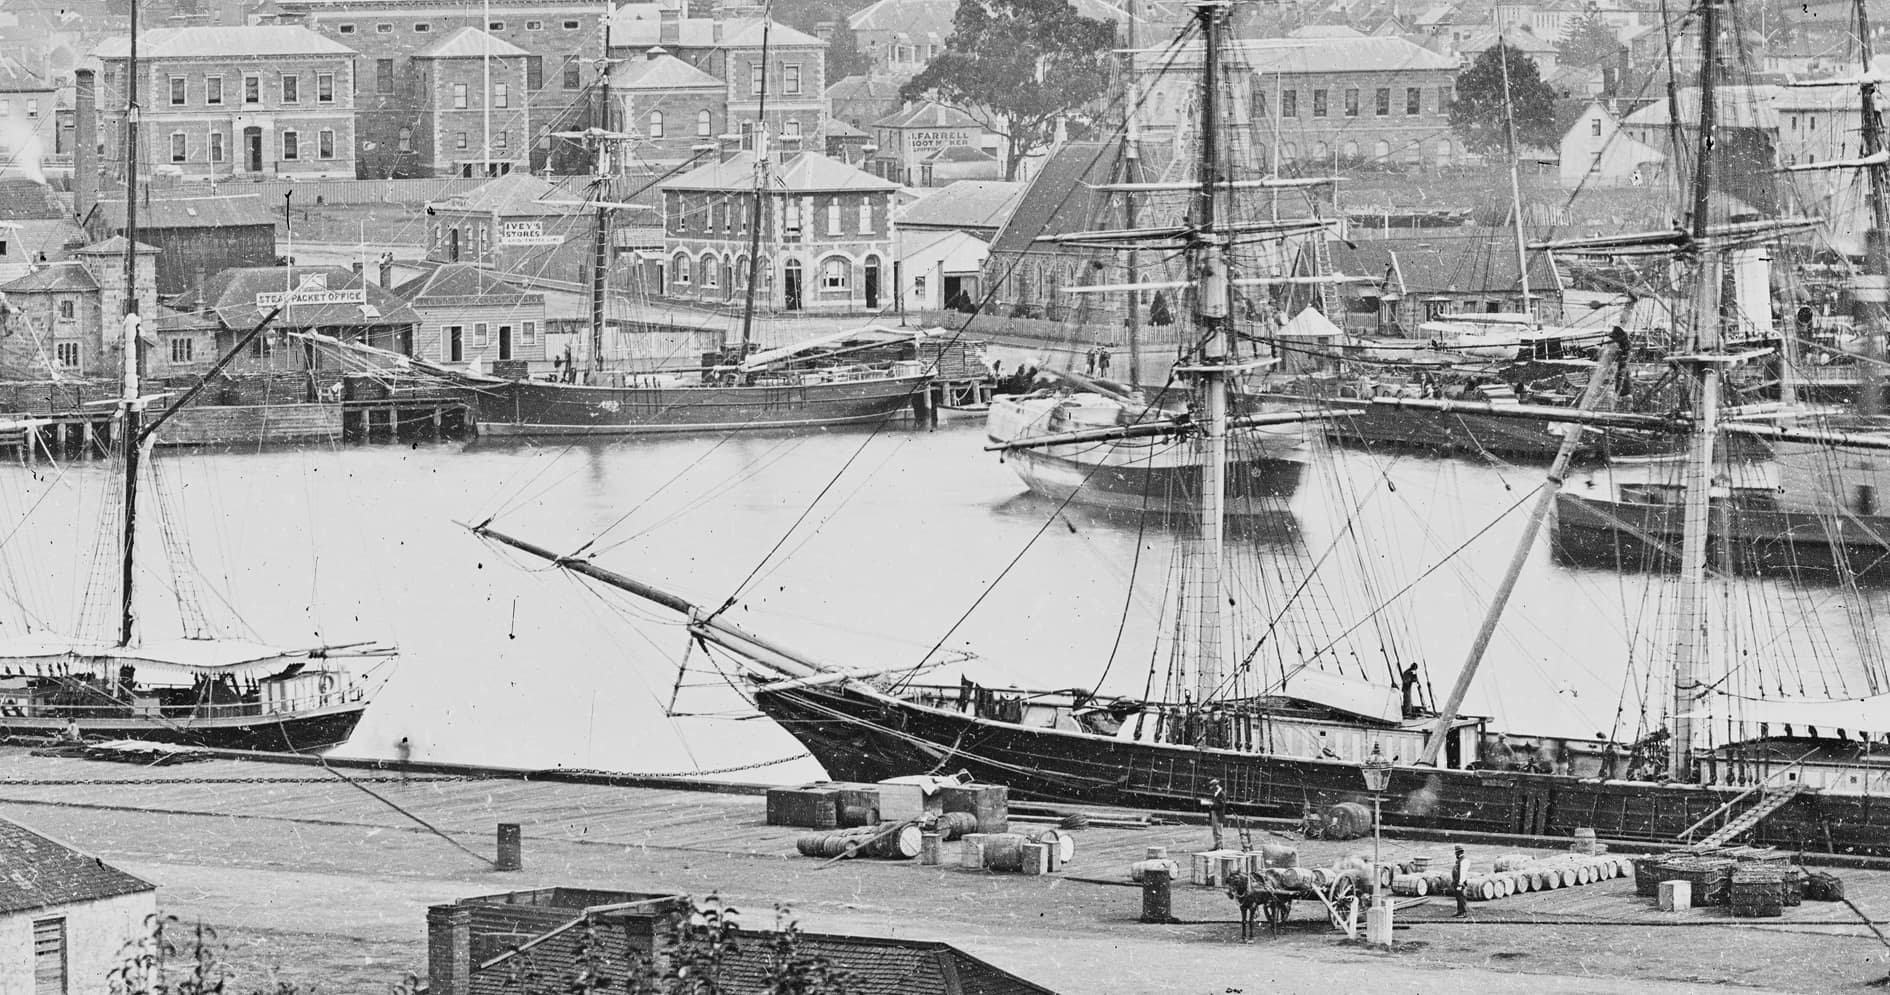
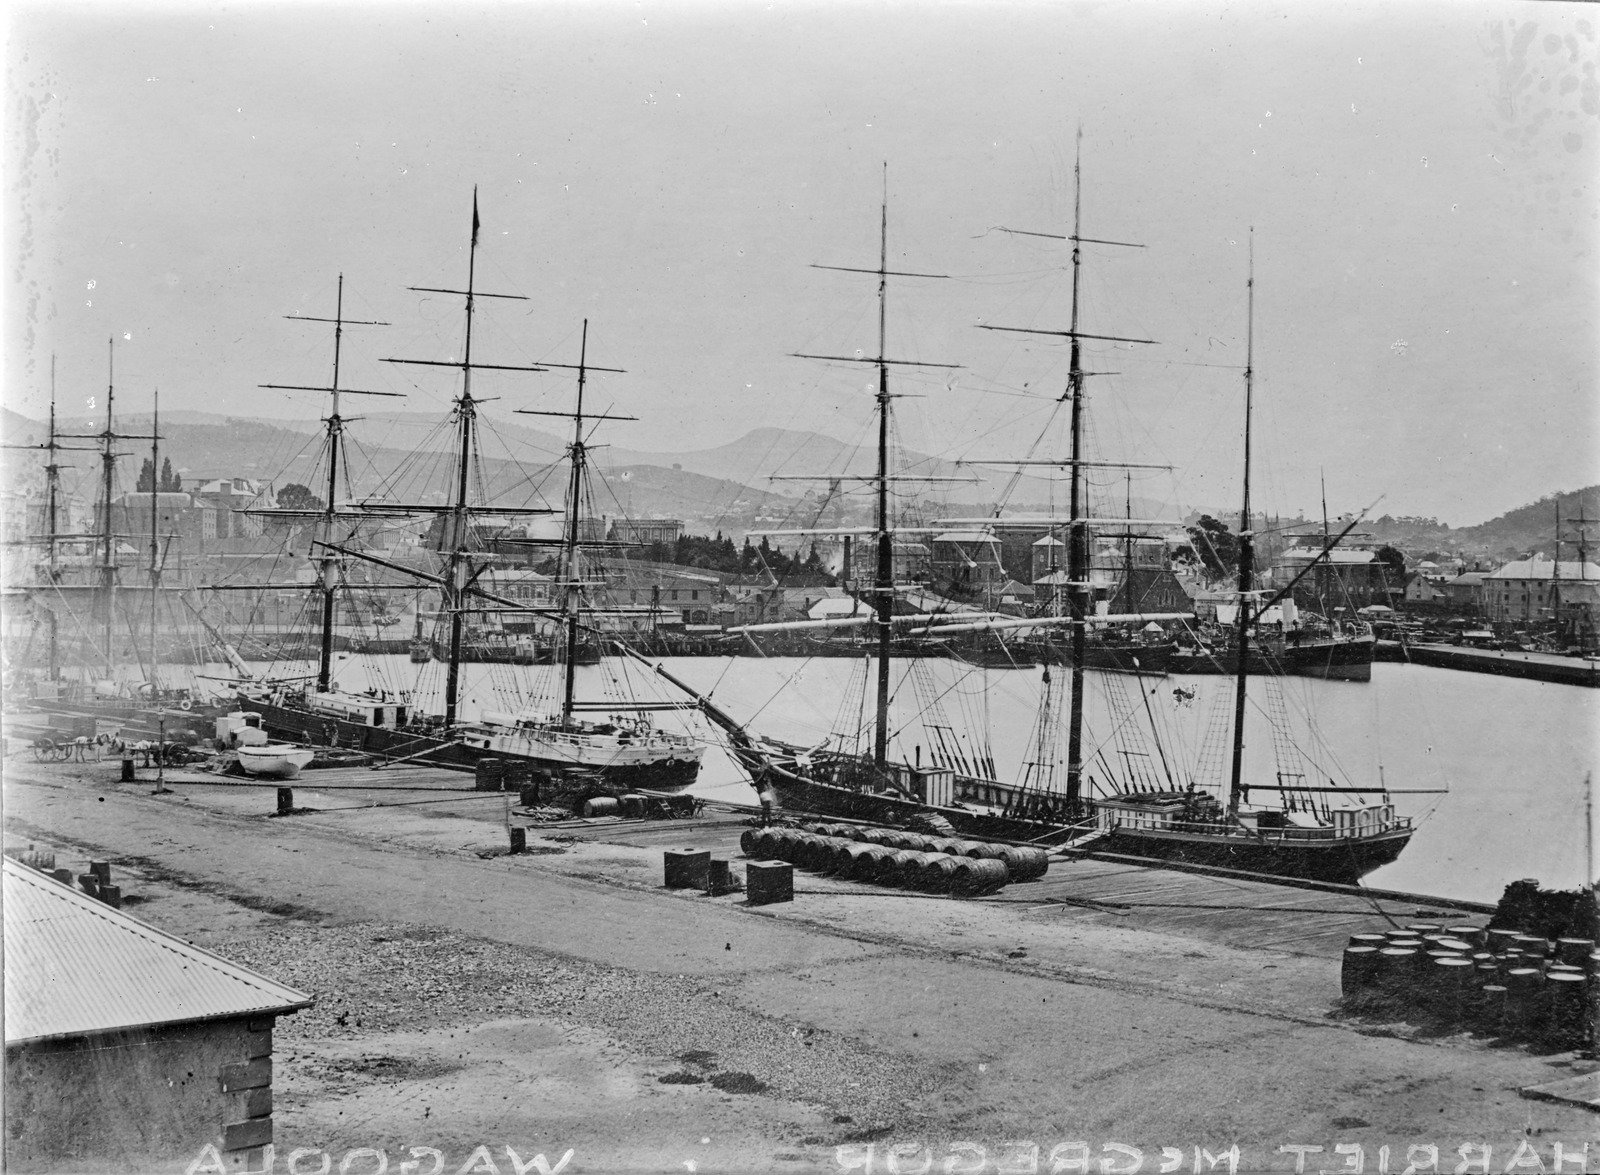
Harbor, Hobart 1880
Hobart from the Bay 1880
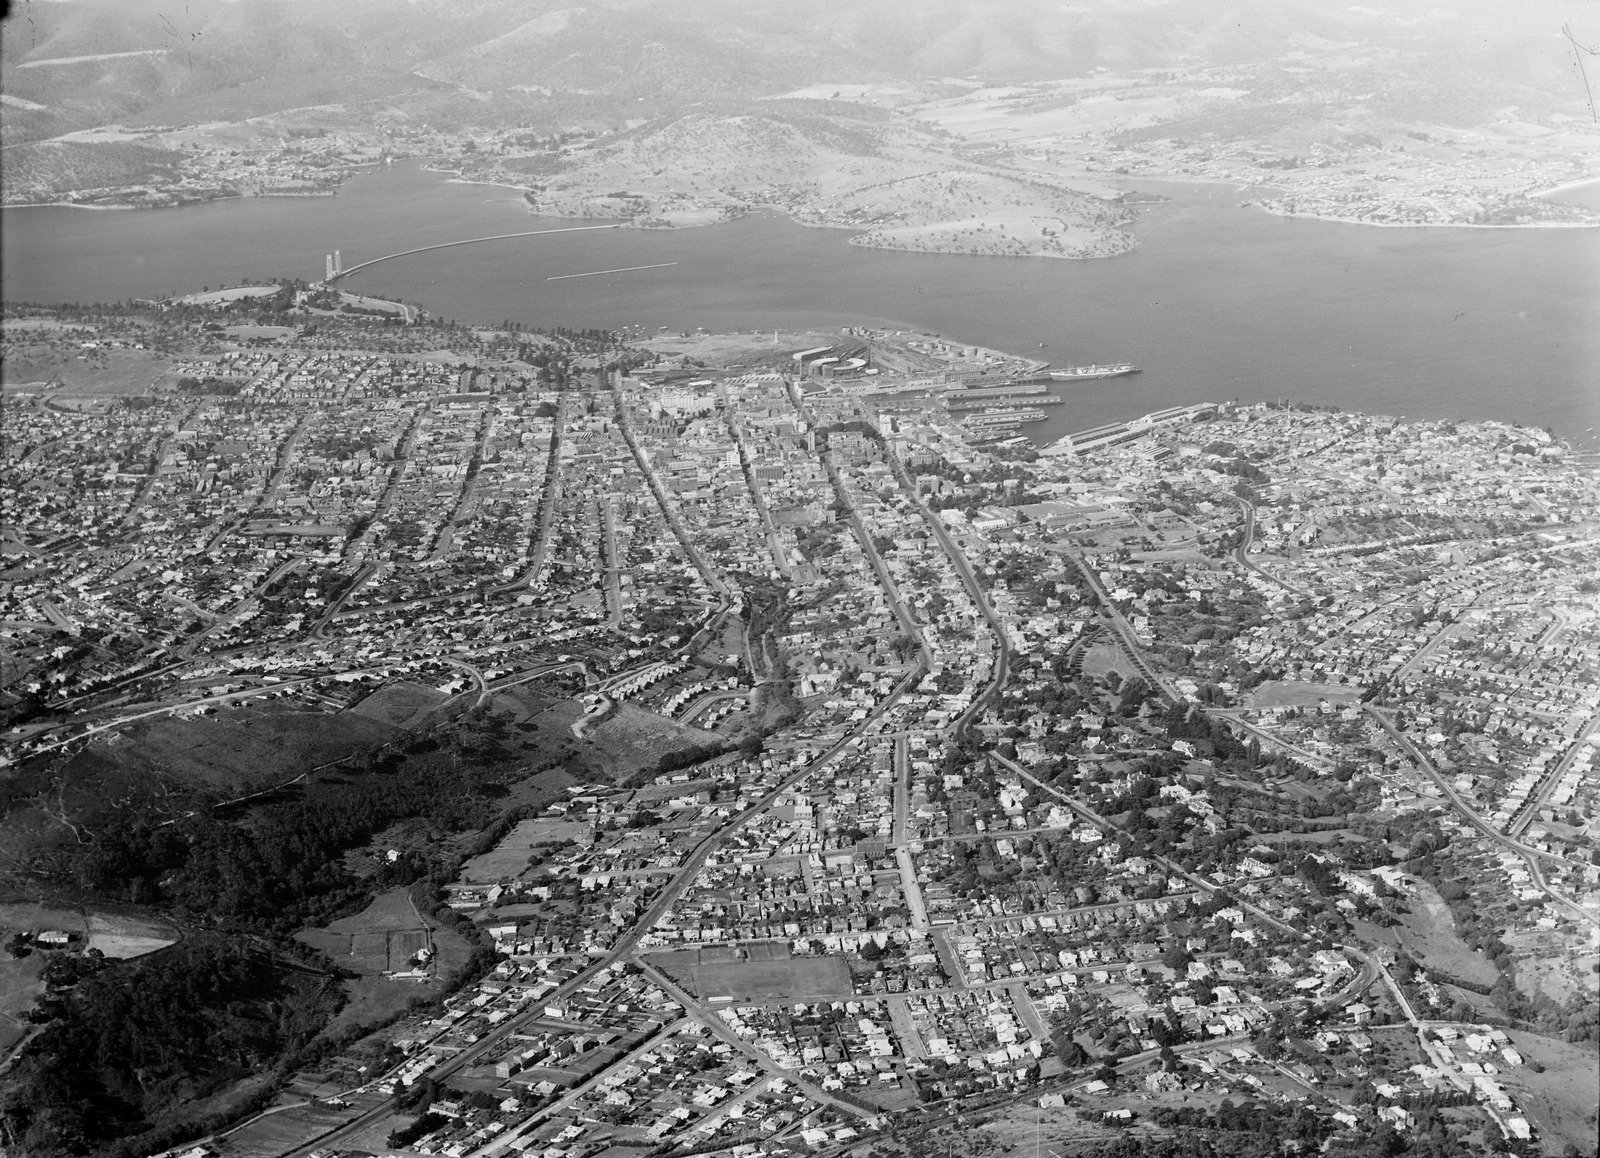
Hobart Tas Aerial 1947 1
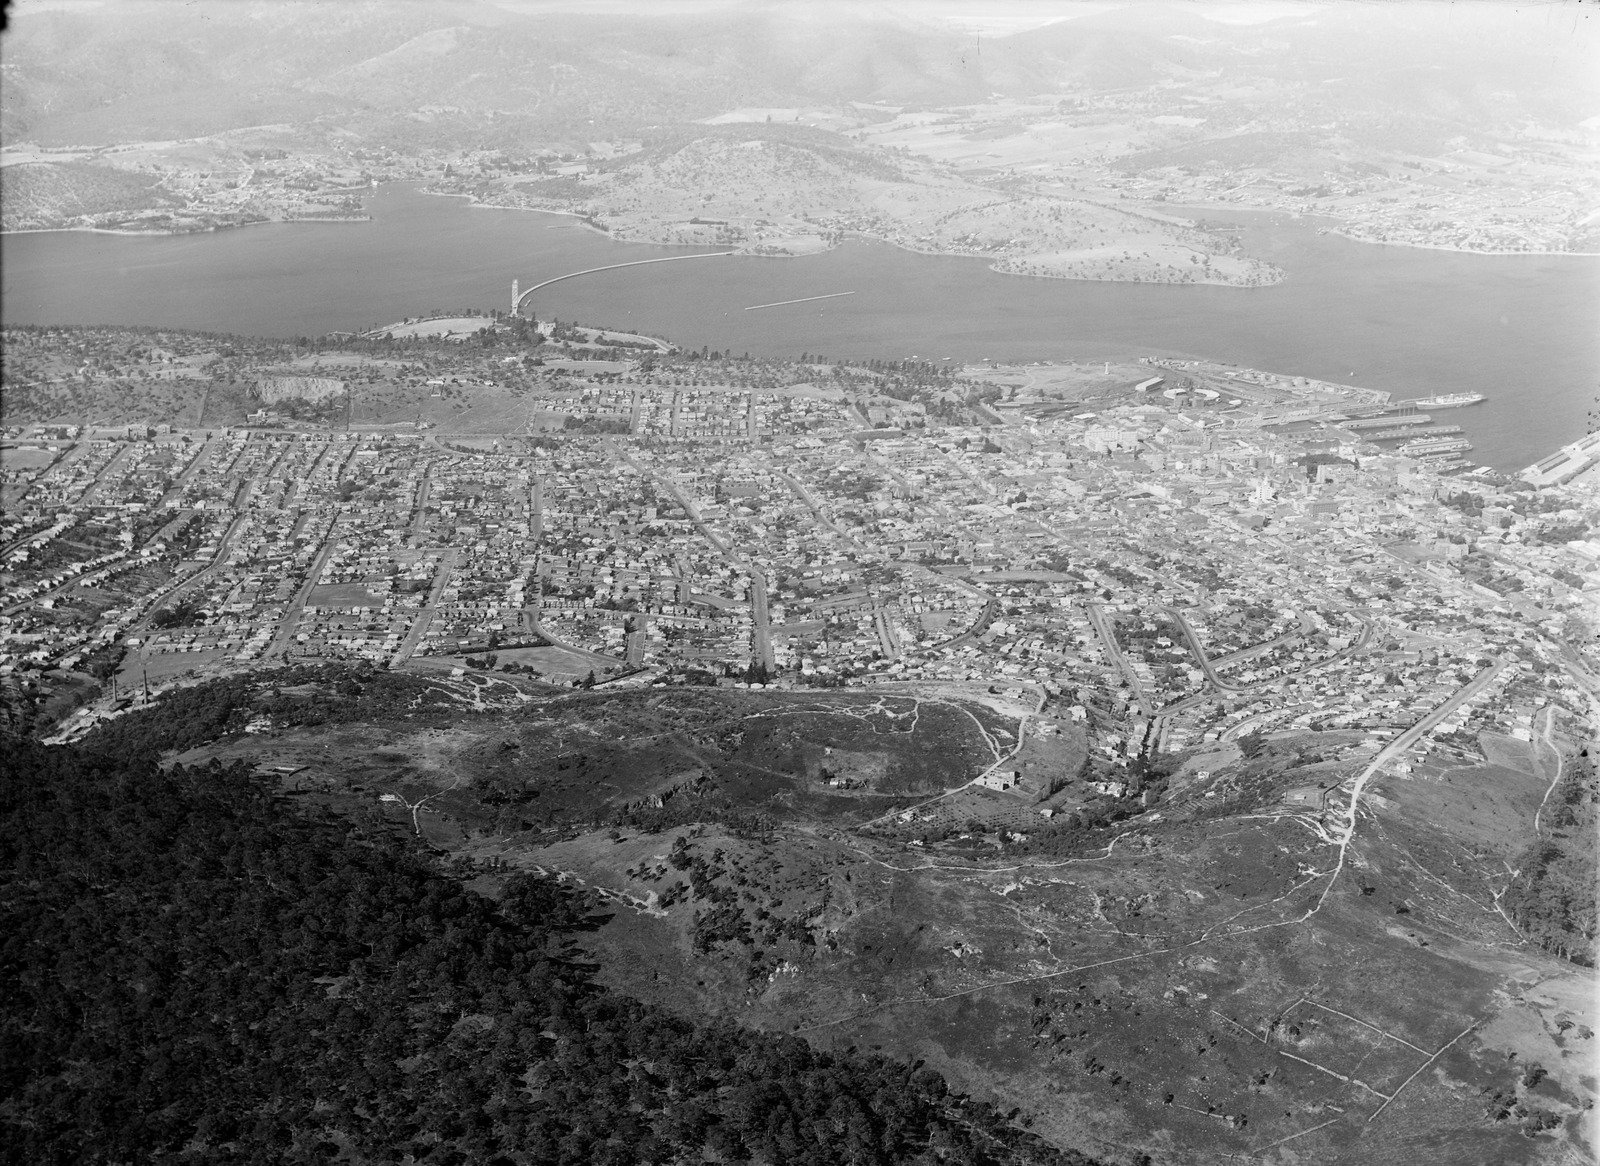
Hobart Tas Aerial 1947 2
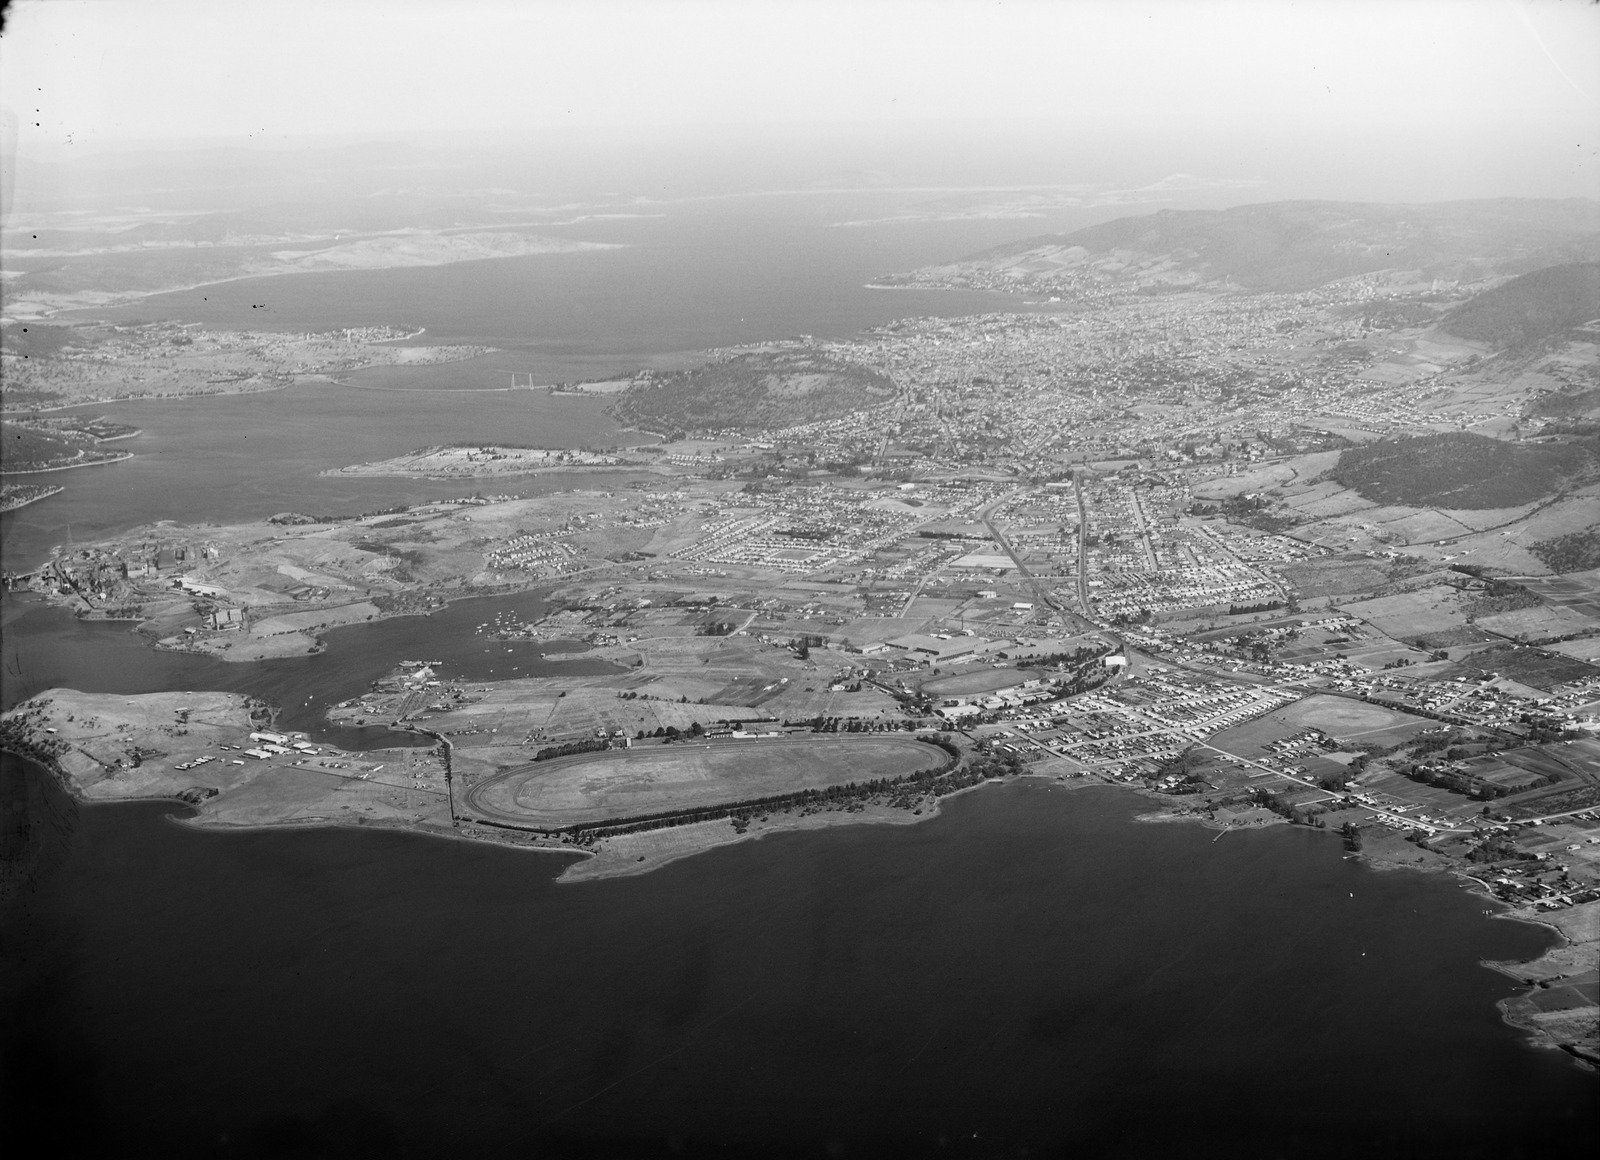
Hobart Tas Aerial 1947 3
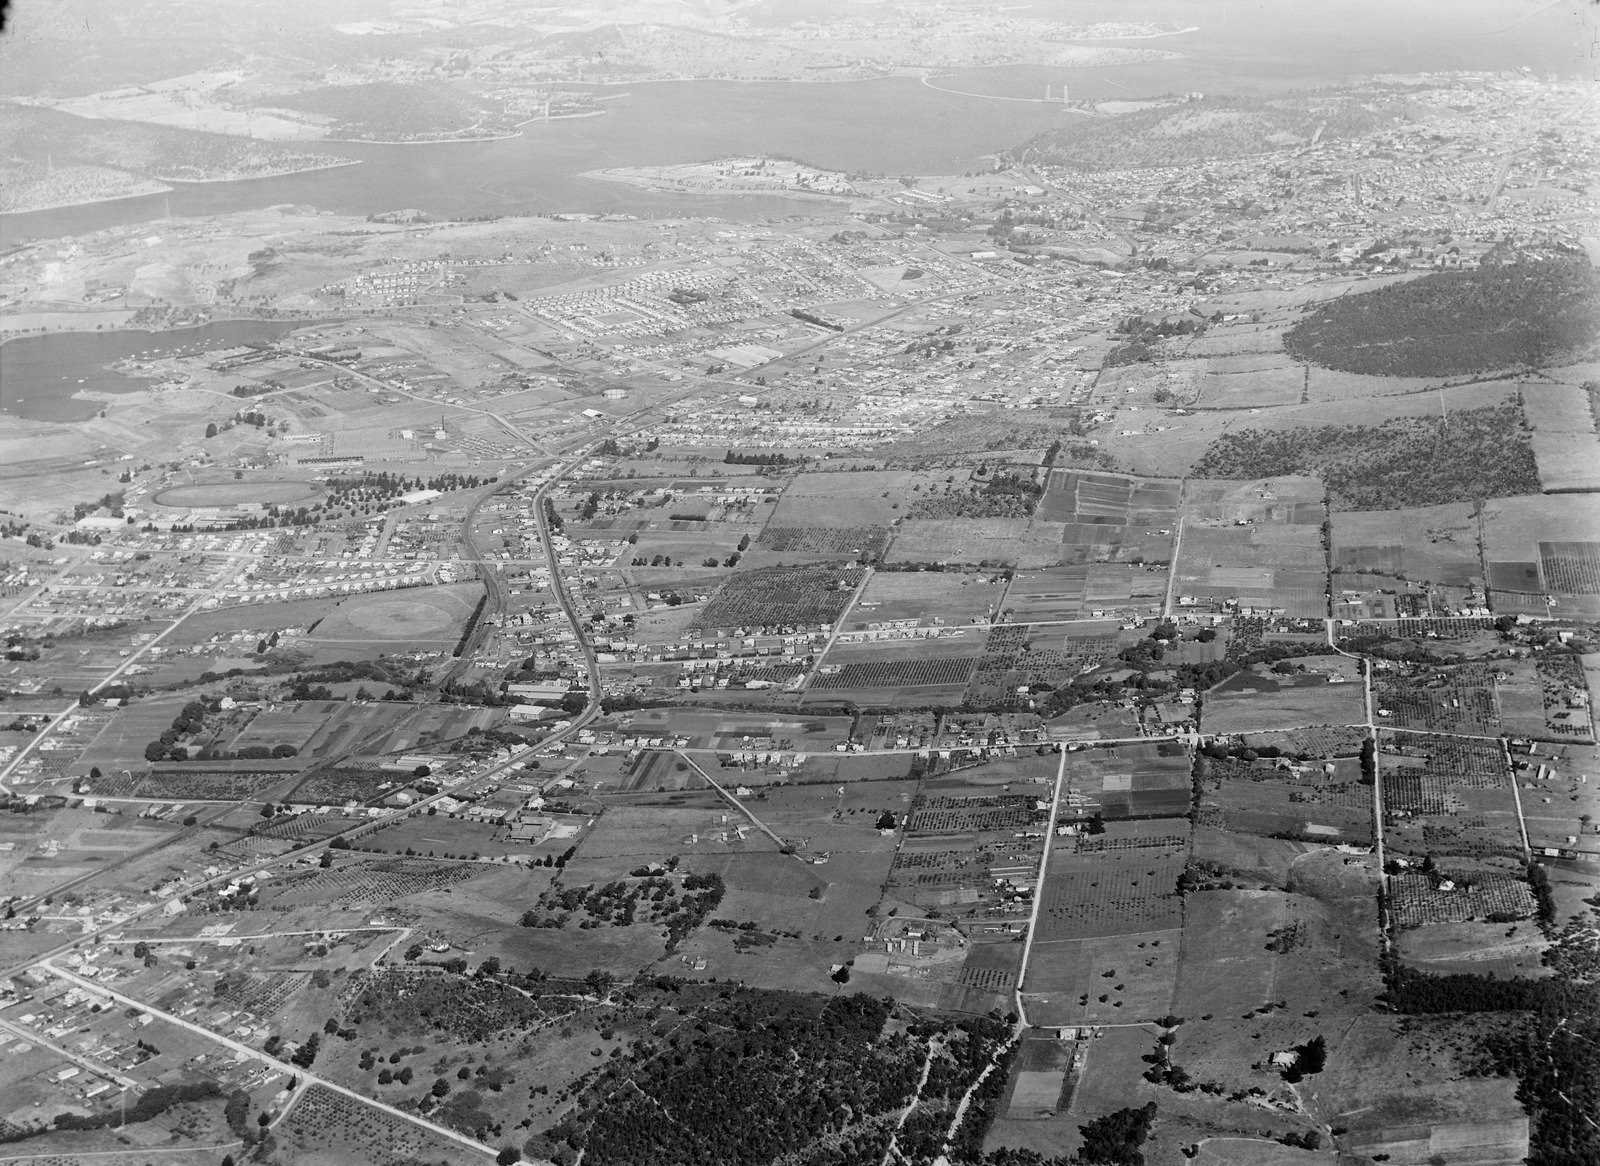
Hobart Tas Aerial 1947 4
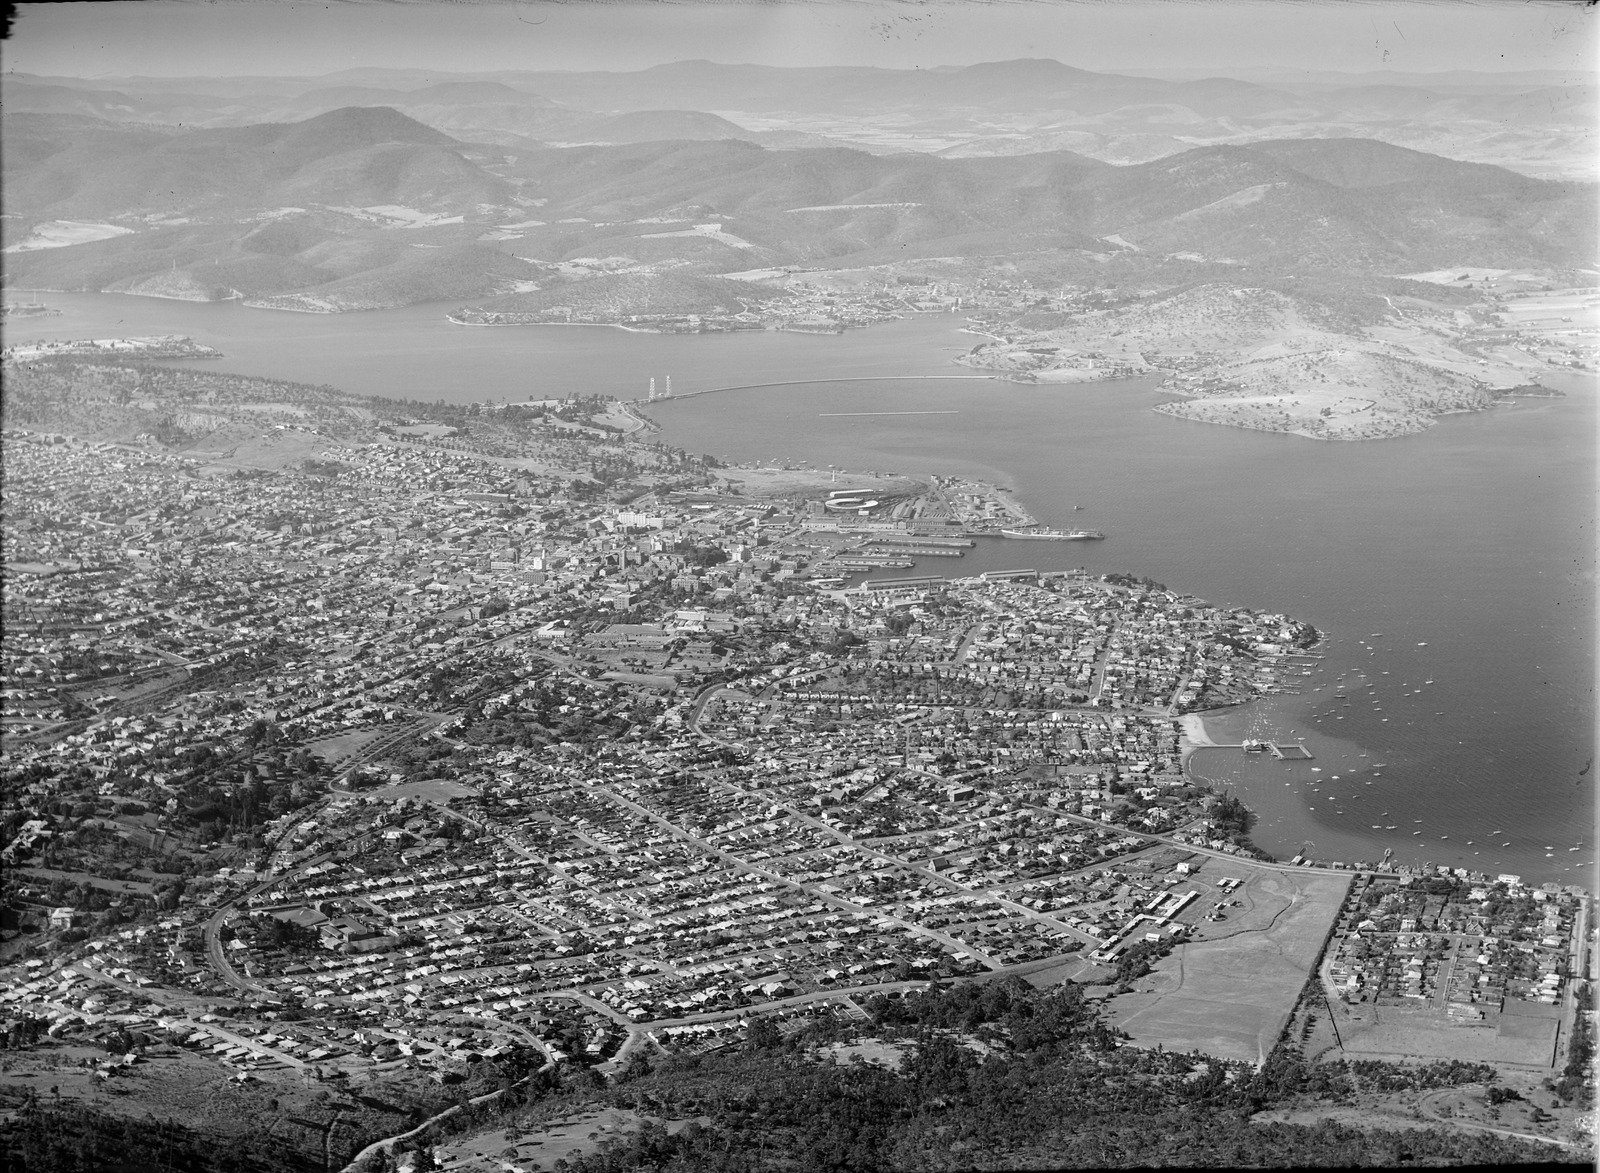
Hobart Tas Aerial 1947 5
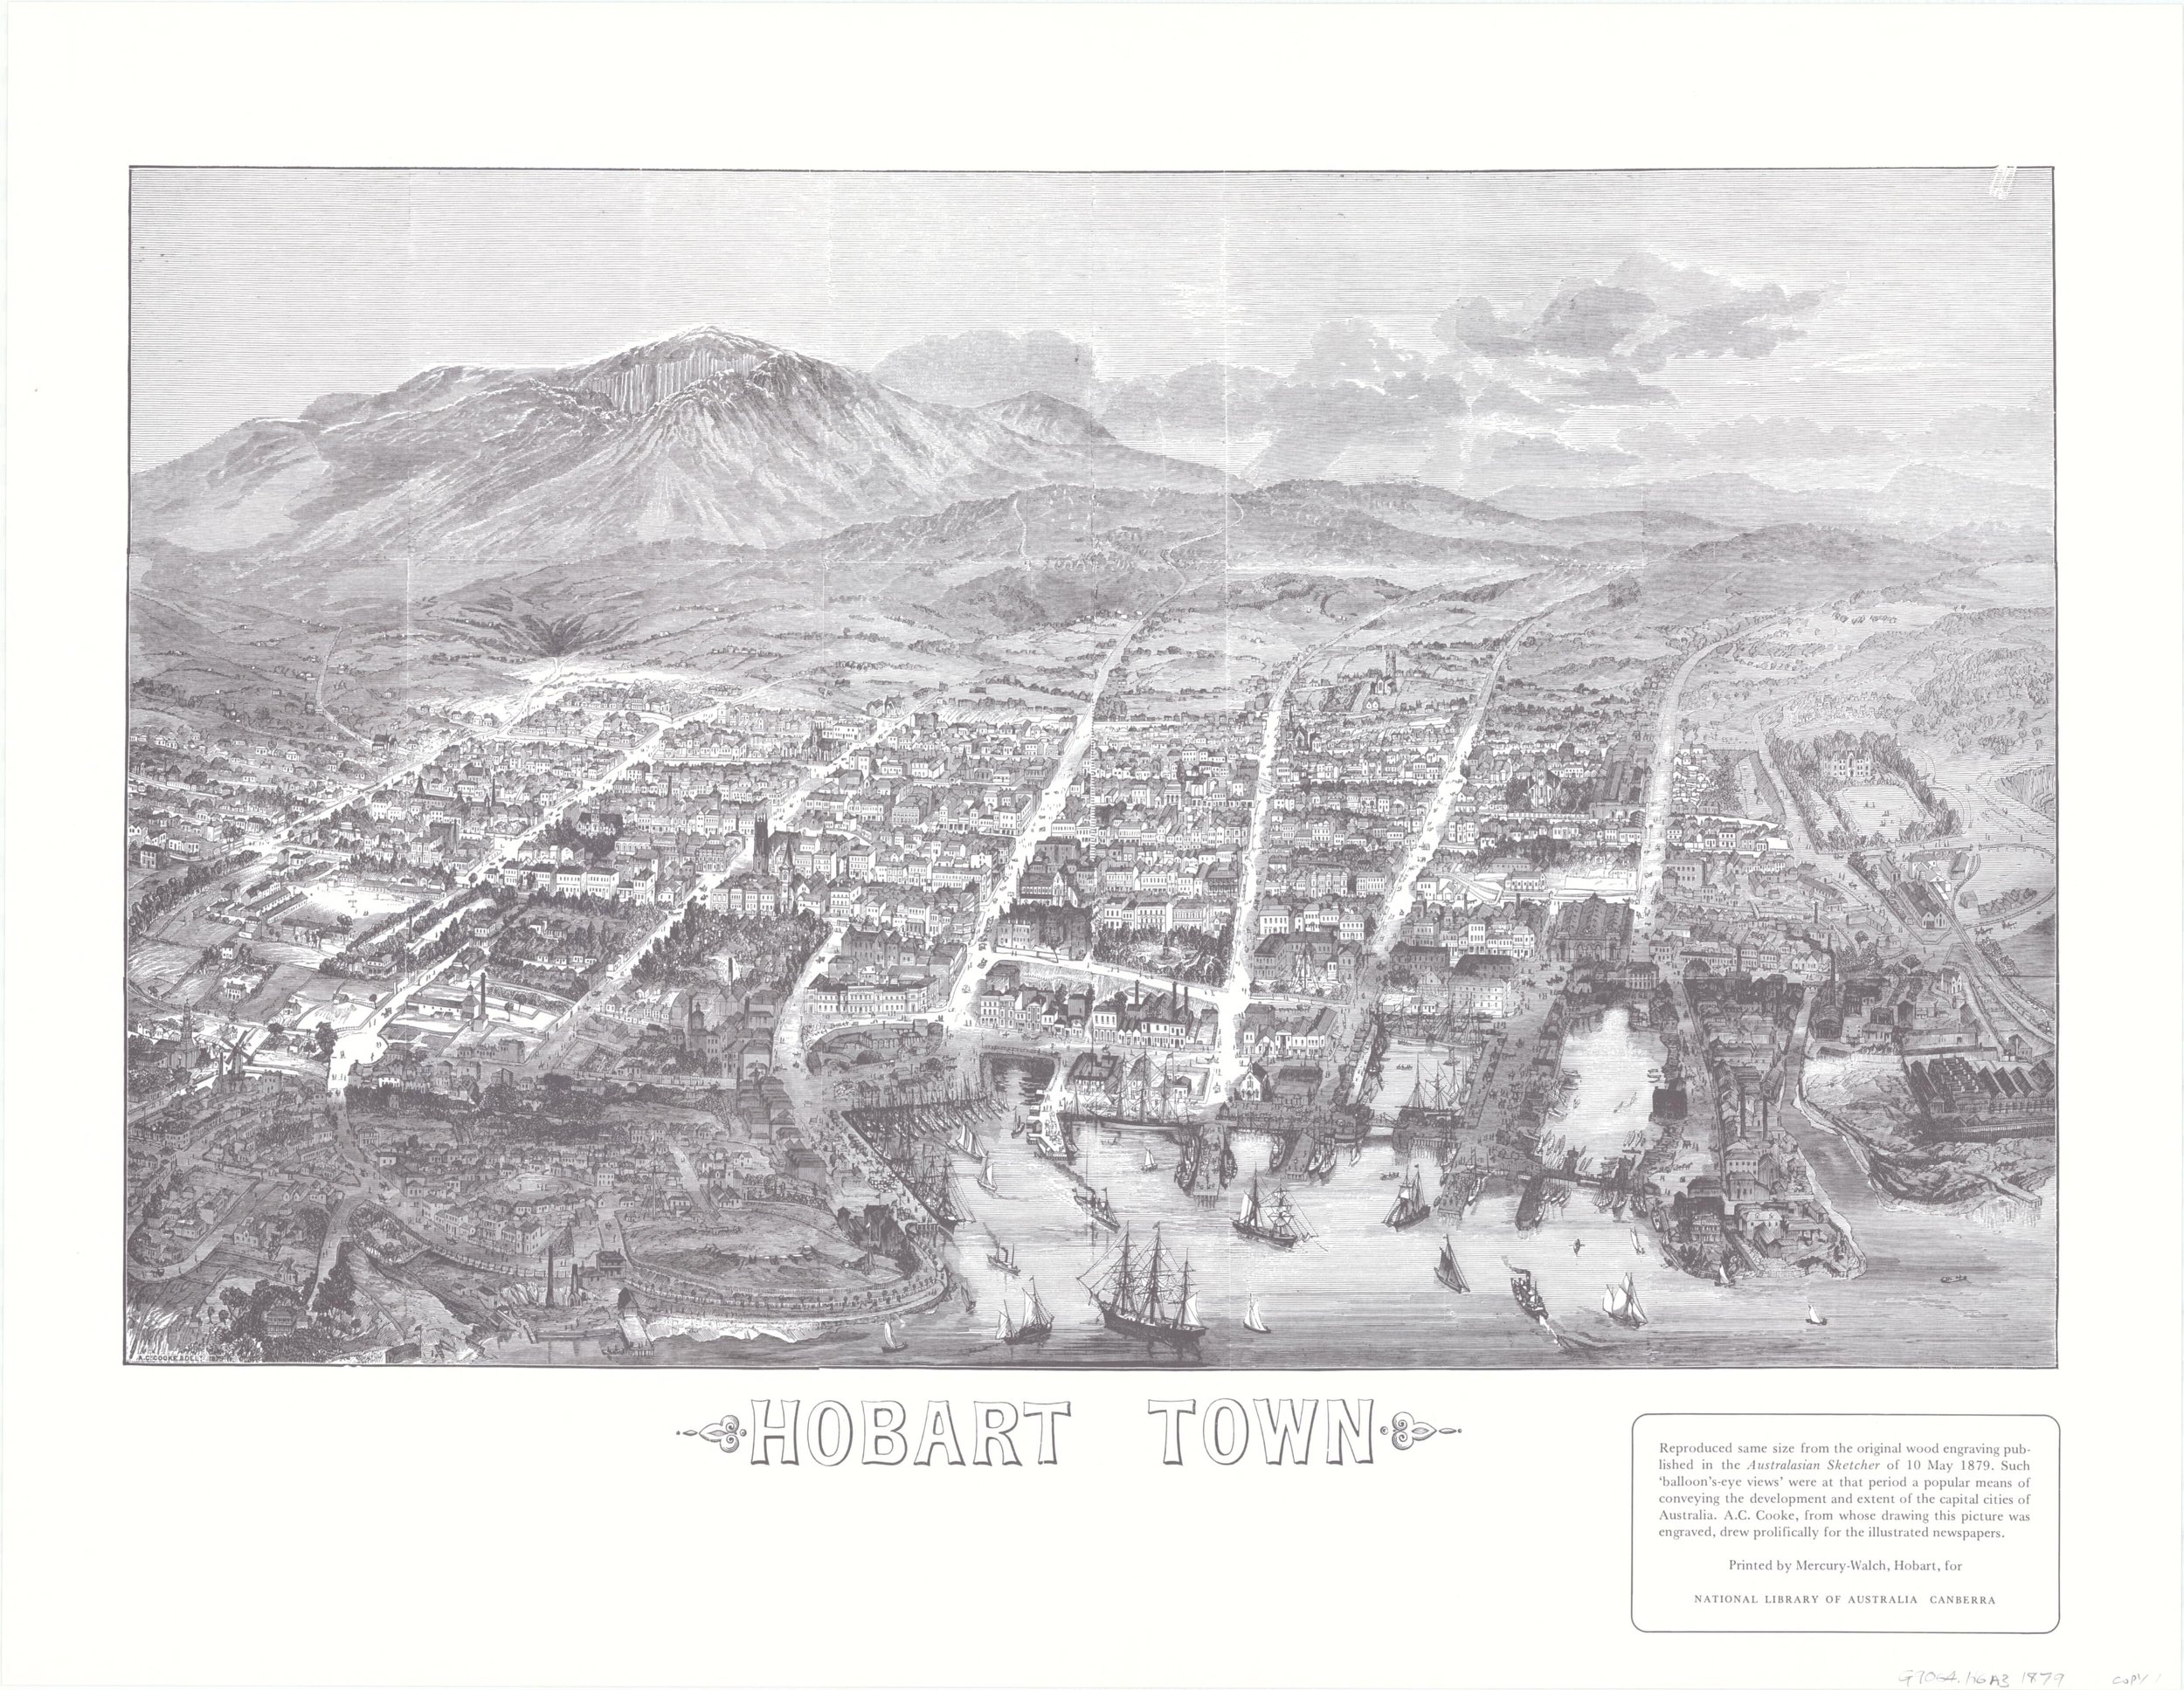
Hobart Town 1879 Newspaper
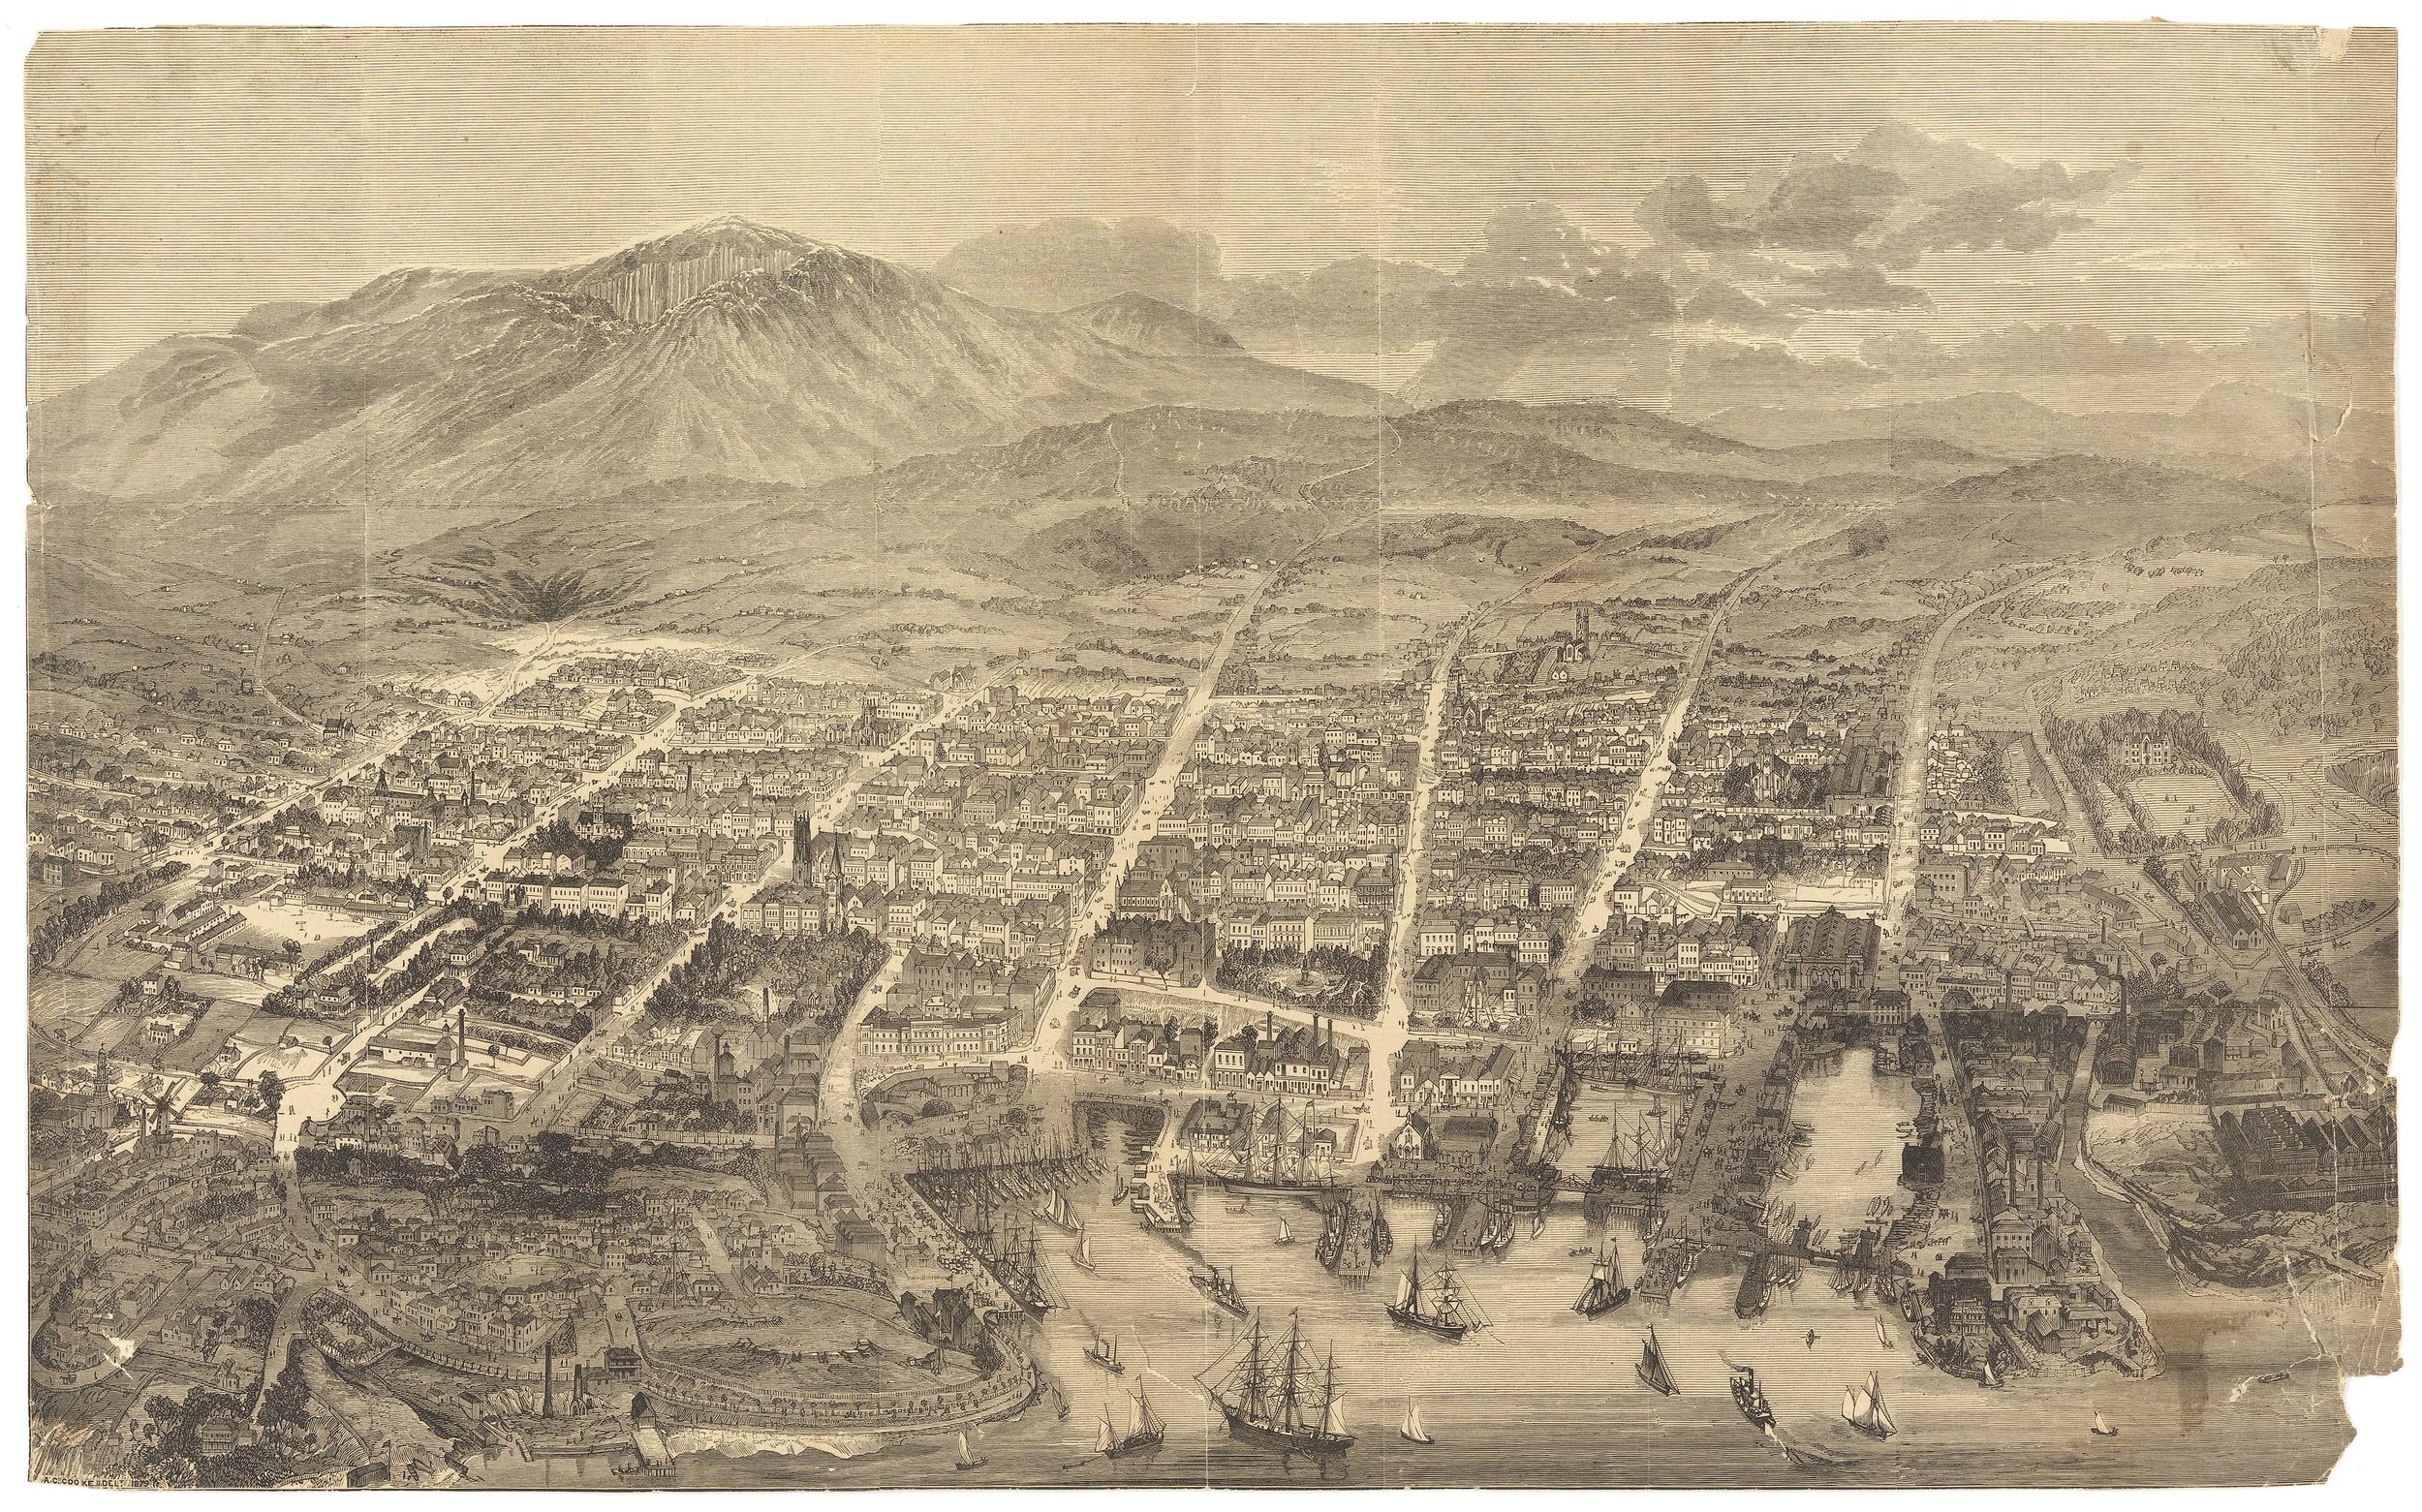
Hobart town 1879
Hobart Town Map 1838
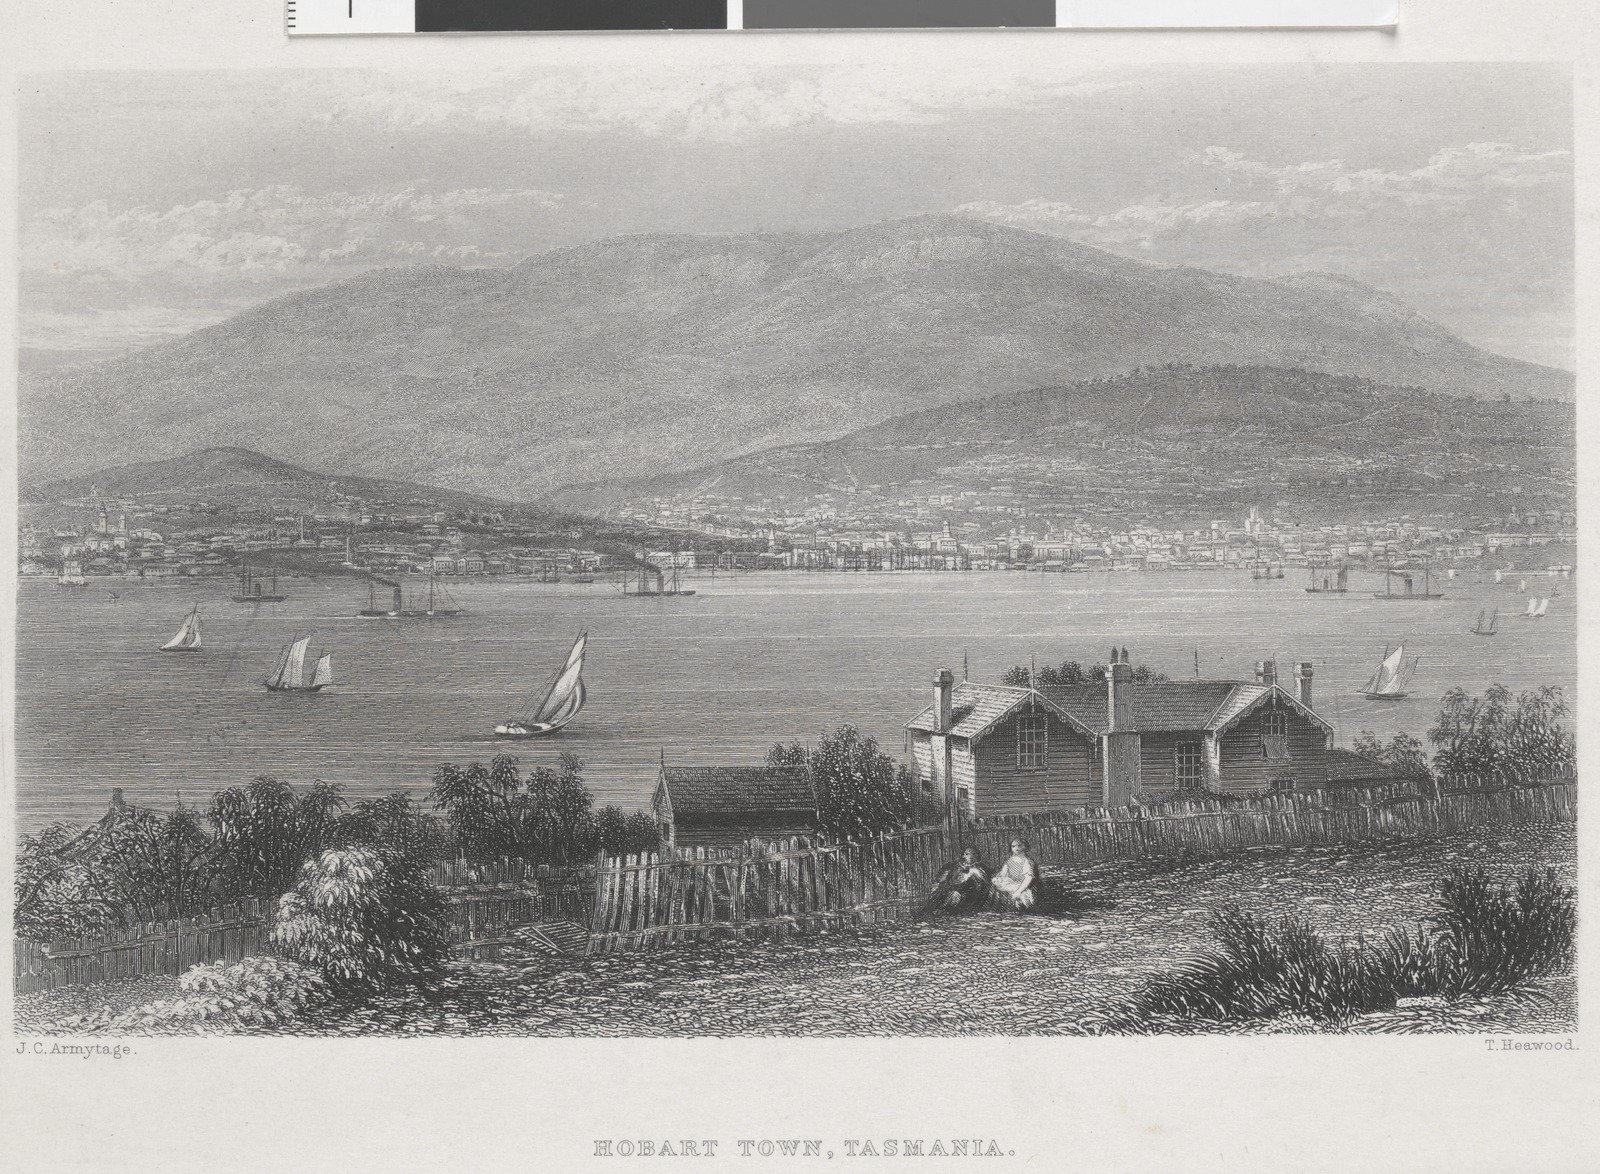
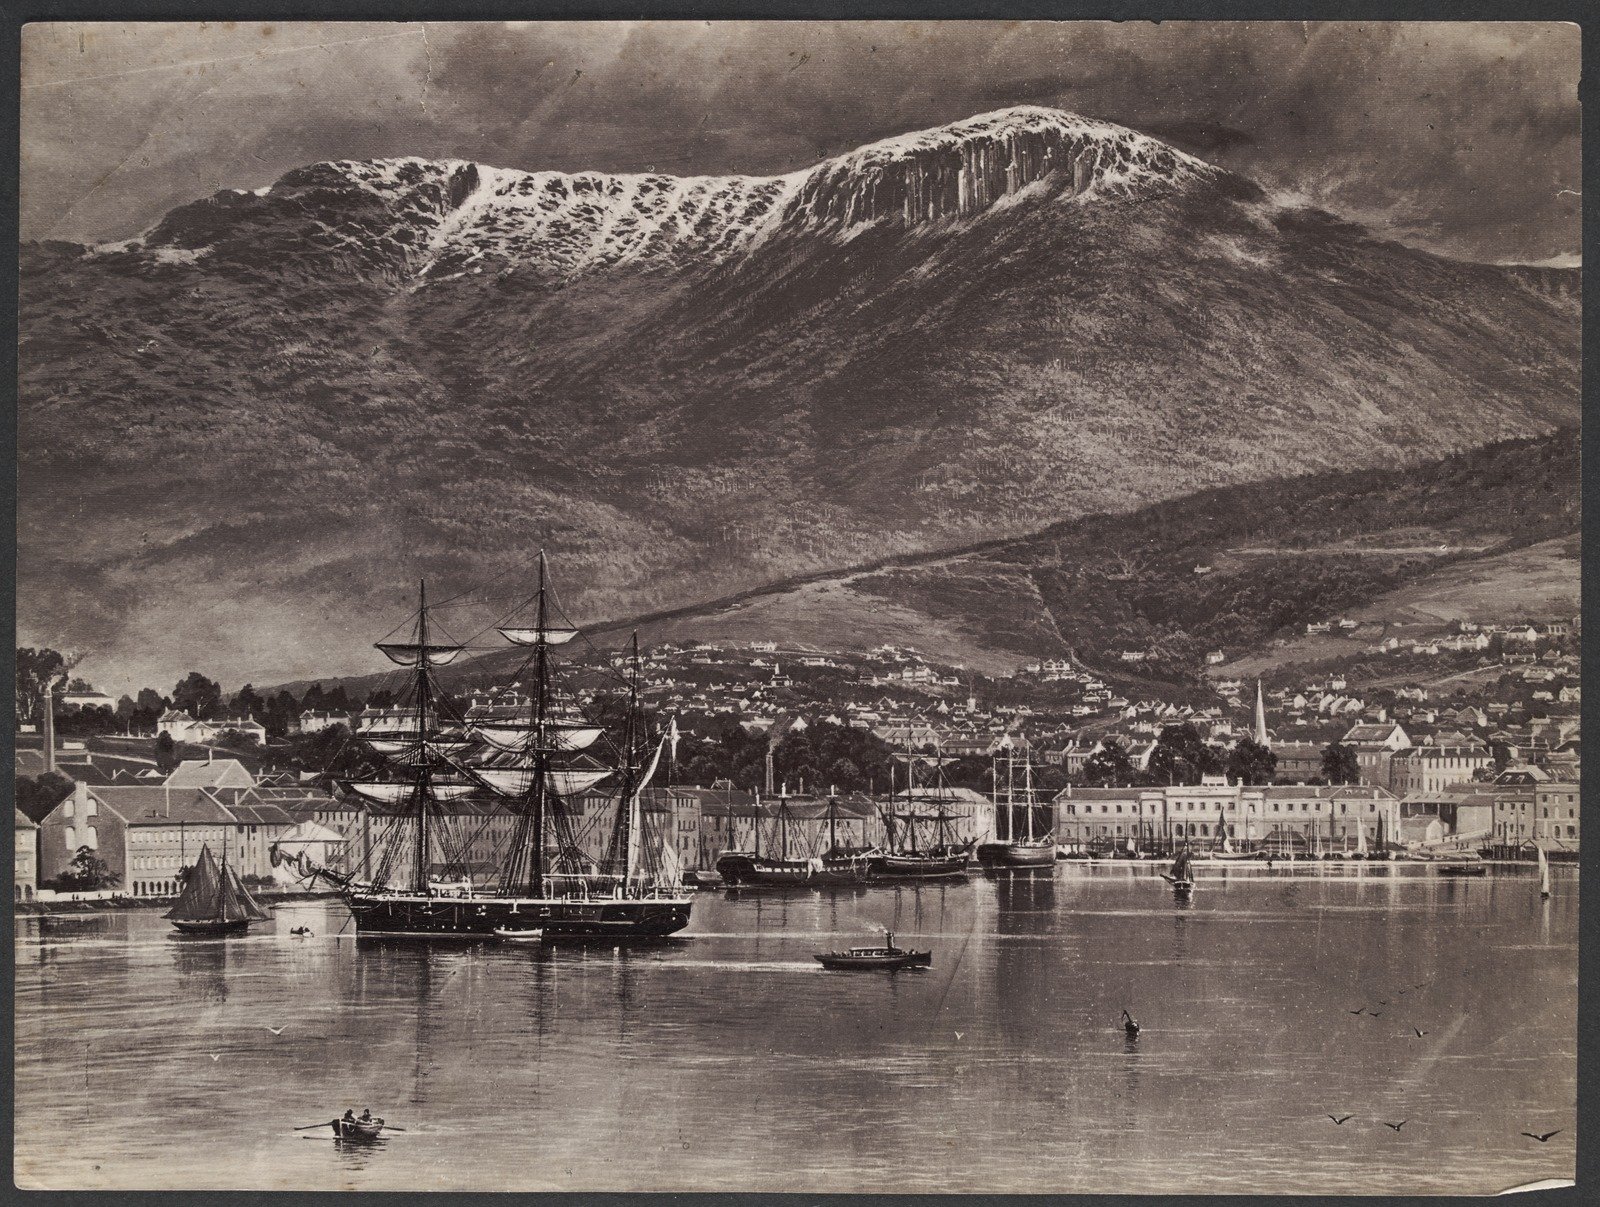
Hobart Town, Tasmania 1876
Hobart Views 1910
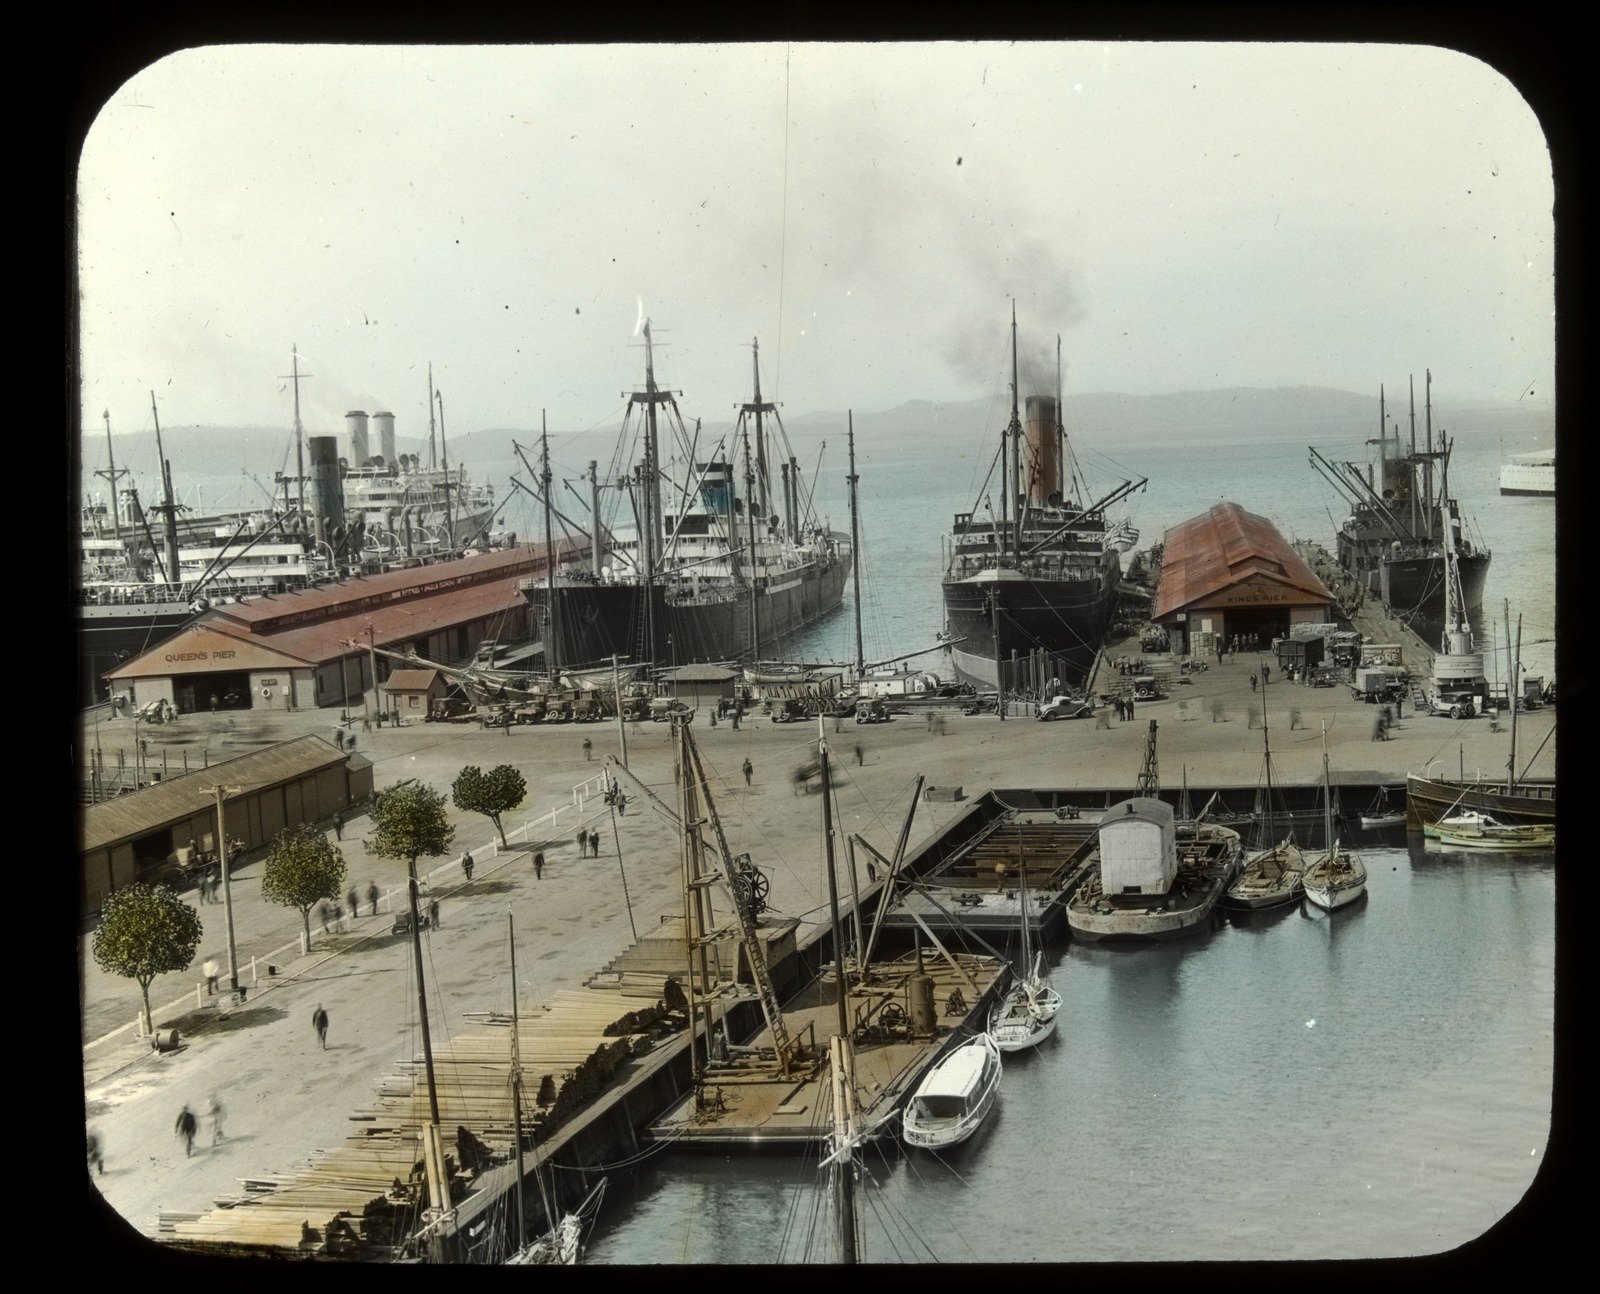
Hobart wharves, Tasmania 1900
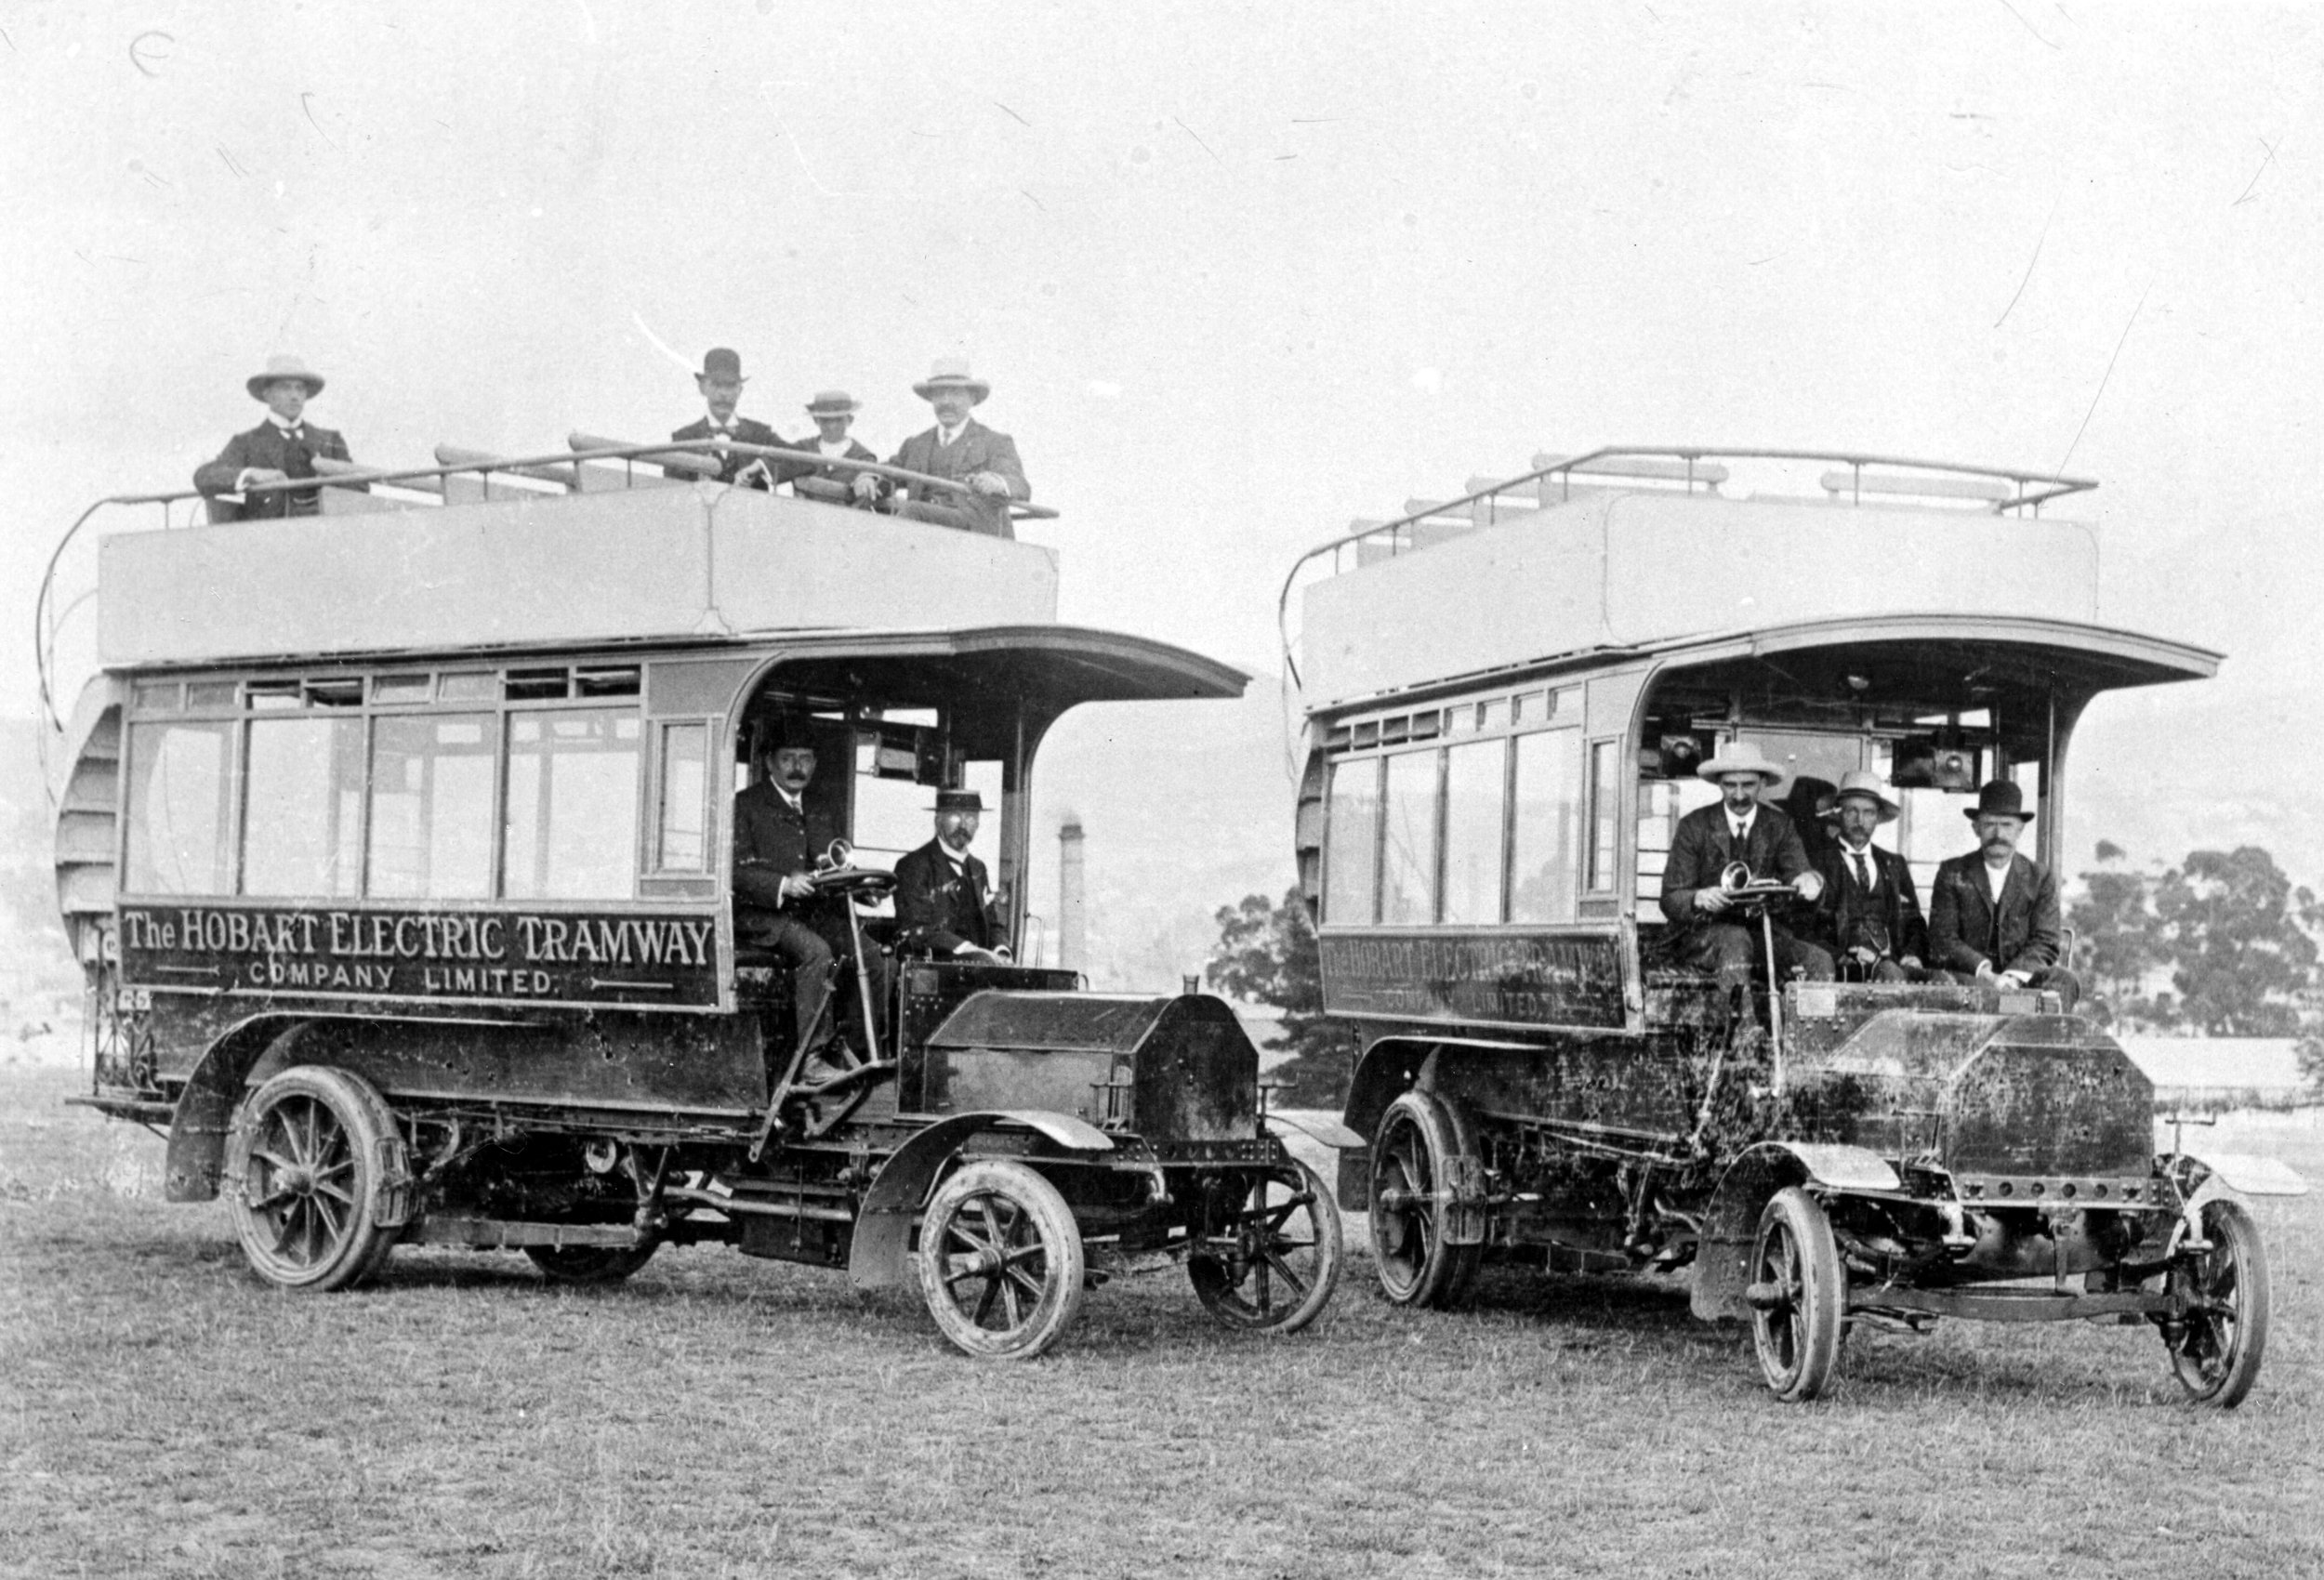
Hobart Electric Tramway Company Daimler buses 1920s
Hobart from Lenna, Battery Point c1900

Hobart_trolleybus 1935 (small print only)
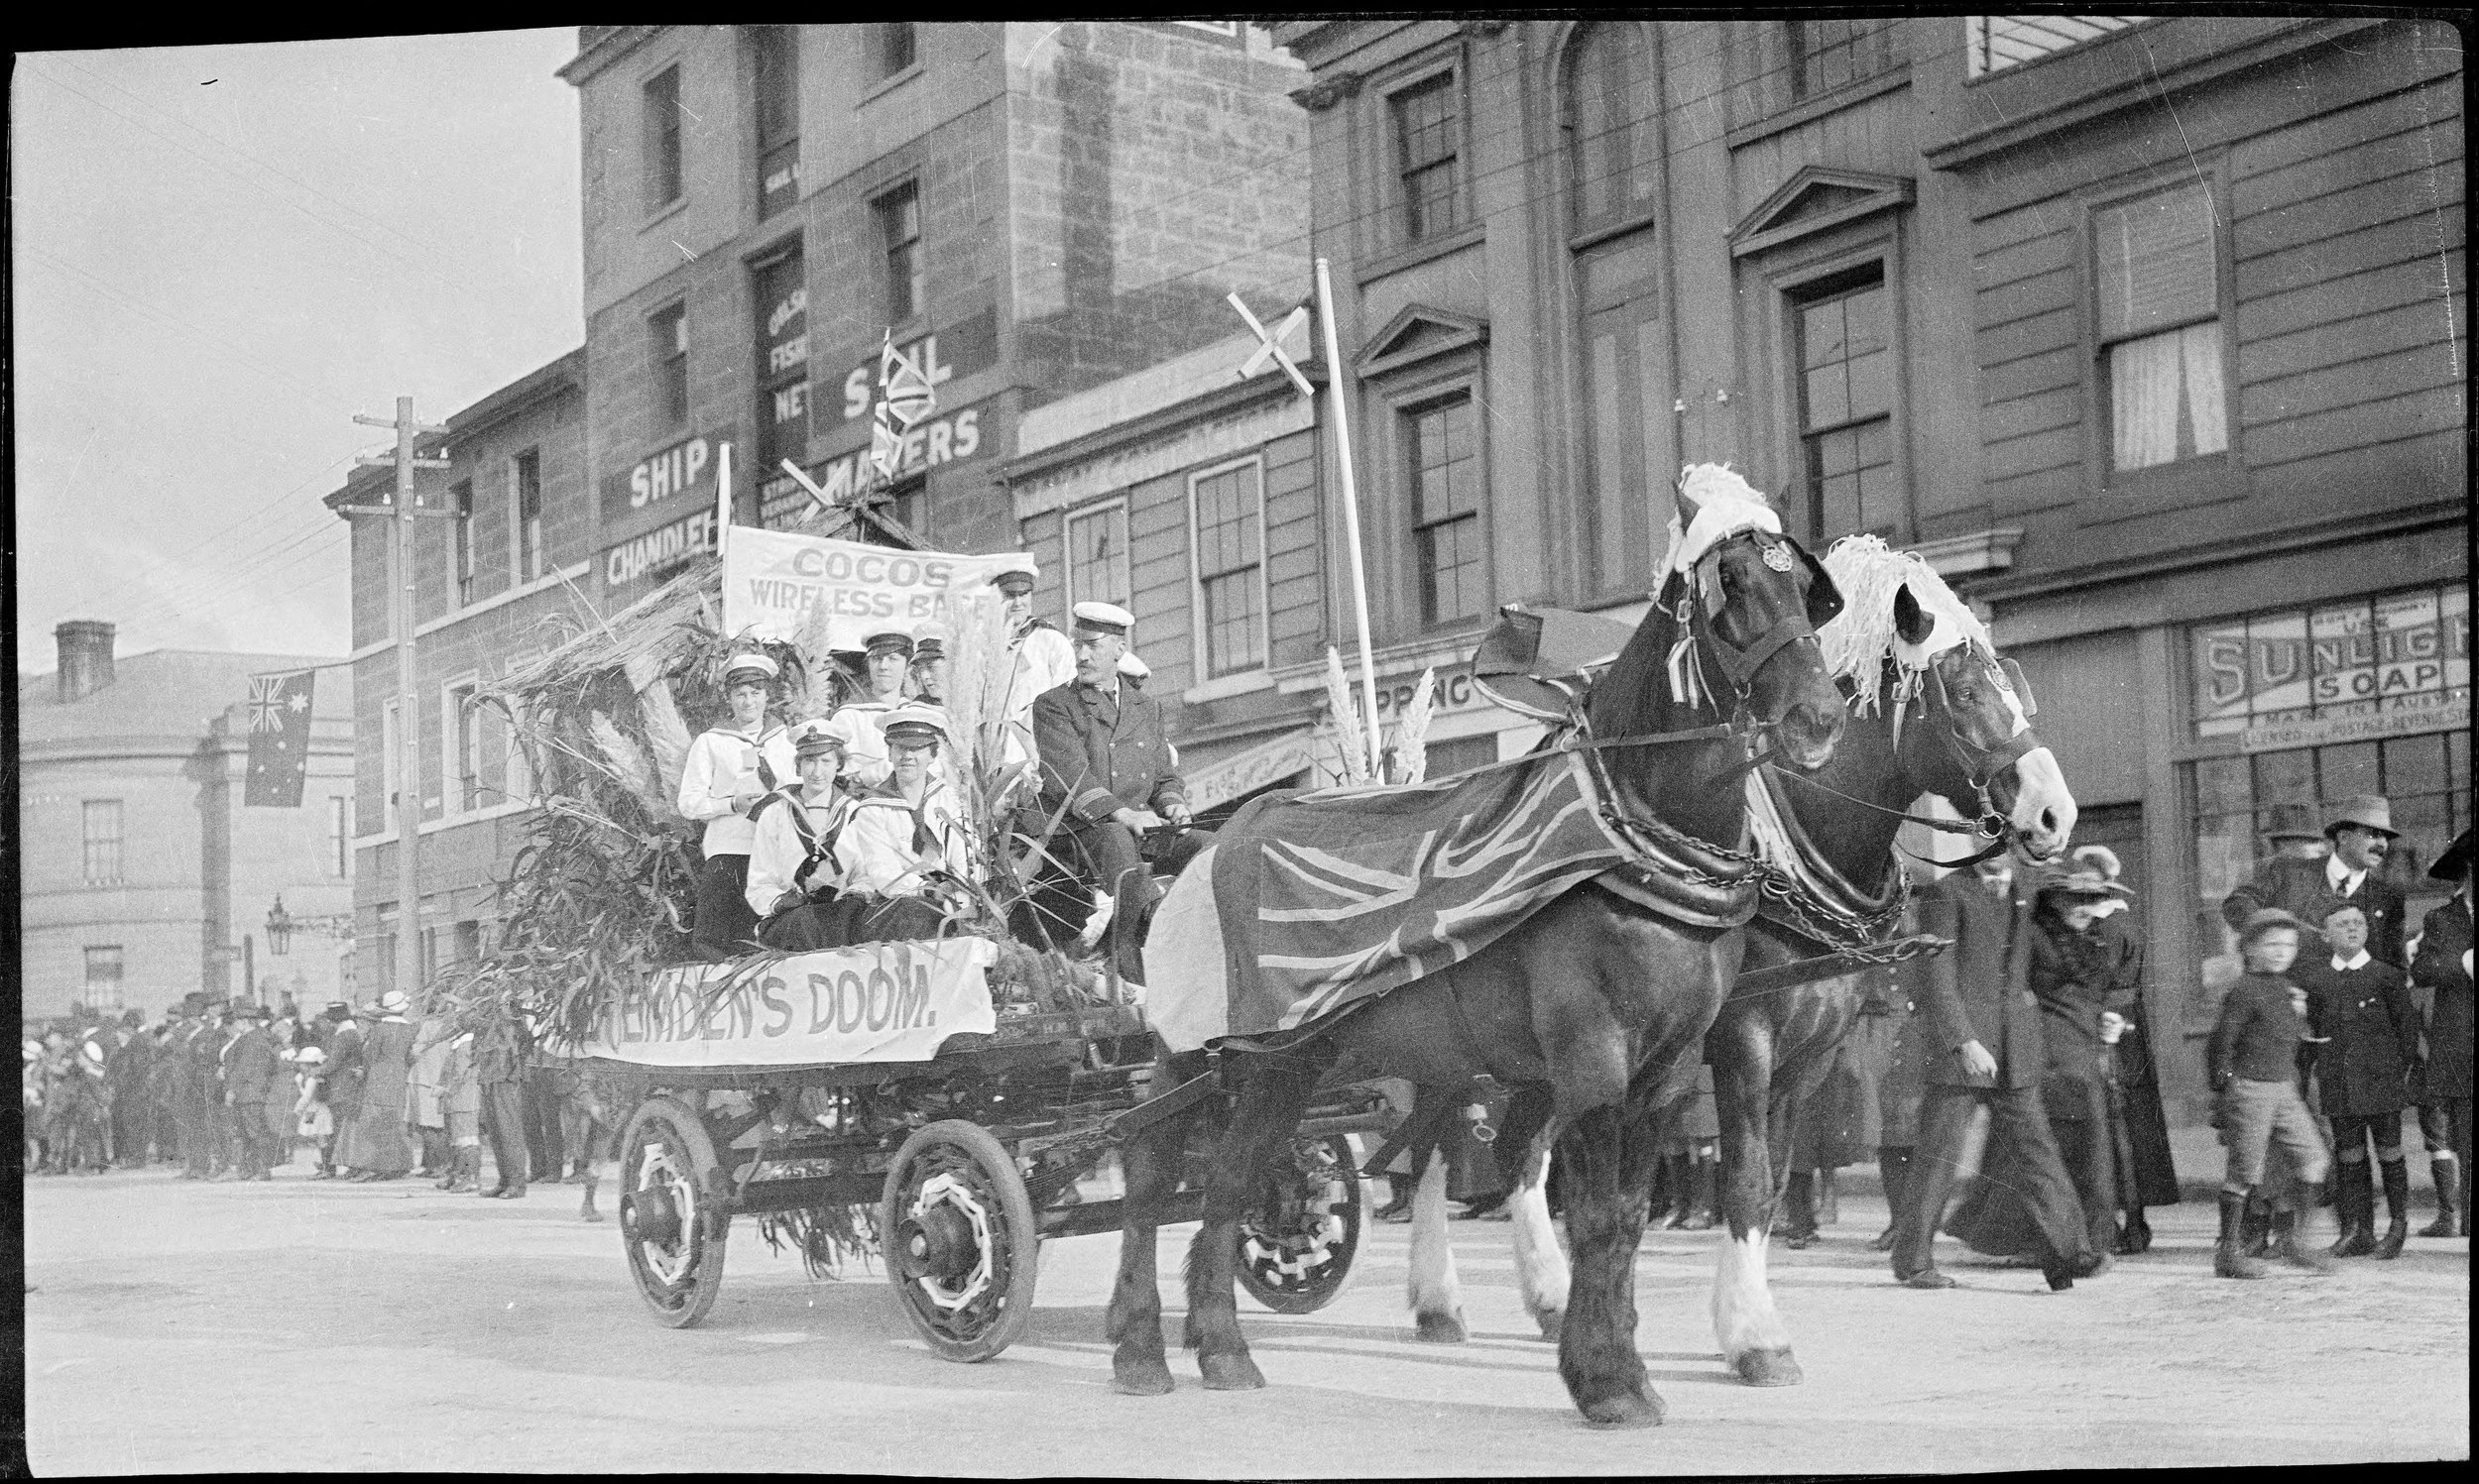
horse drawn cart in Morrison Street 1919
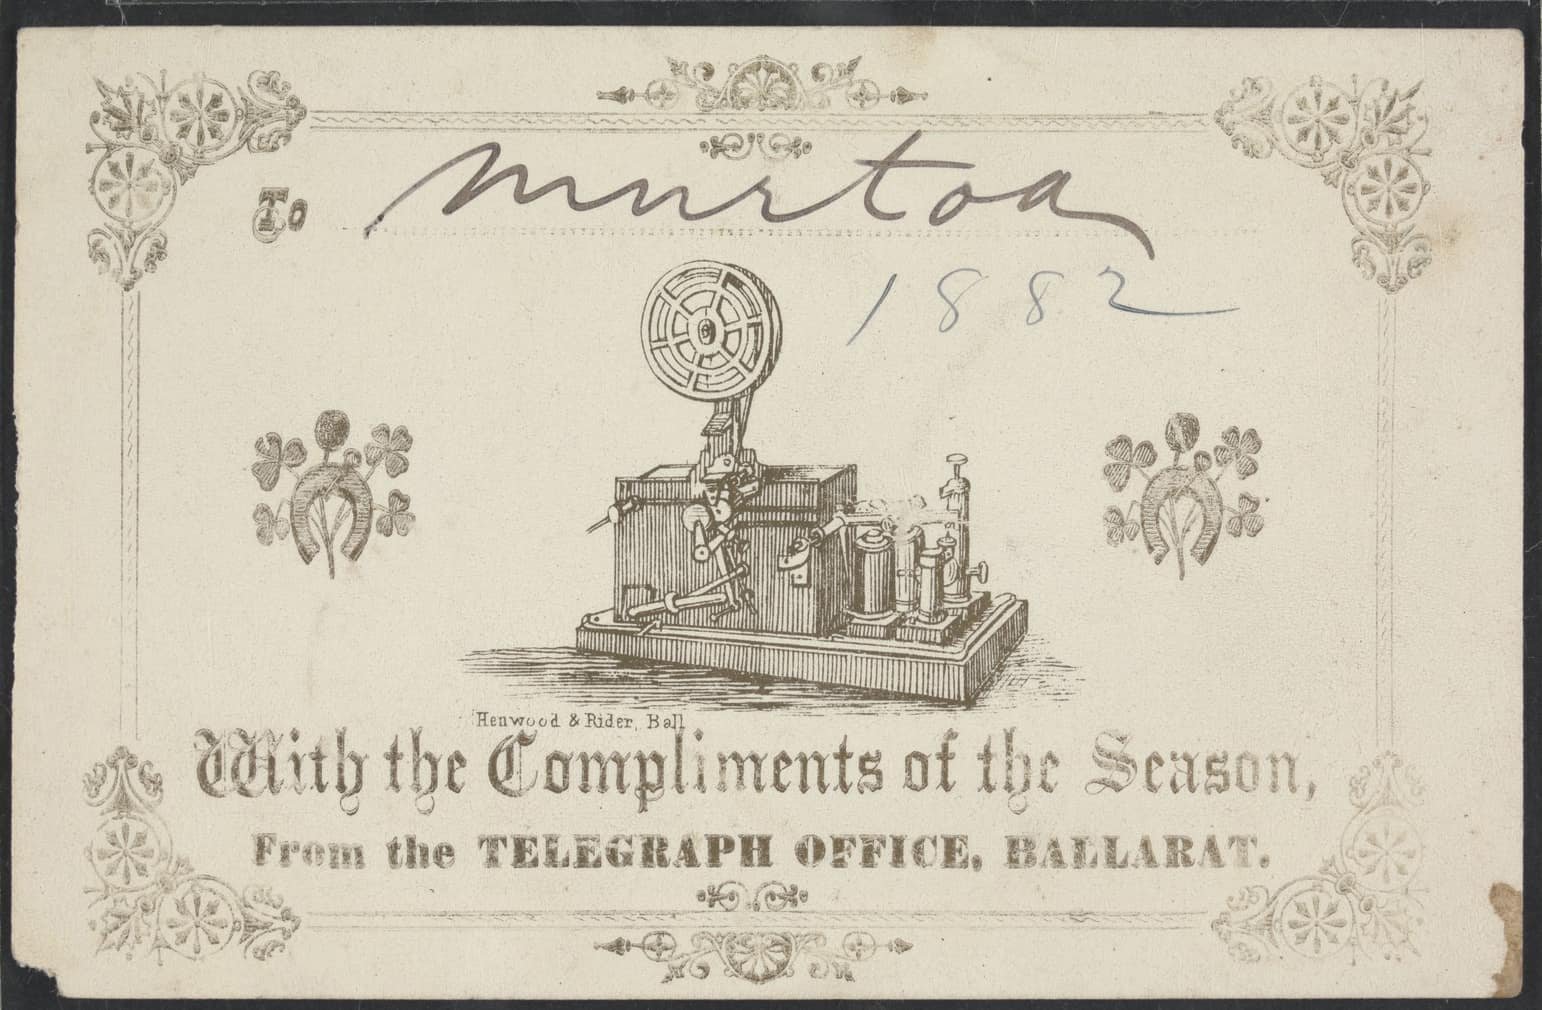
image of telegraph machine 1930s
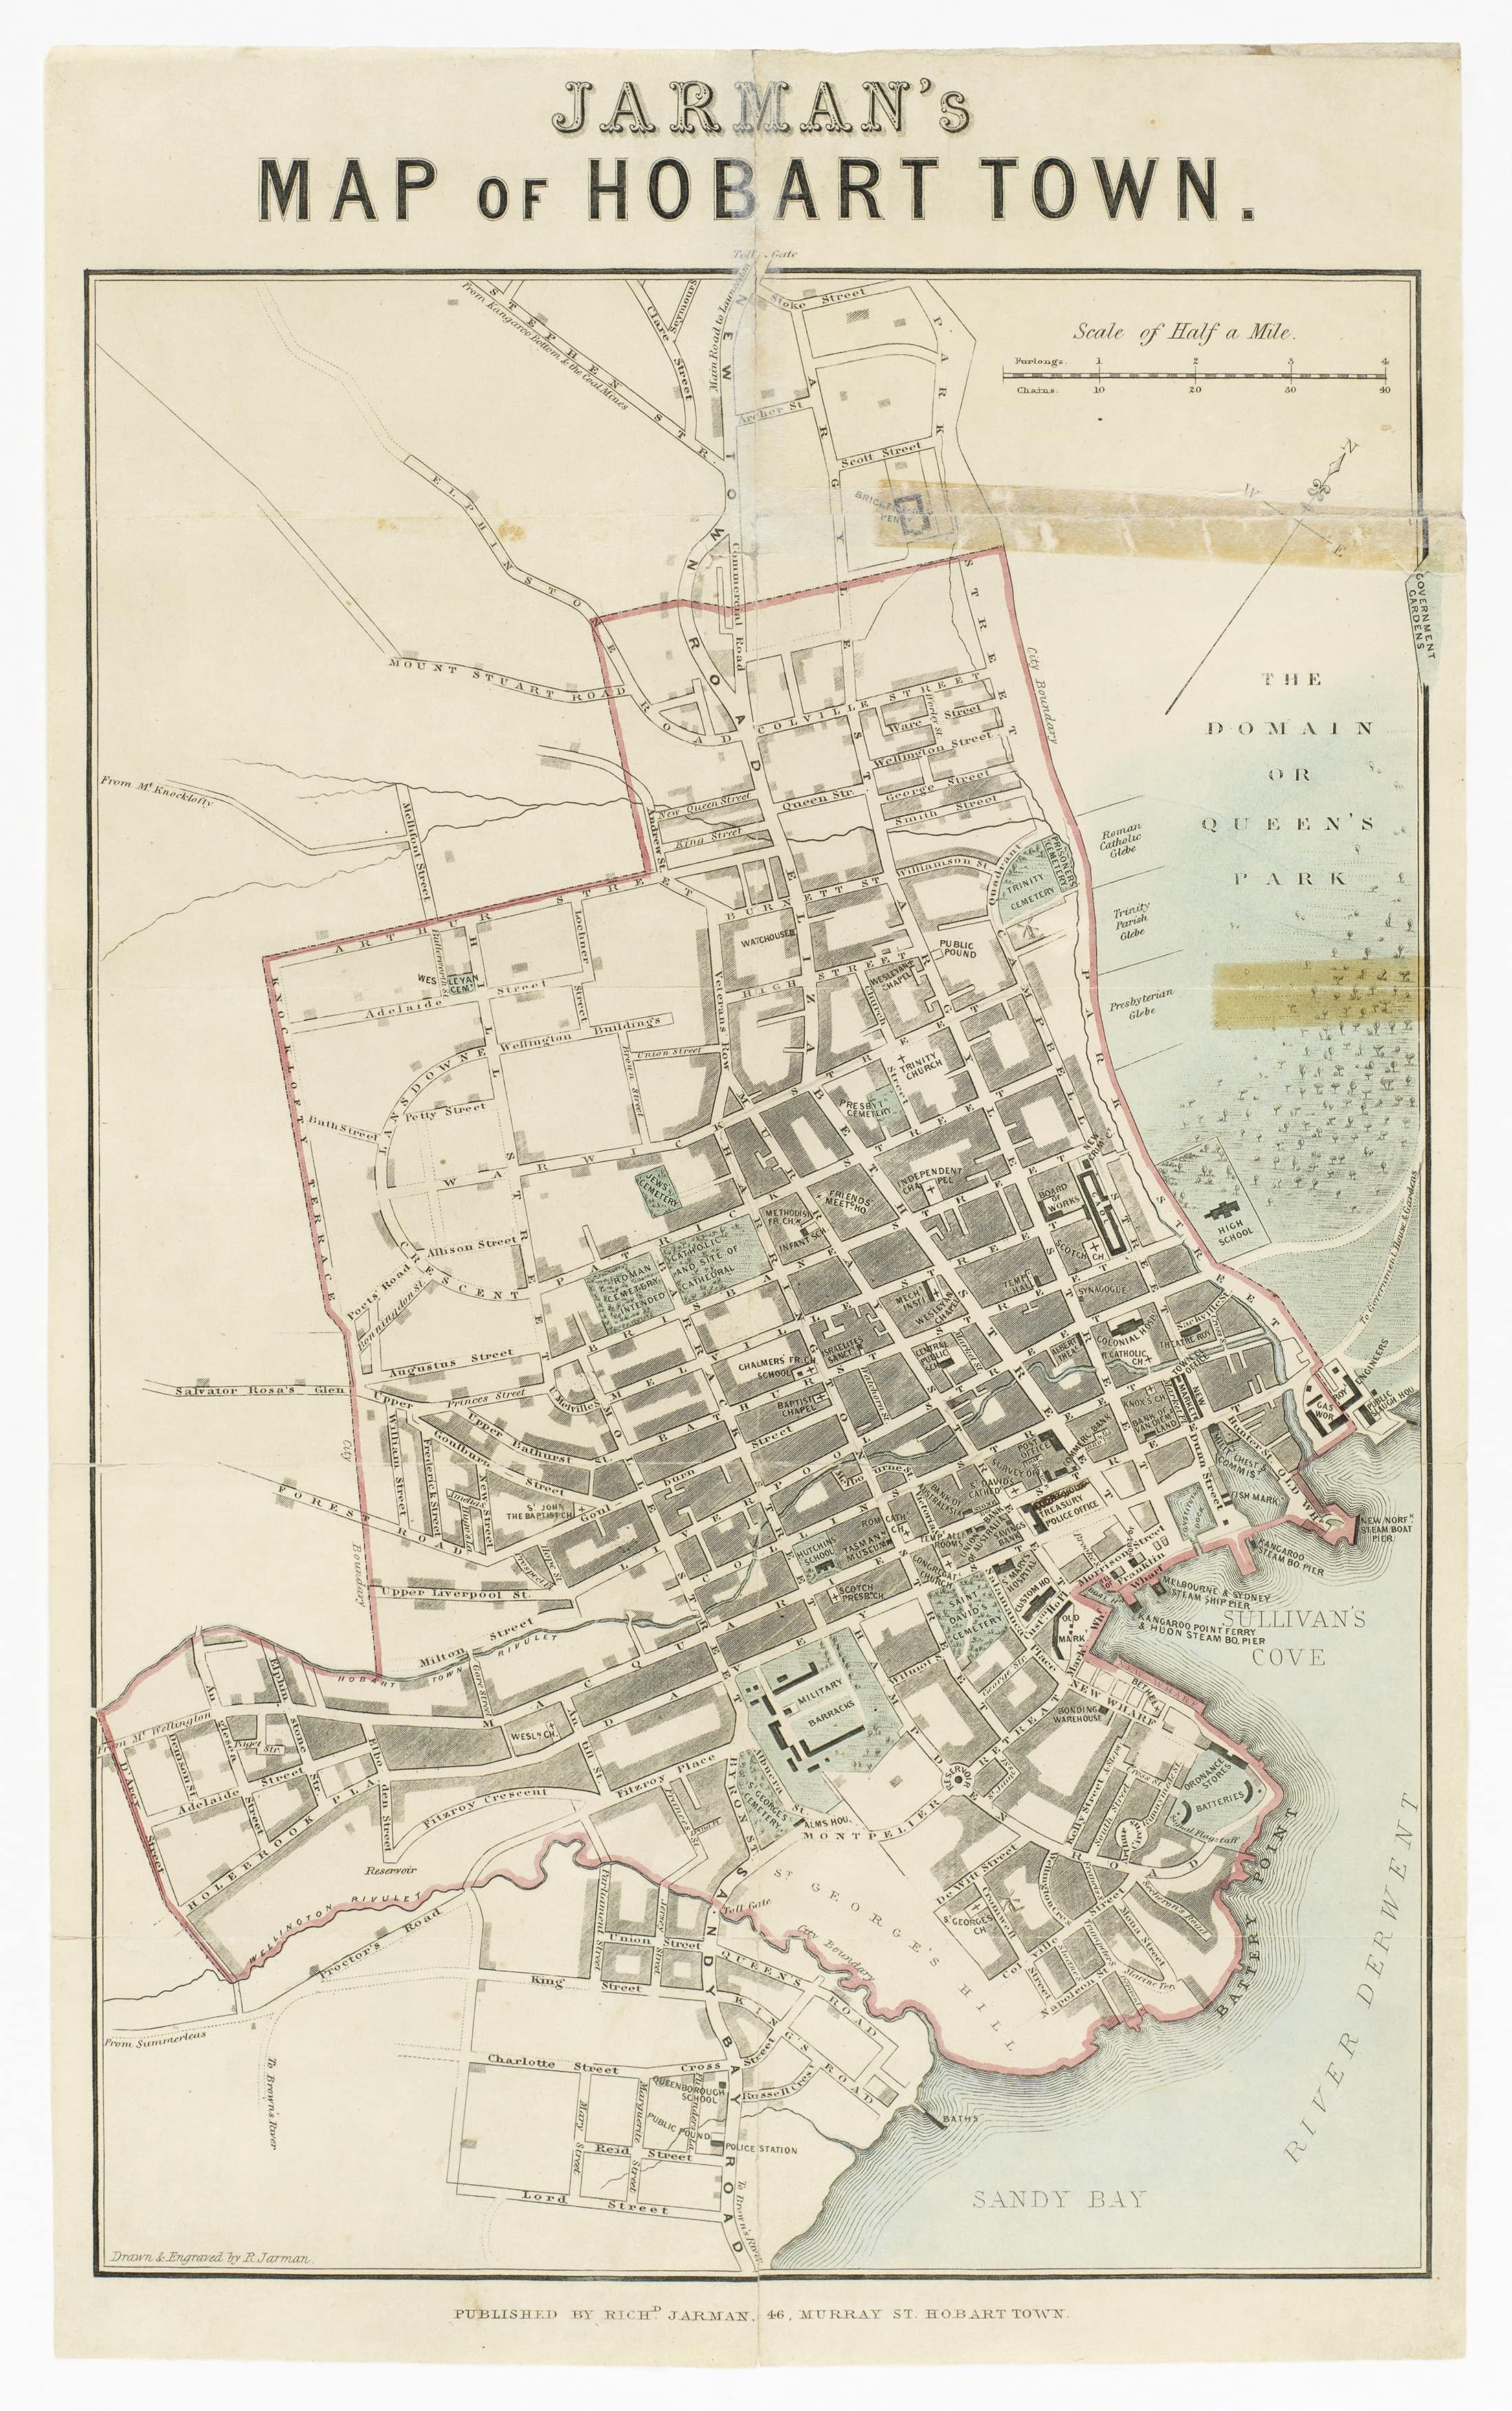
Jarman's_Map_of_Hobart_Town(1858) version 2
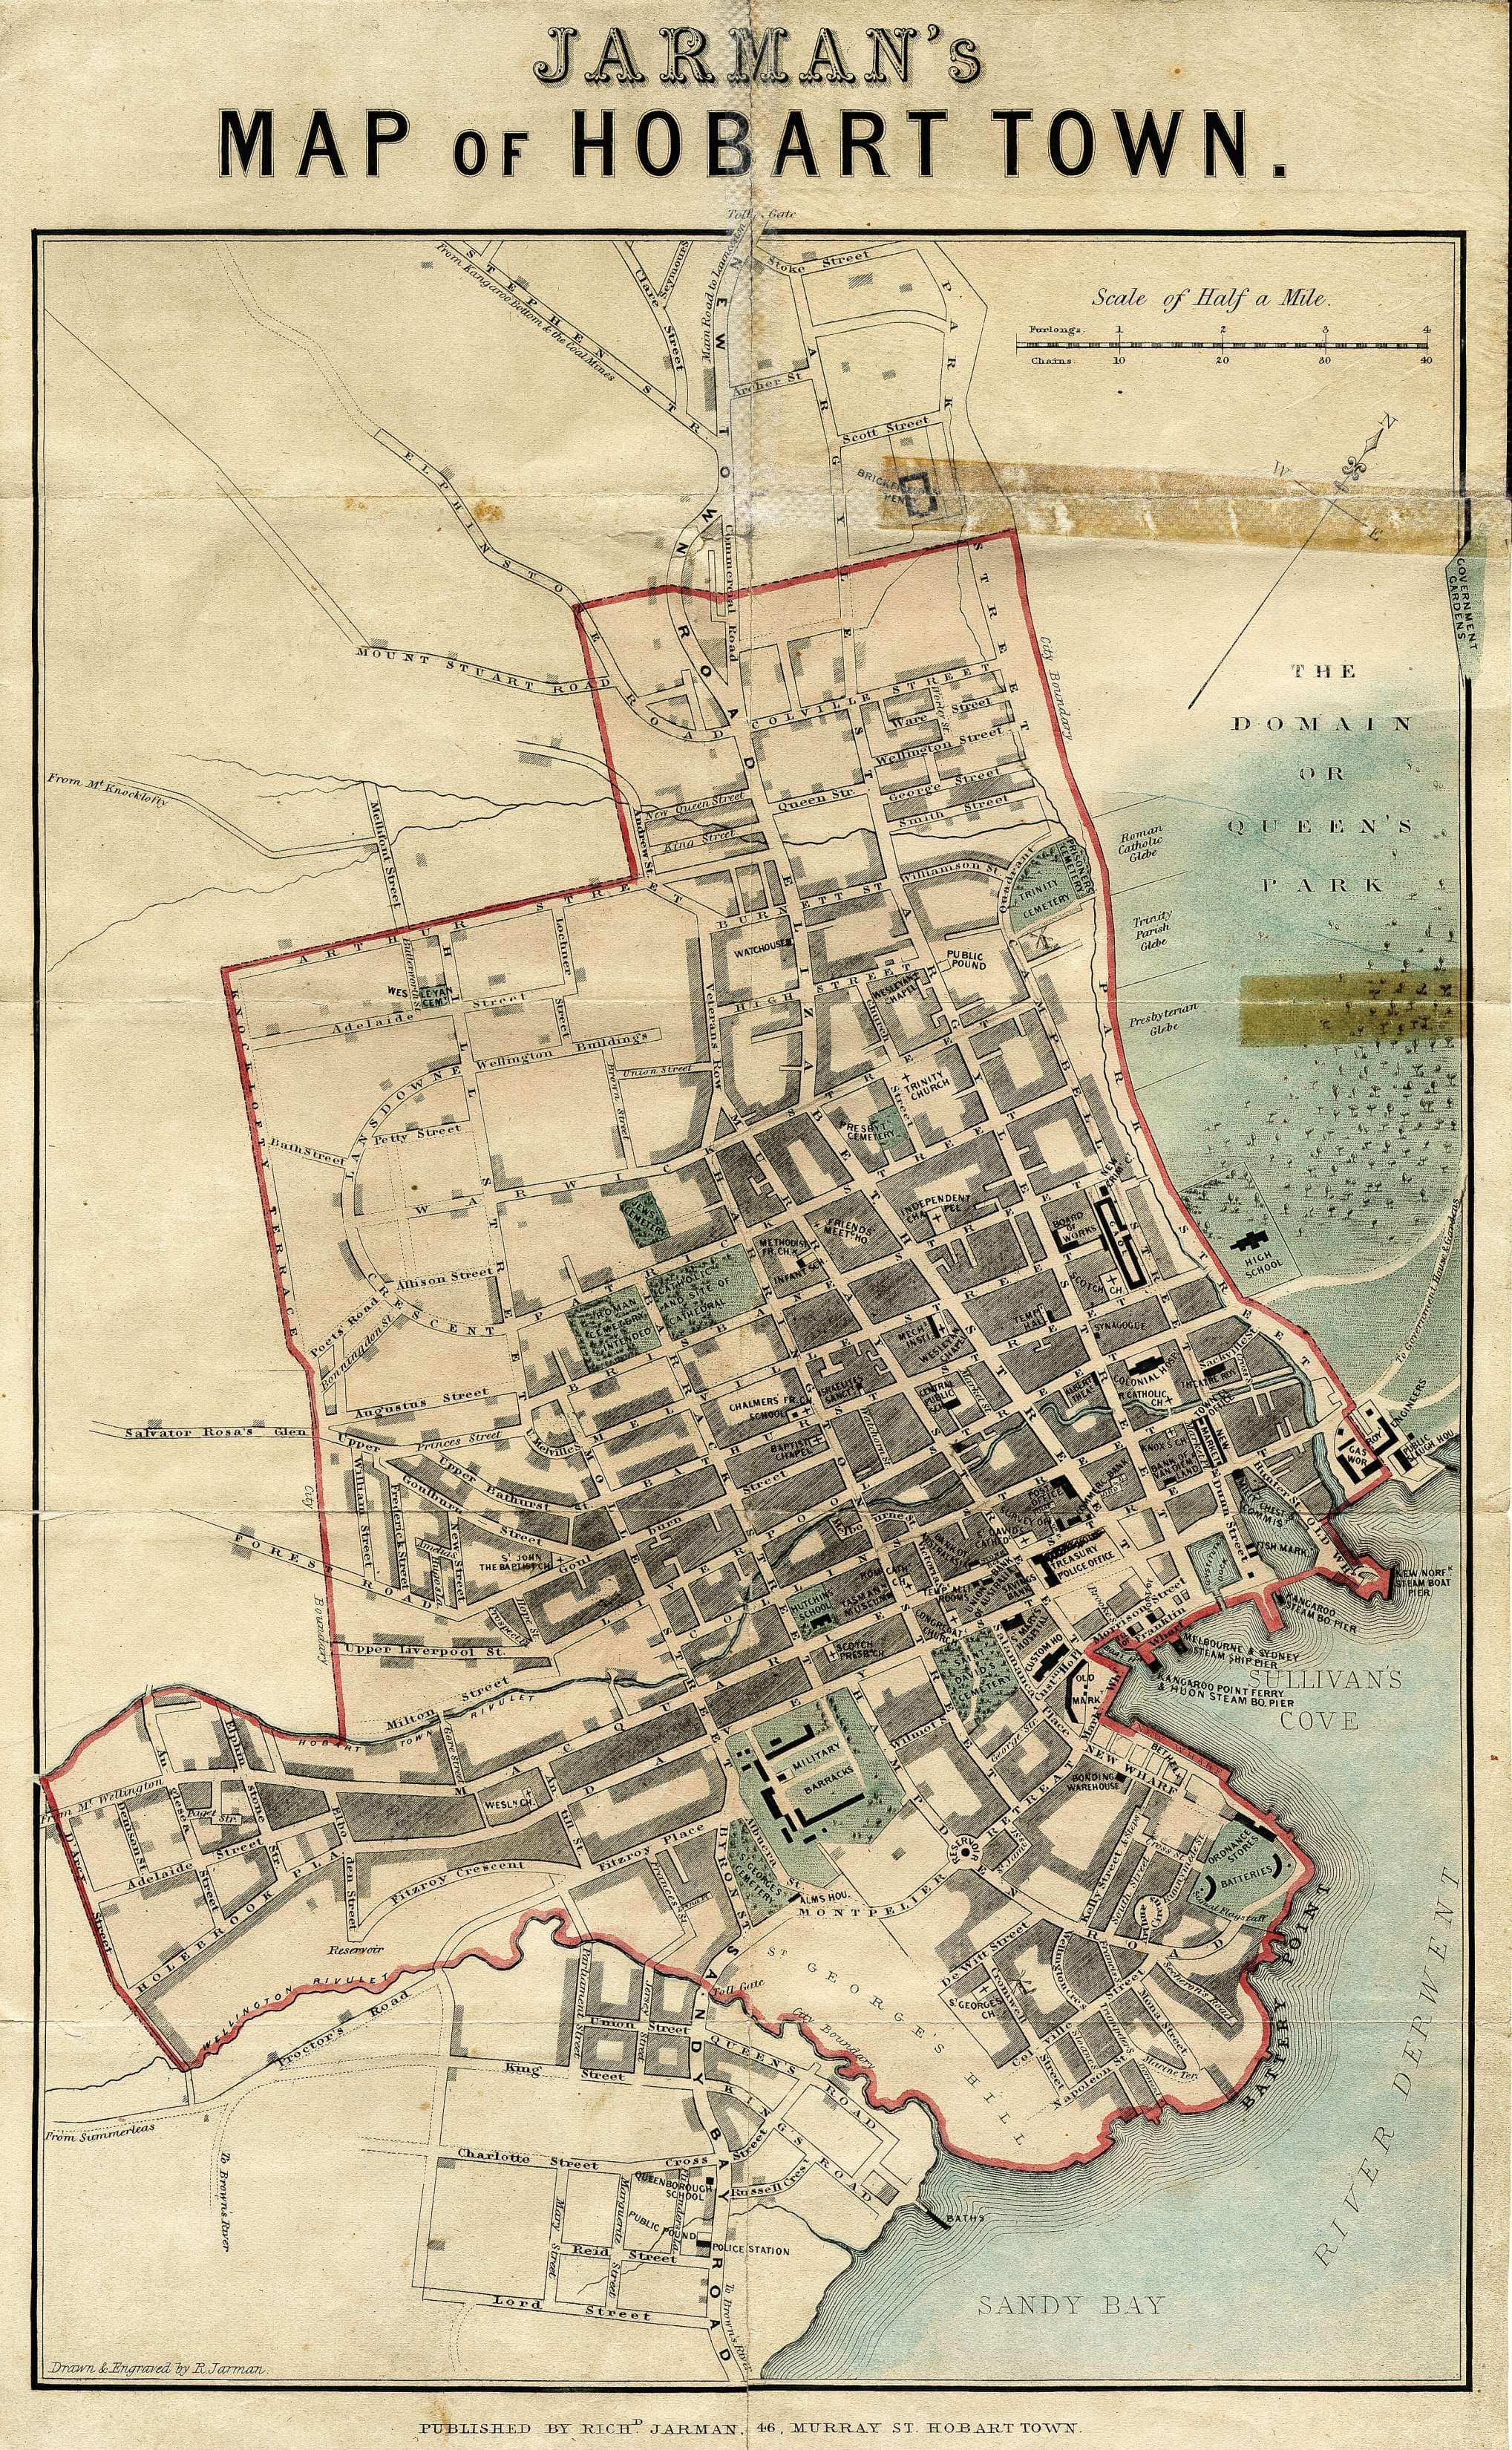
Jarman's_Map_of_Hobart_Town(1858)

Litho The signal station on Mount Nelson, Hobart Town 1880

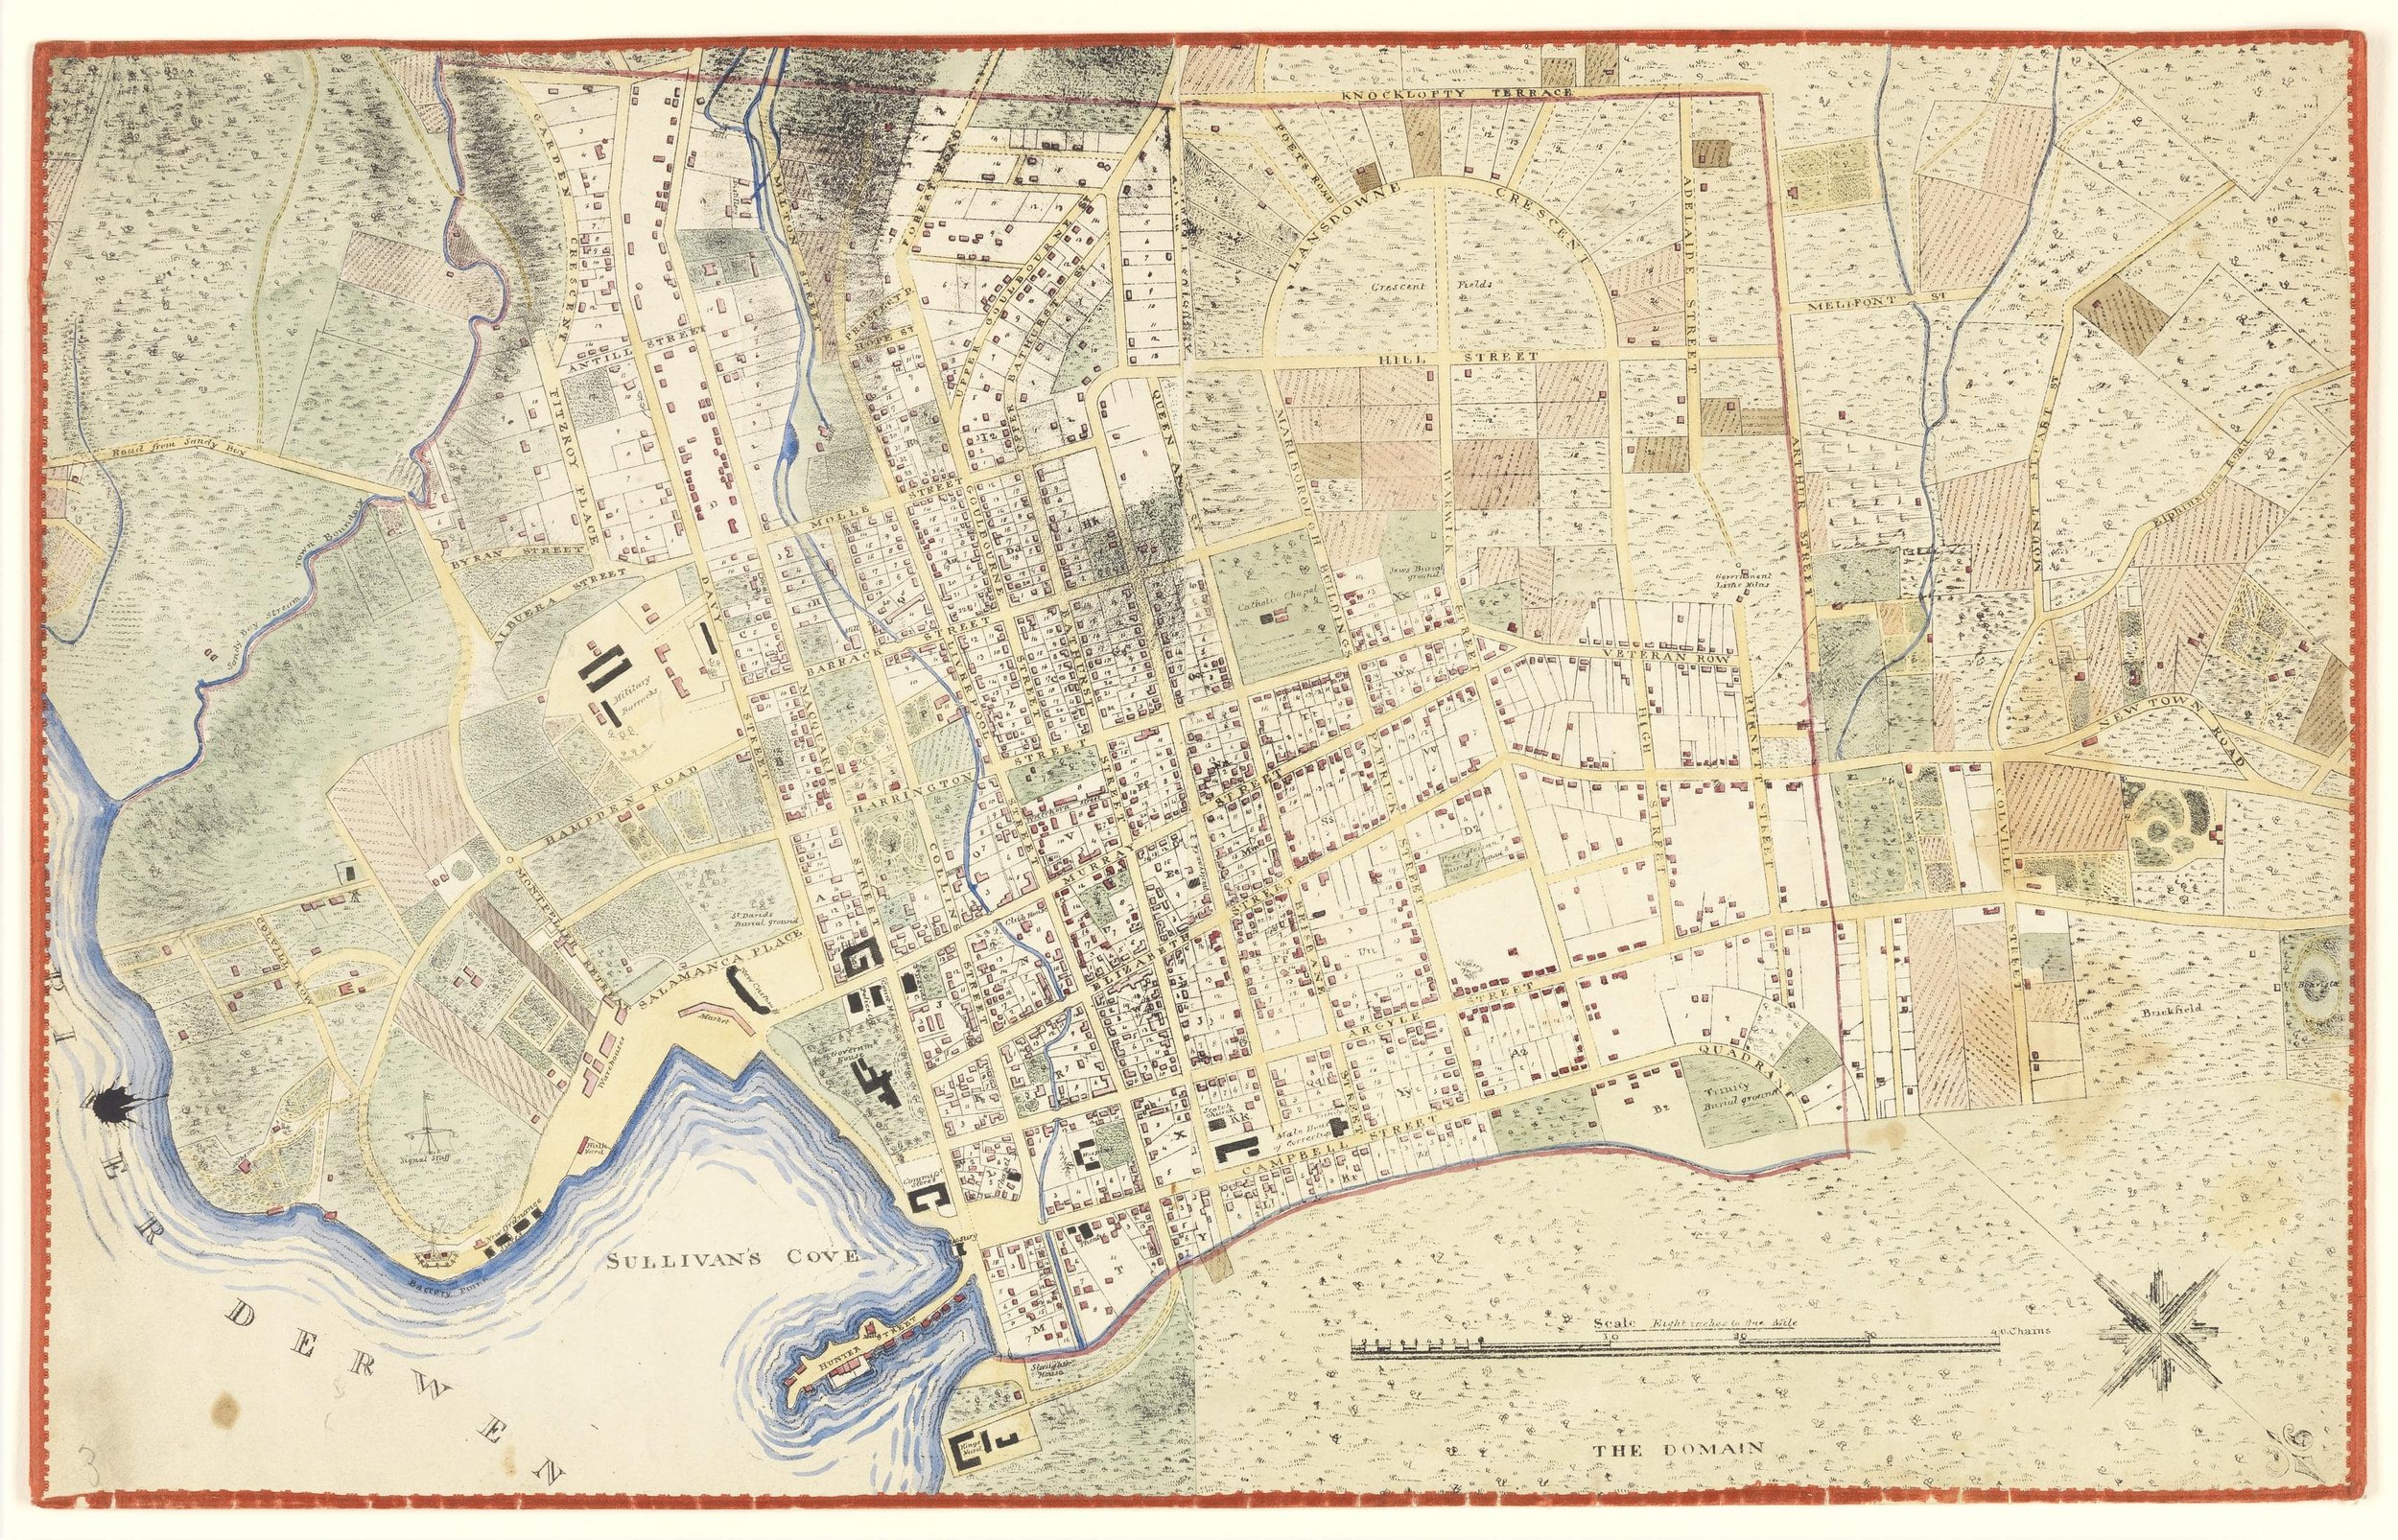
Map - Hobart 9 - Chart of Sullivans Cove and part of Hobart Town showing the intended improvements, surveyor John Lee Archer 1828
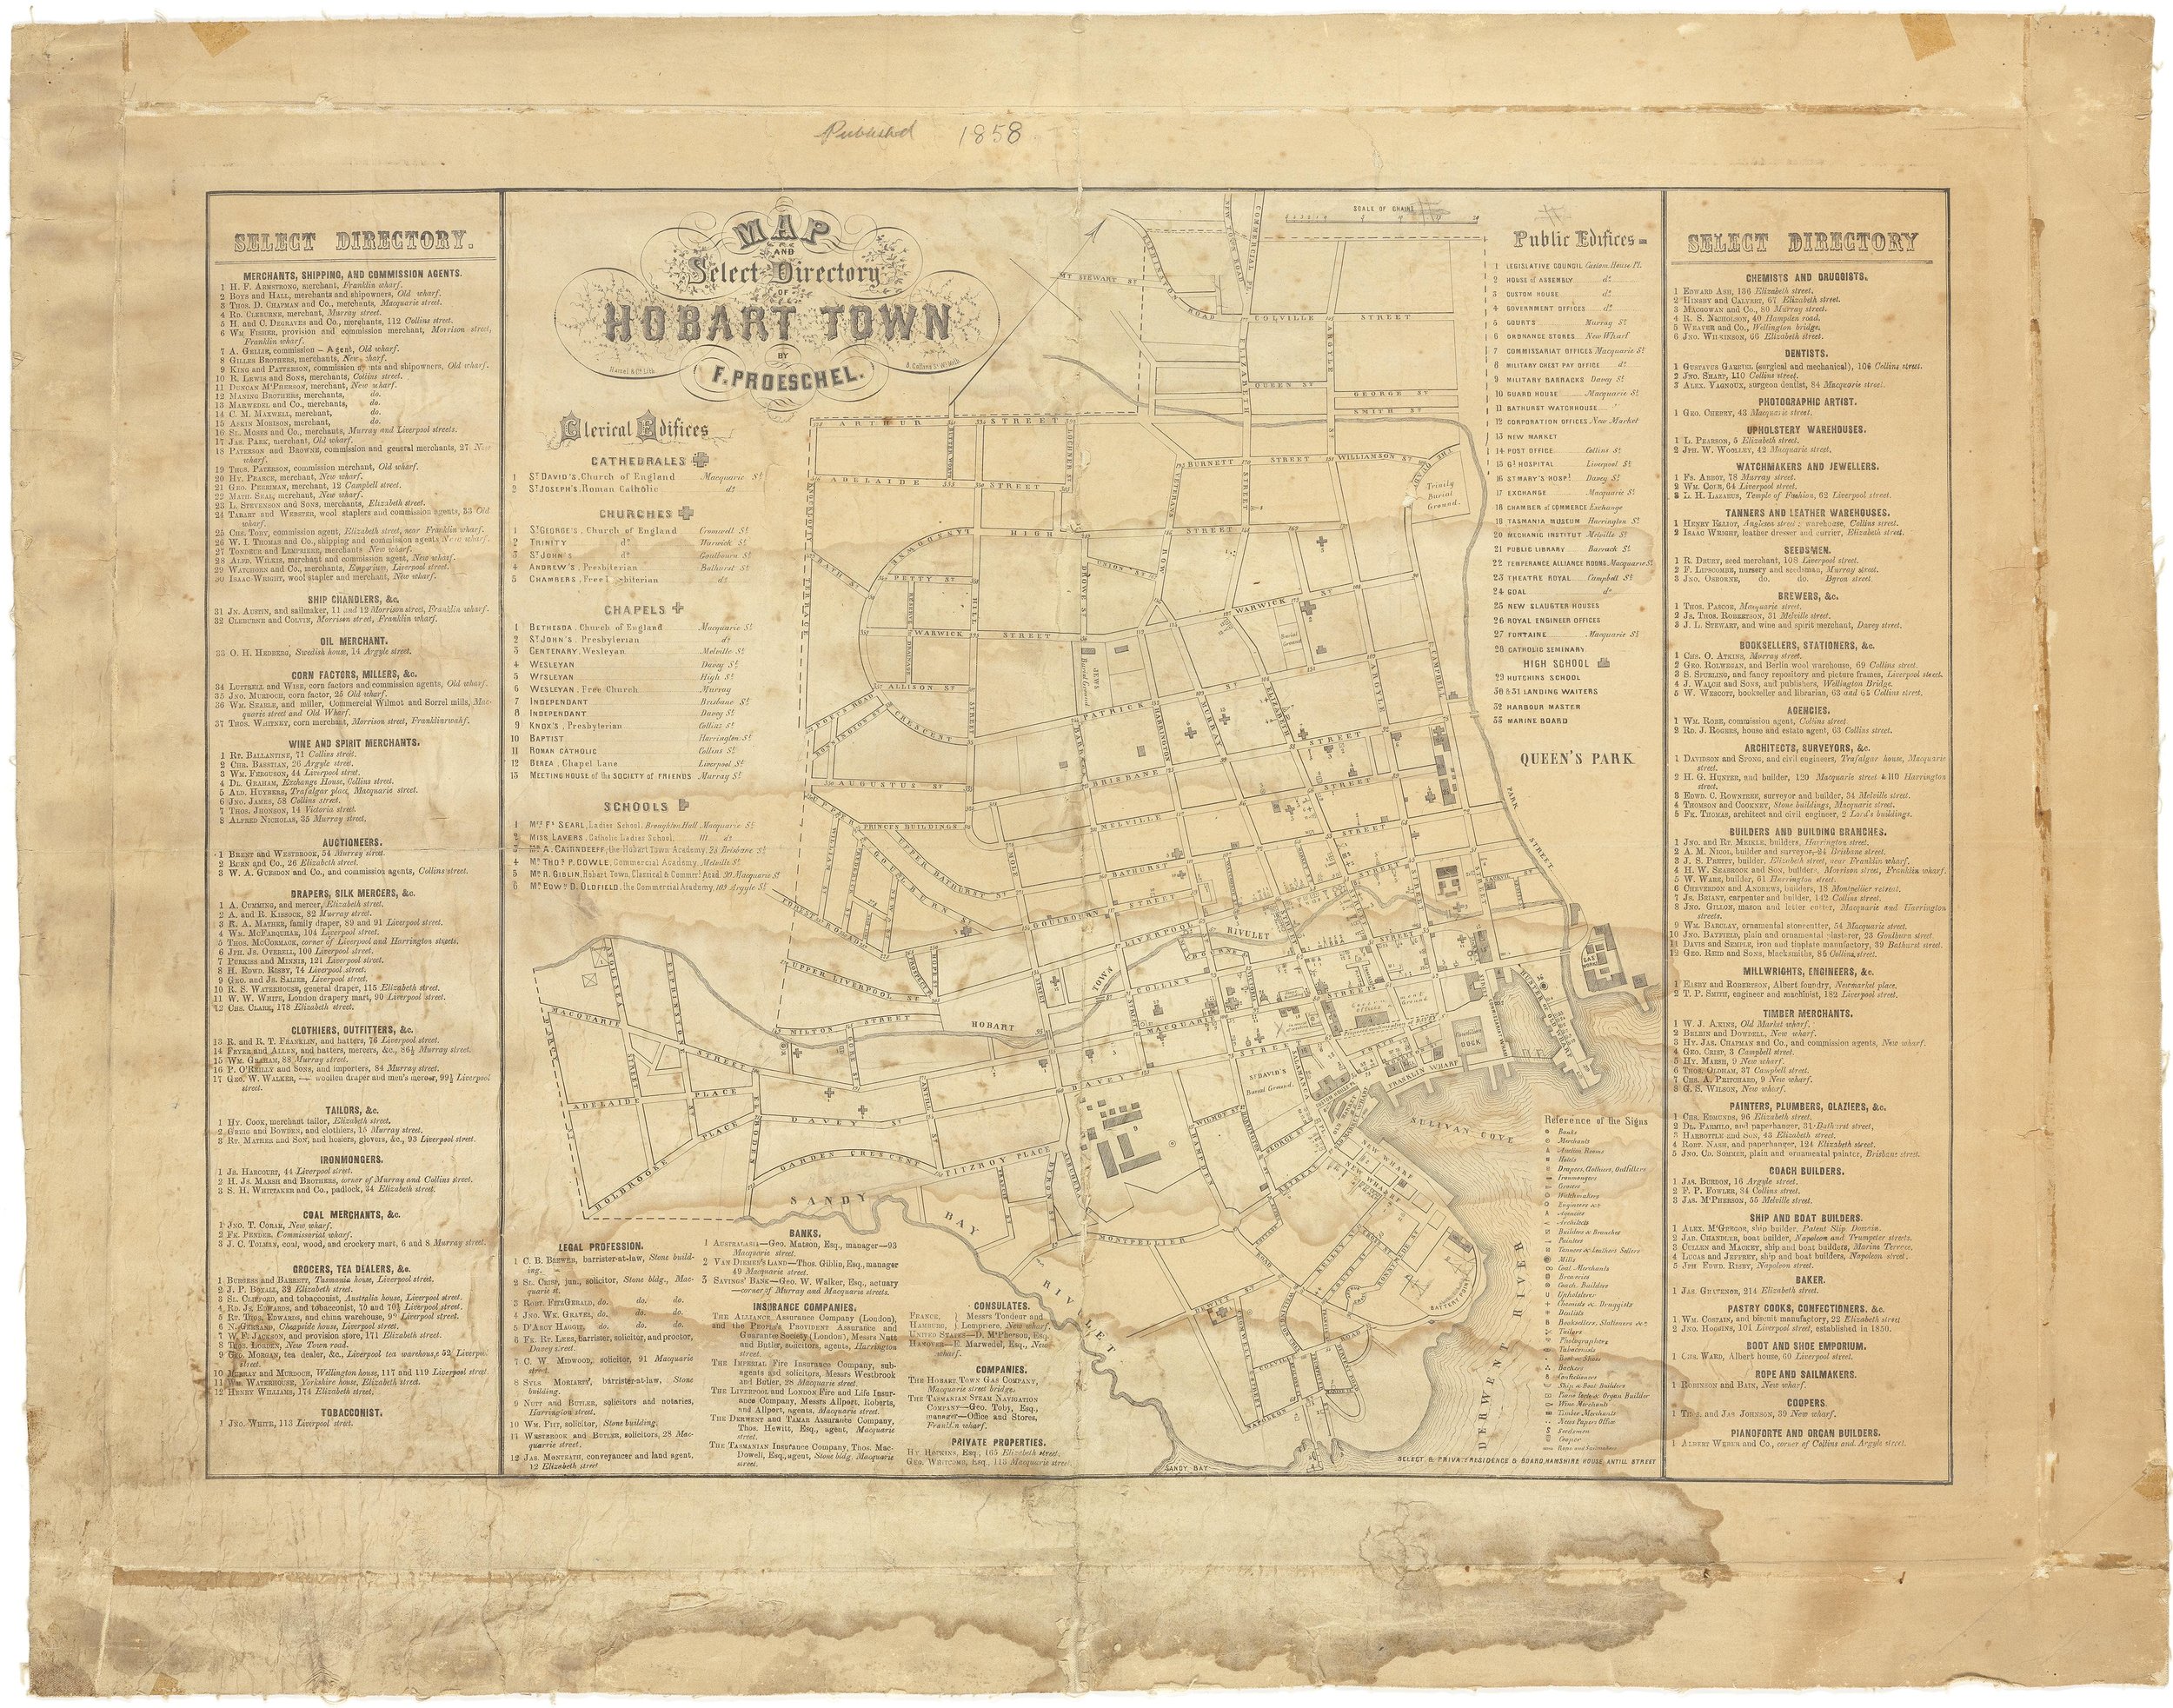
Map and select directory of Hobart Town 1858
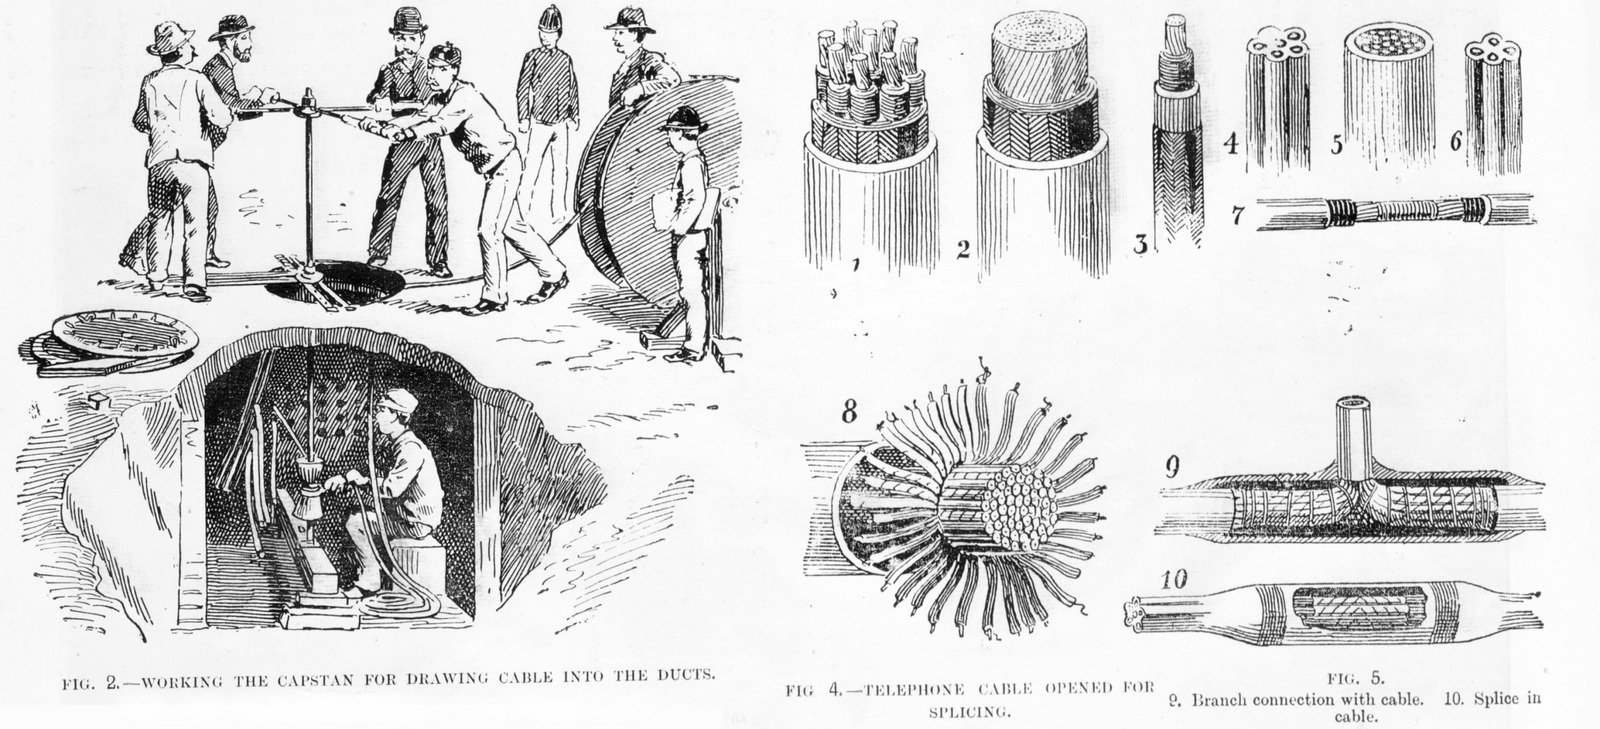
Materials Used Telegraph And Electric Power Workers 1889
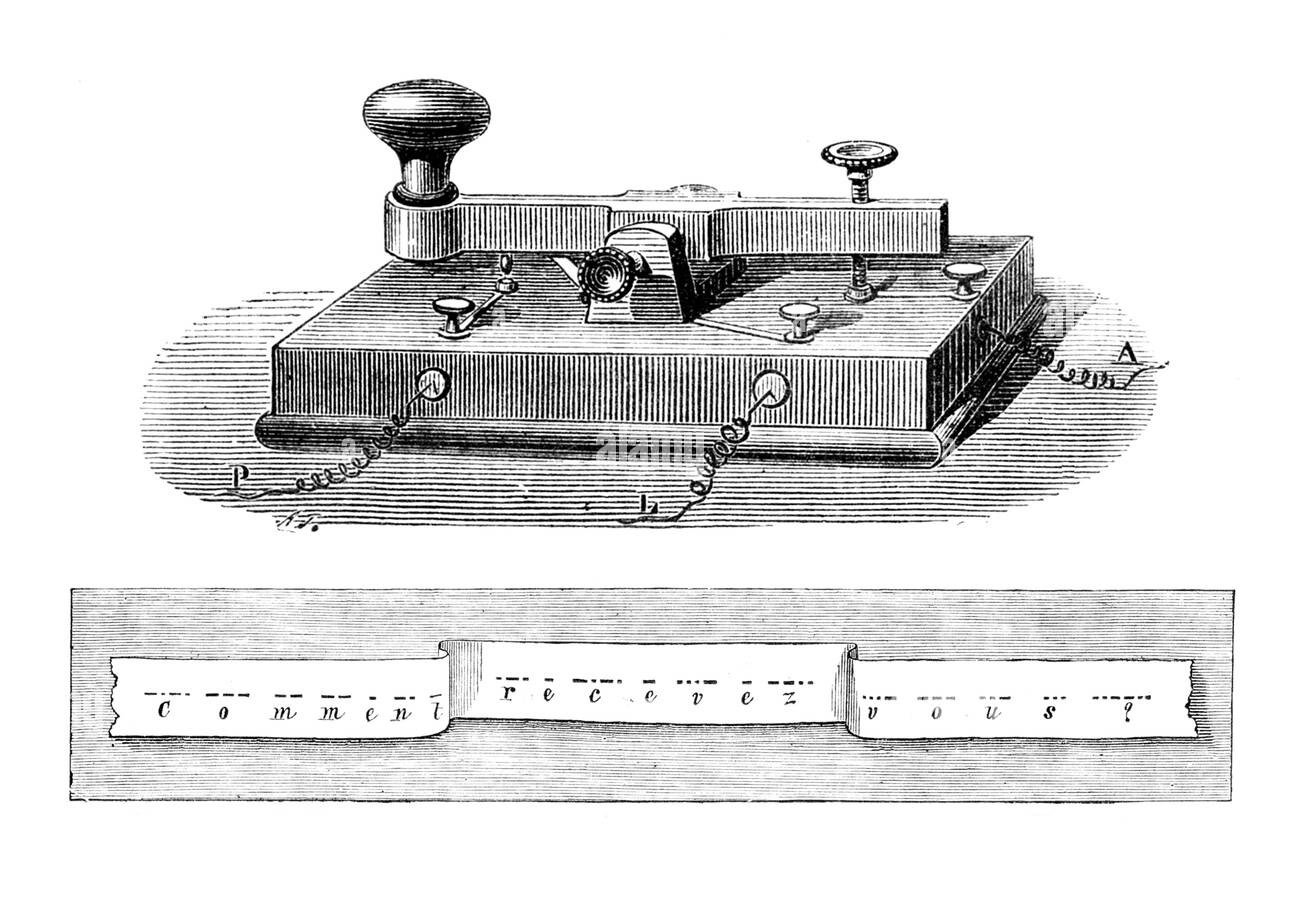
morse-telegraph-transmitter-with-code
New Wharf, Hobart, Tasmania 1900

On the wharf, Hobart 1901
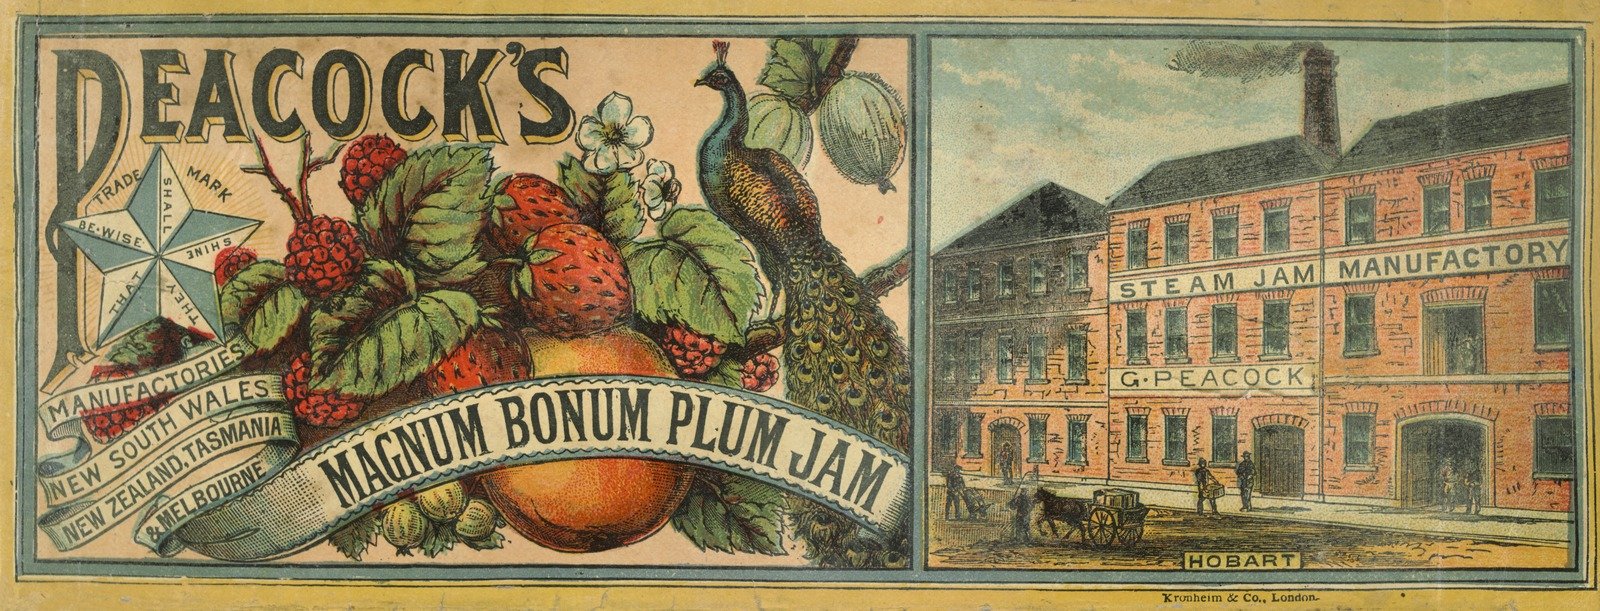
Peacock's magnum bonum plum jam 1885

Plan_of_Hobart_Town_Hall_signed_by_the_architect_Henry_Hunter

Australian Penny Token, ND, Joseph Moir, Hobart Town 1850

Shows the harbour with ships and the township of Hobart 1866

Sketch Of The Transit Of Telegraphic Messages By Pneumatic Tube System From District Offices To The Central Station 1892
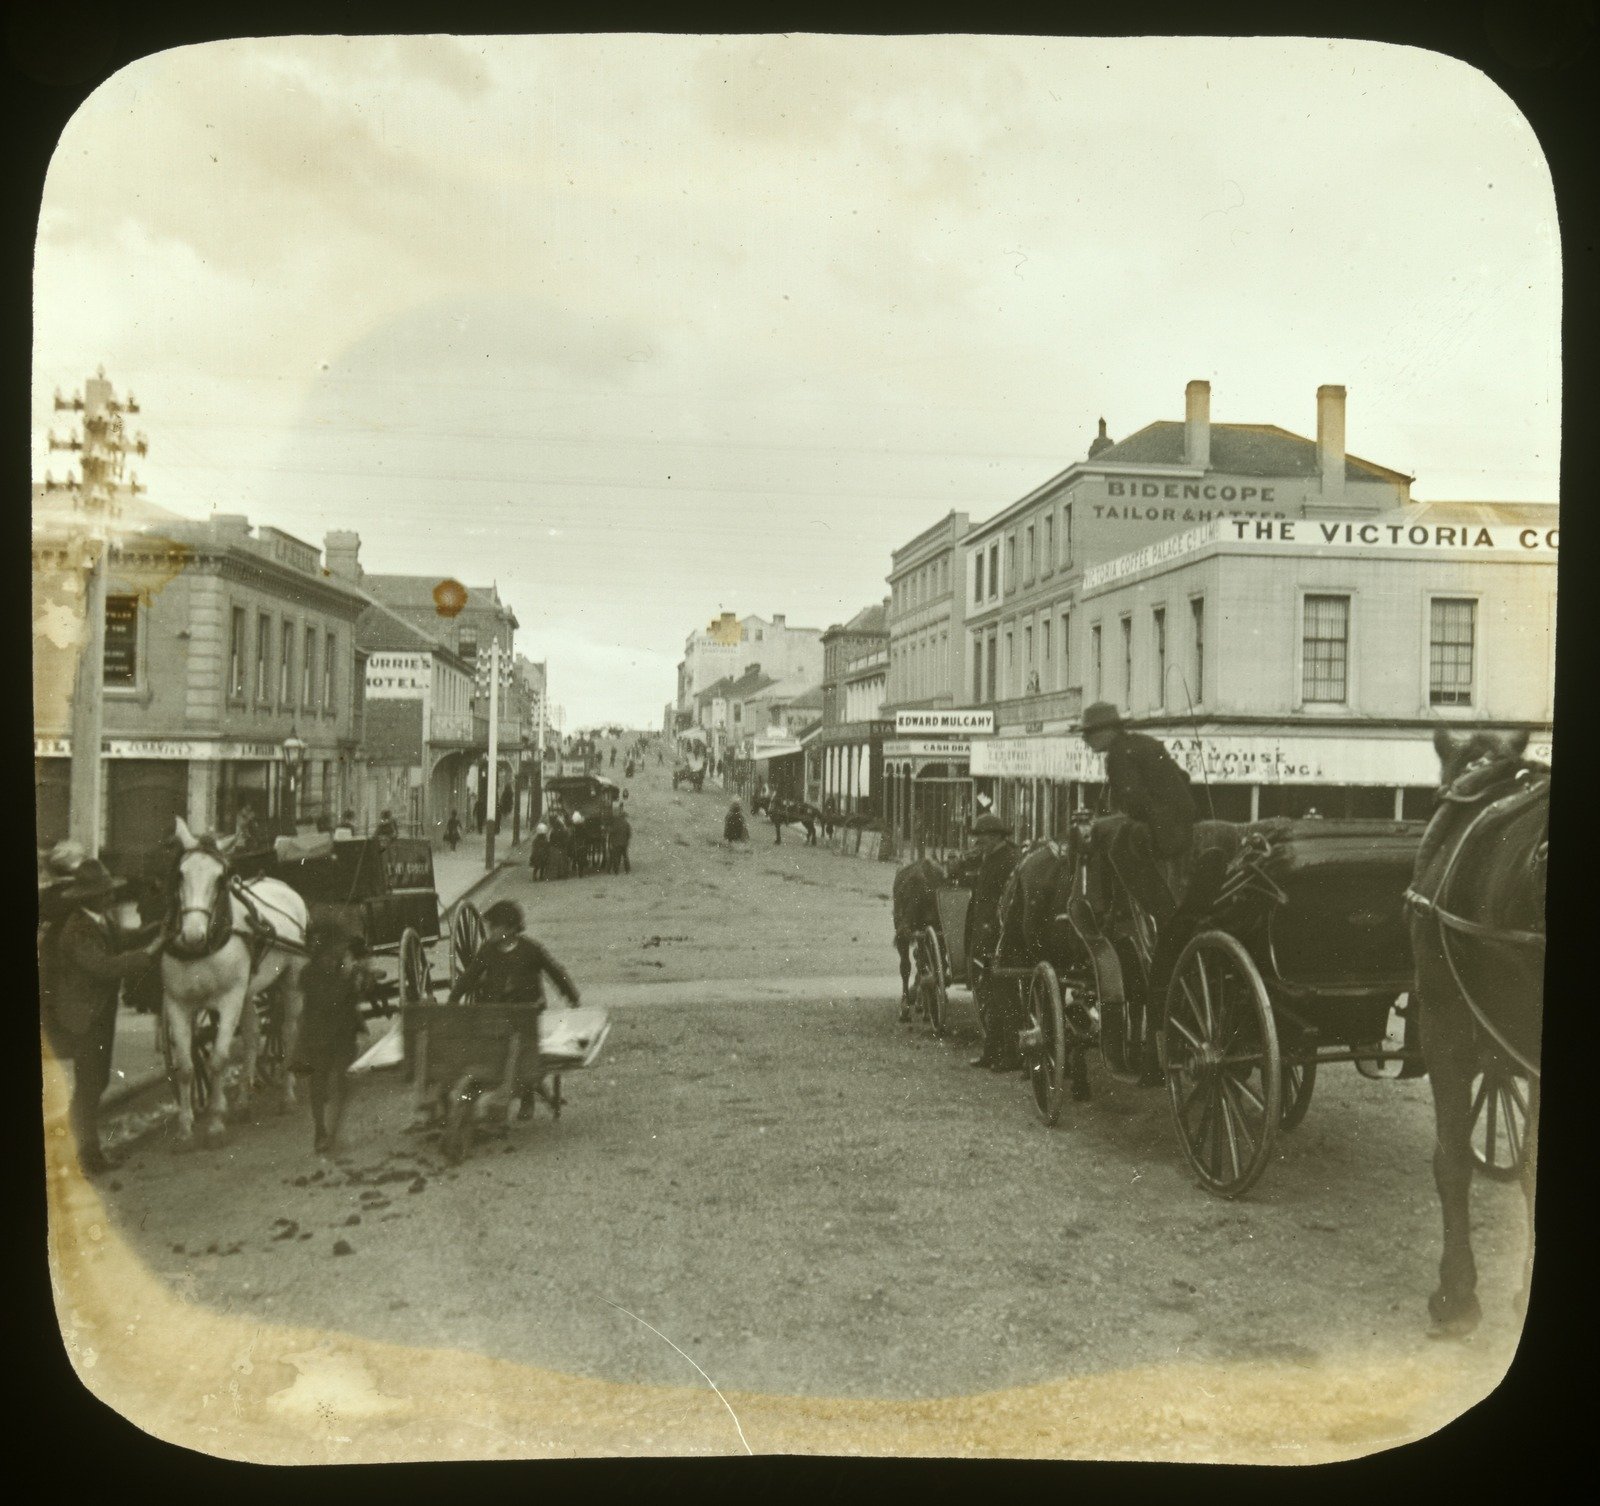
Street scene Hobart 1880s

Studio portrait of boy, whole-length, full face, standing, holding hat and resting arm on piano 1870s
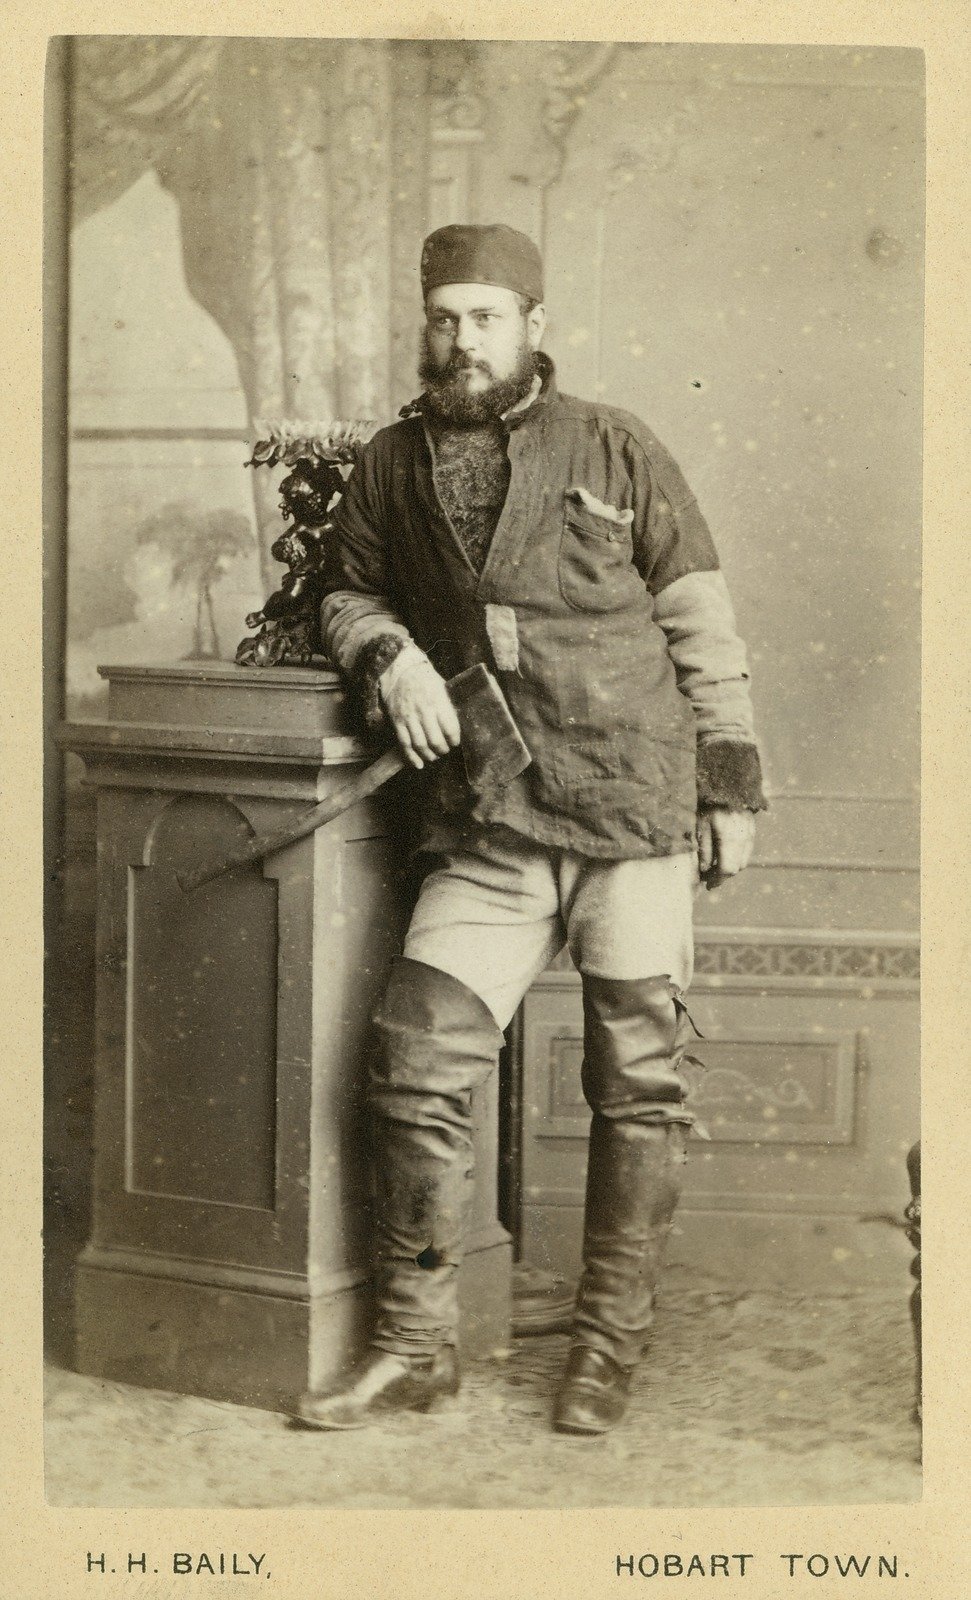
Studio portraits 1865-81 1
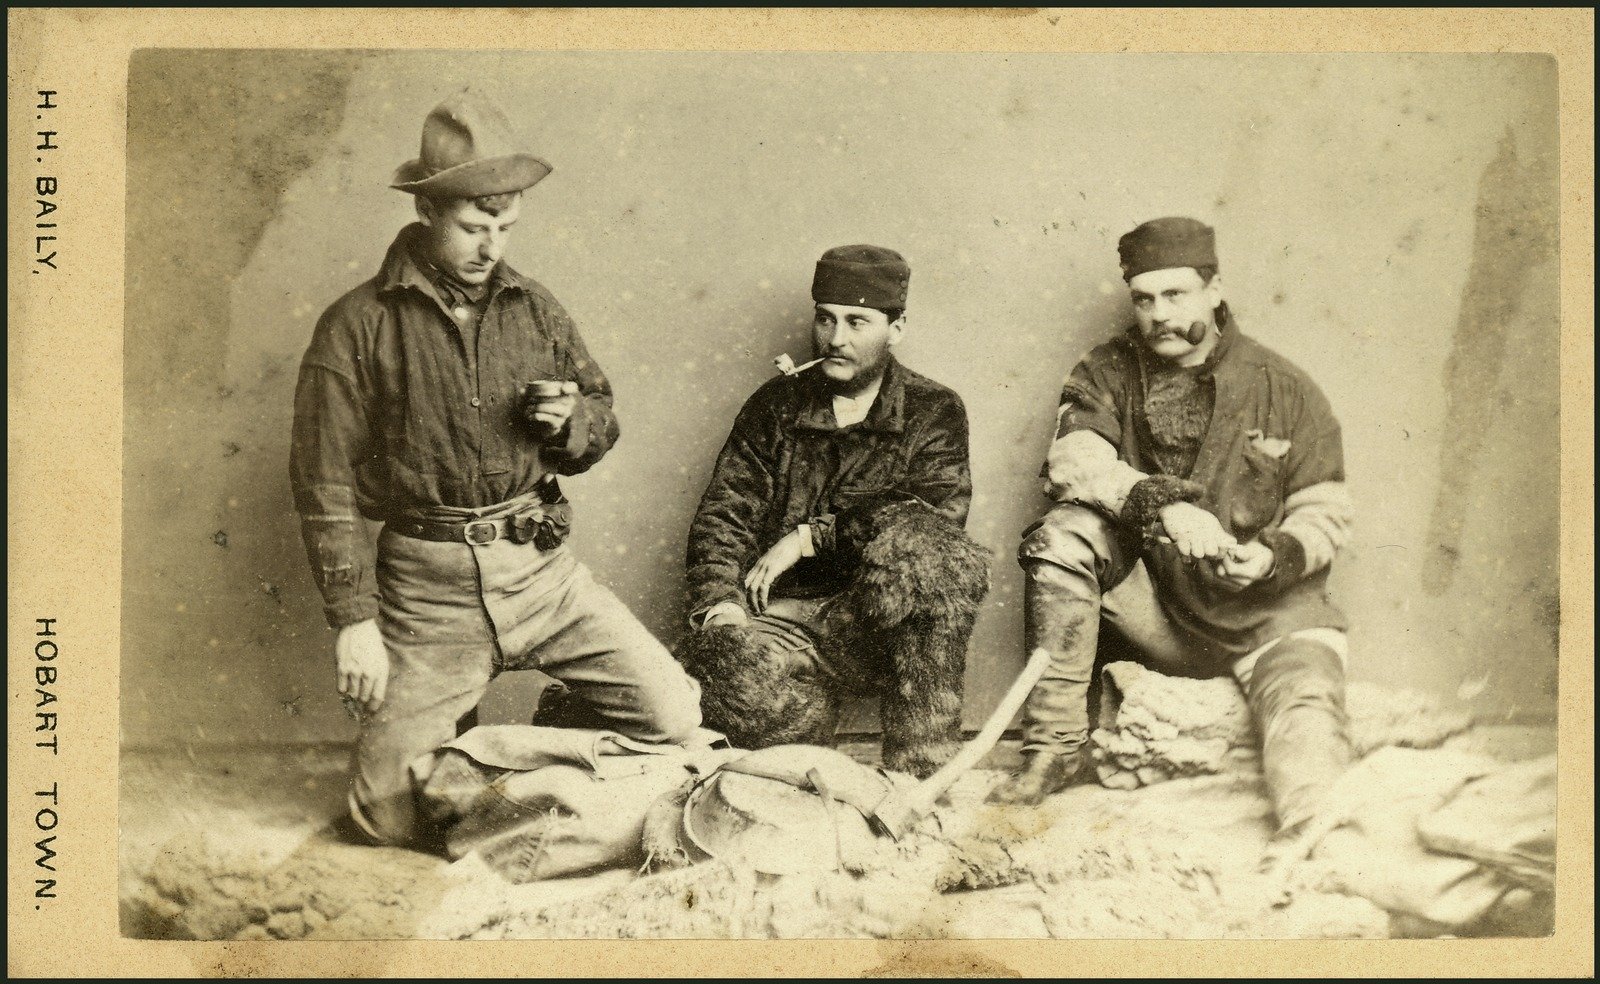
Studio portraits 1865-81 2
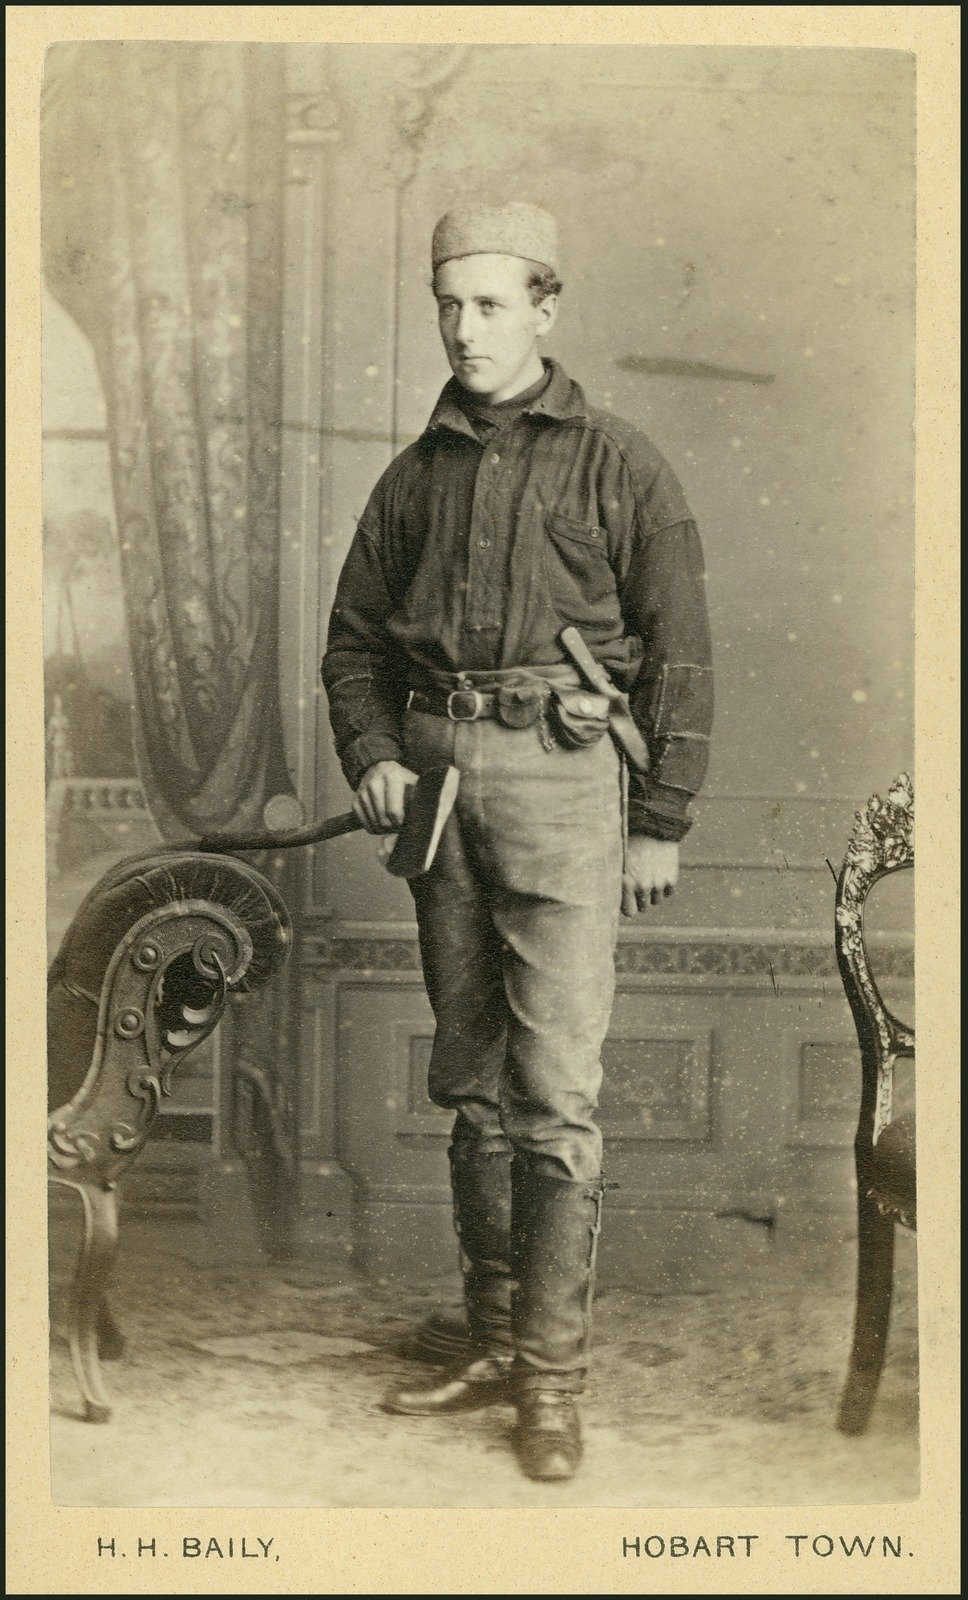
Studio portraits 1865-81 3
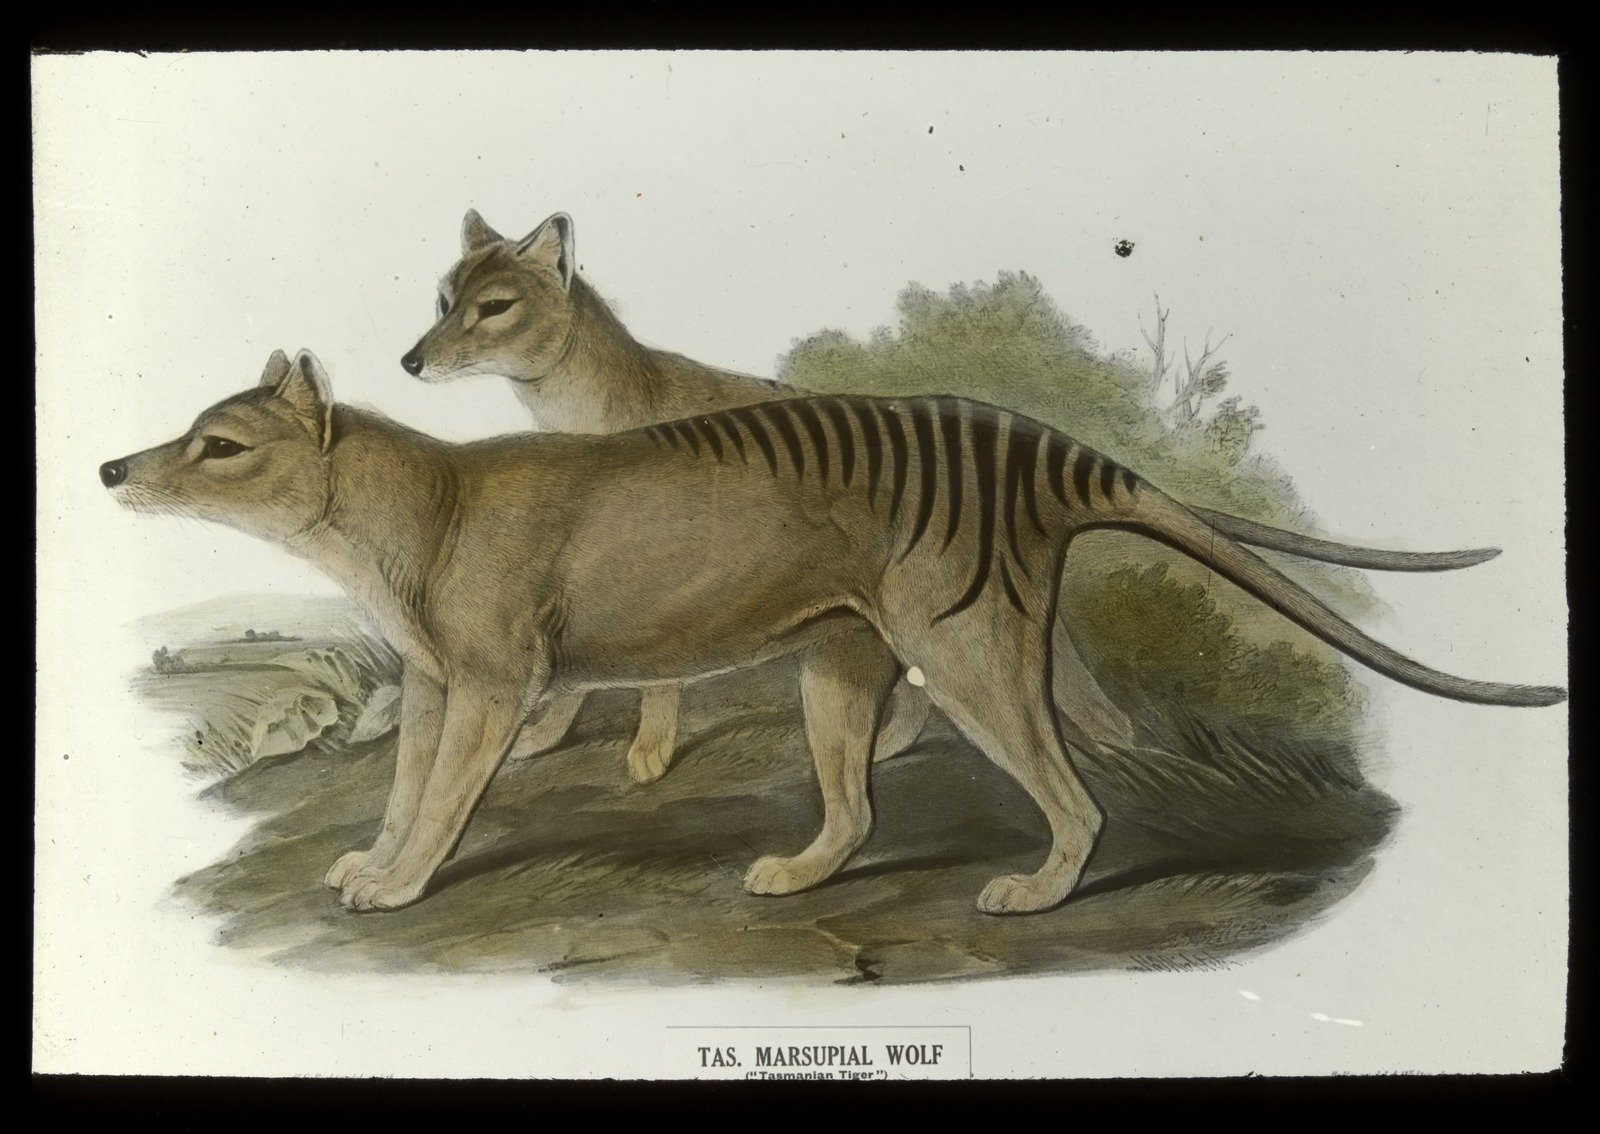
Tas. Marsupial Wolf Tasmanian Tiger 1900
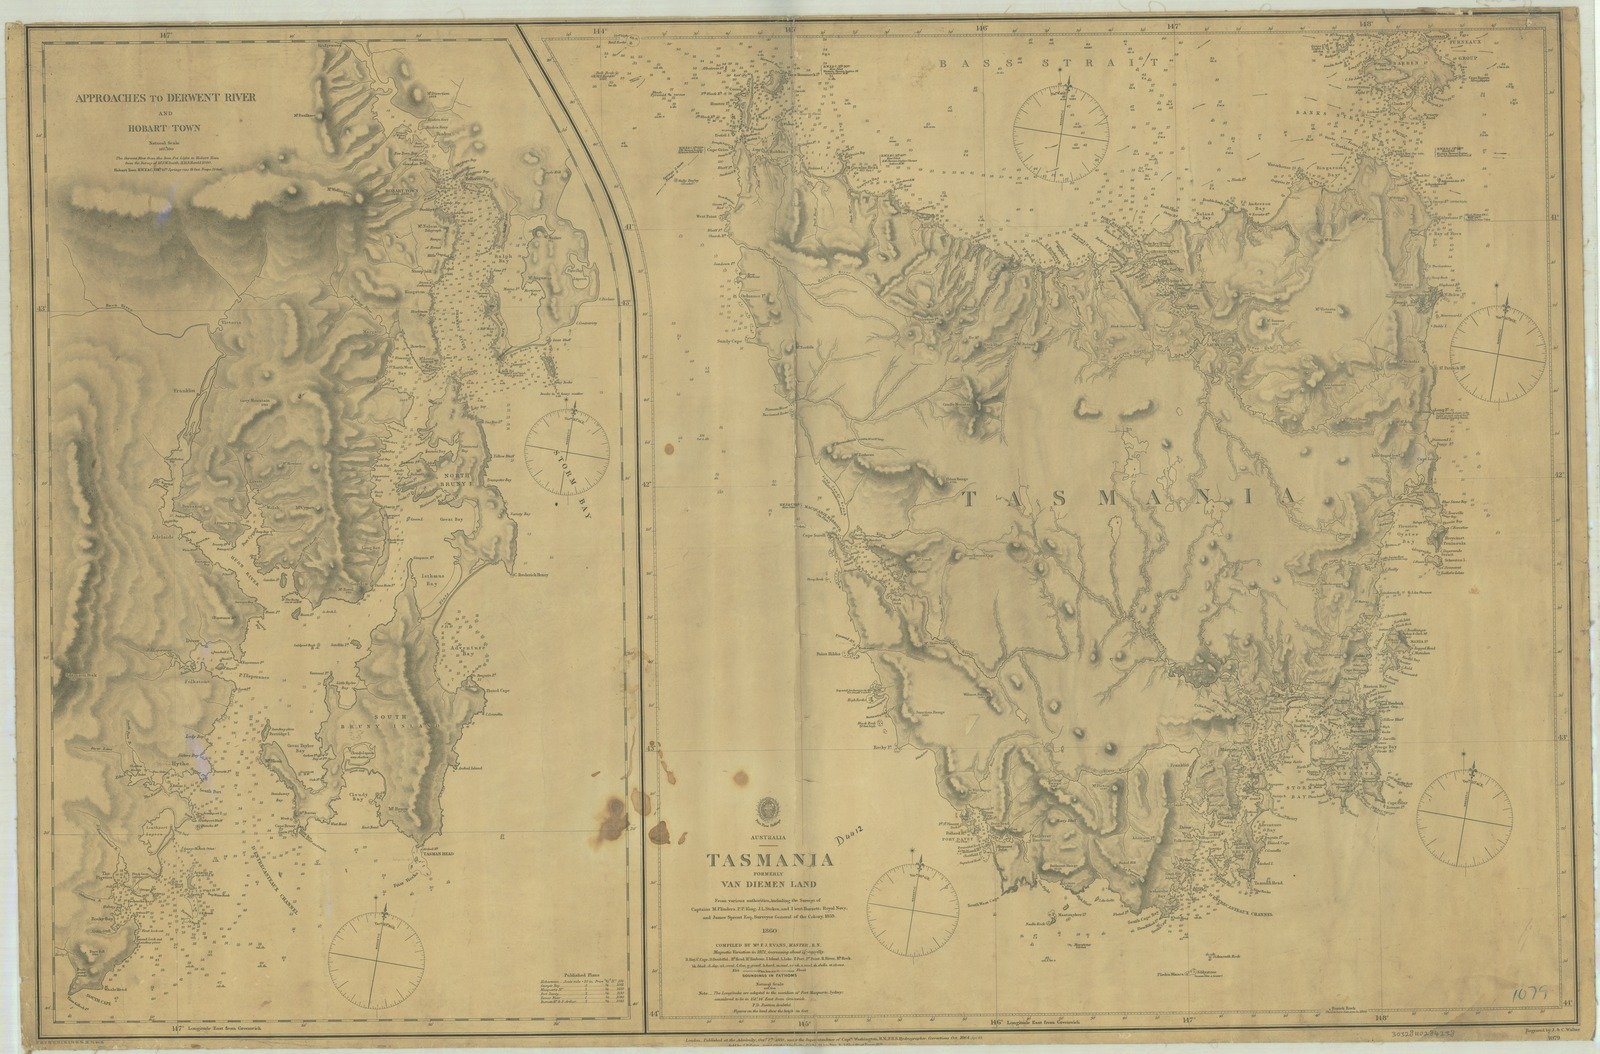
Tasmania formerly Van Diemen Land Map 1860
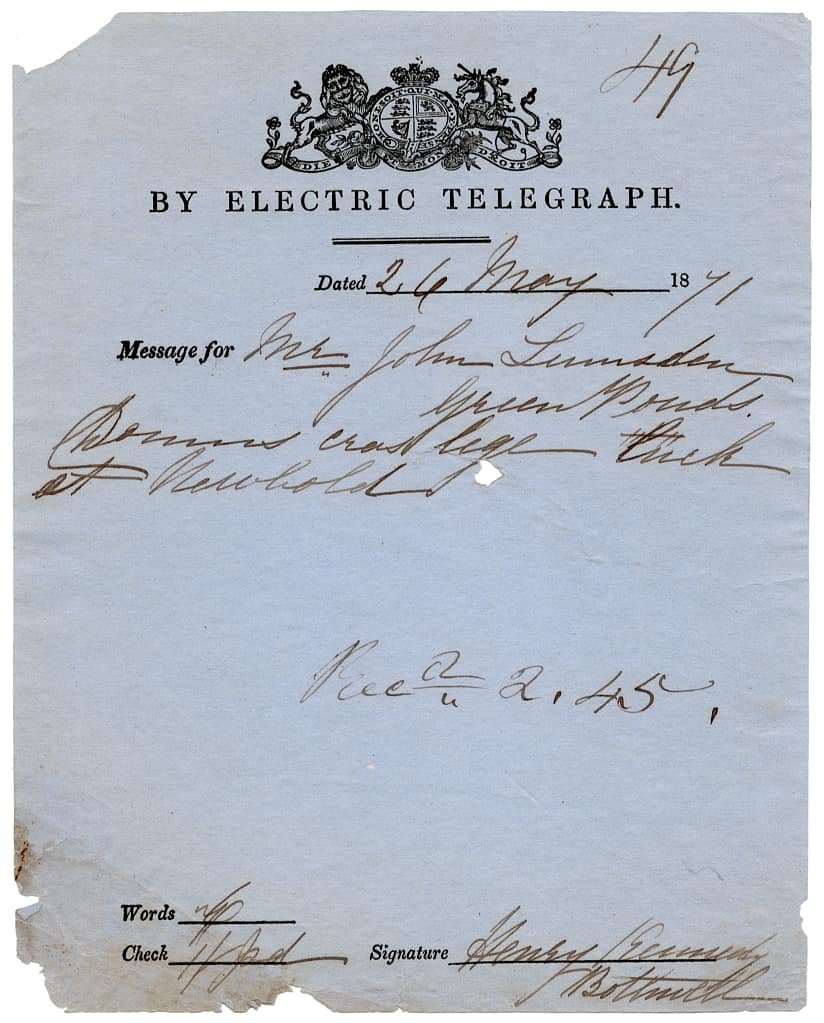
Tasmania telegraph form 1871

Vue de hobart town. prise de la rade. (Ile Van Diemen.) Pre-1850
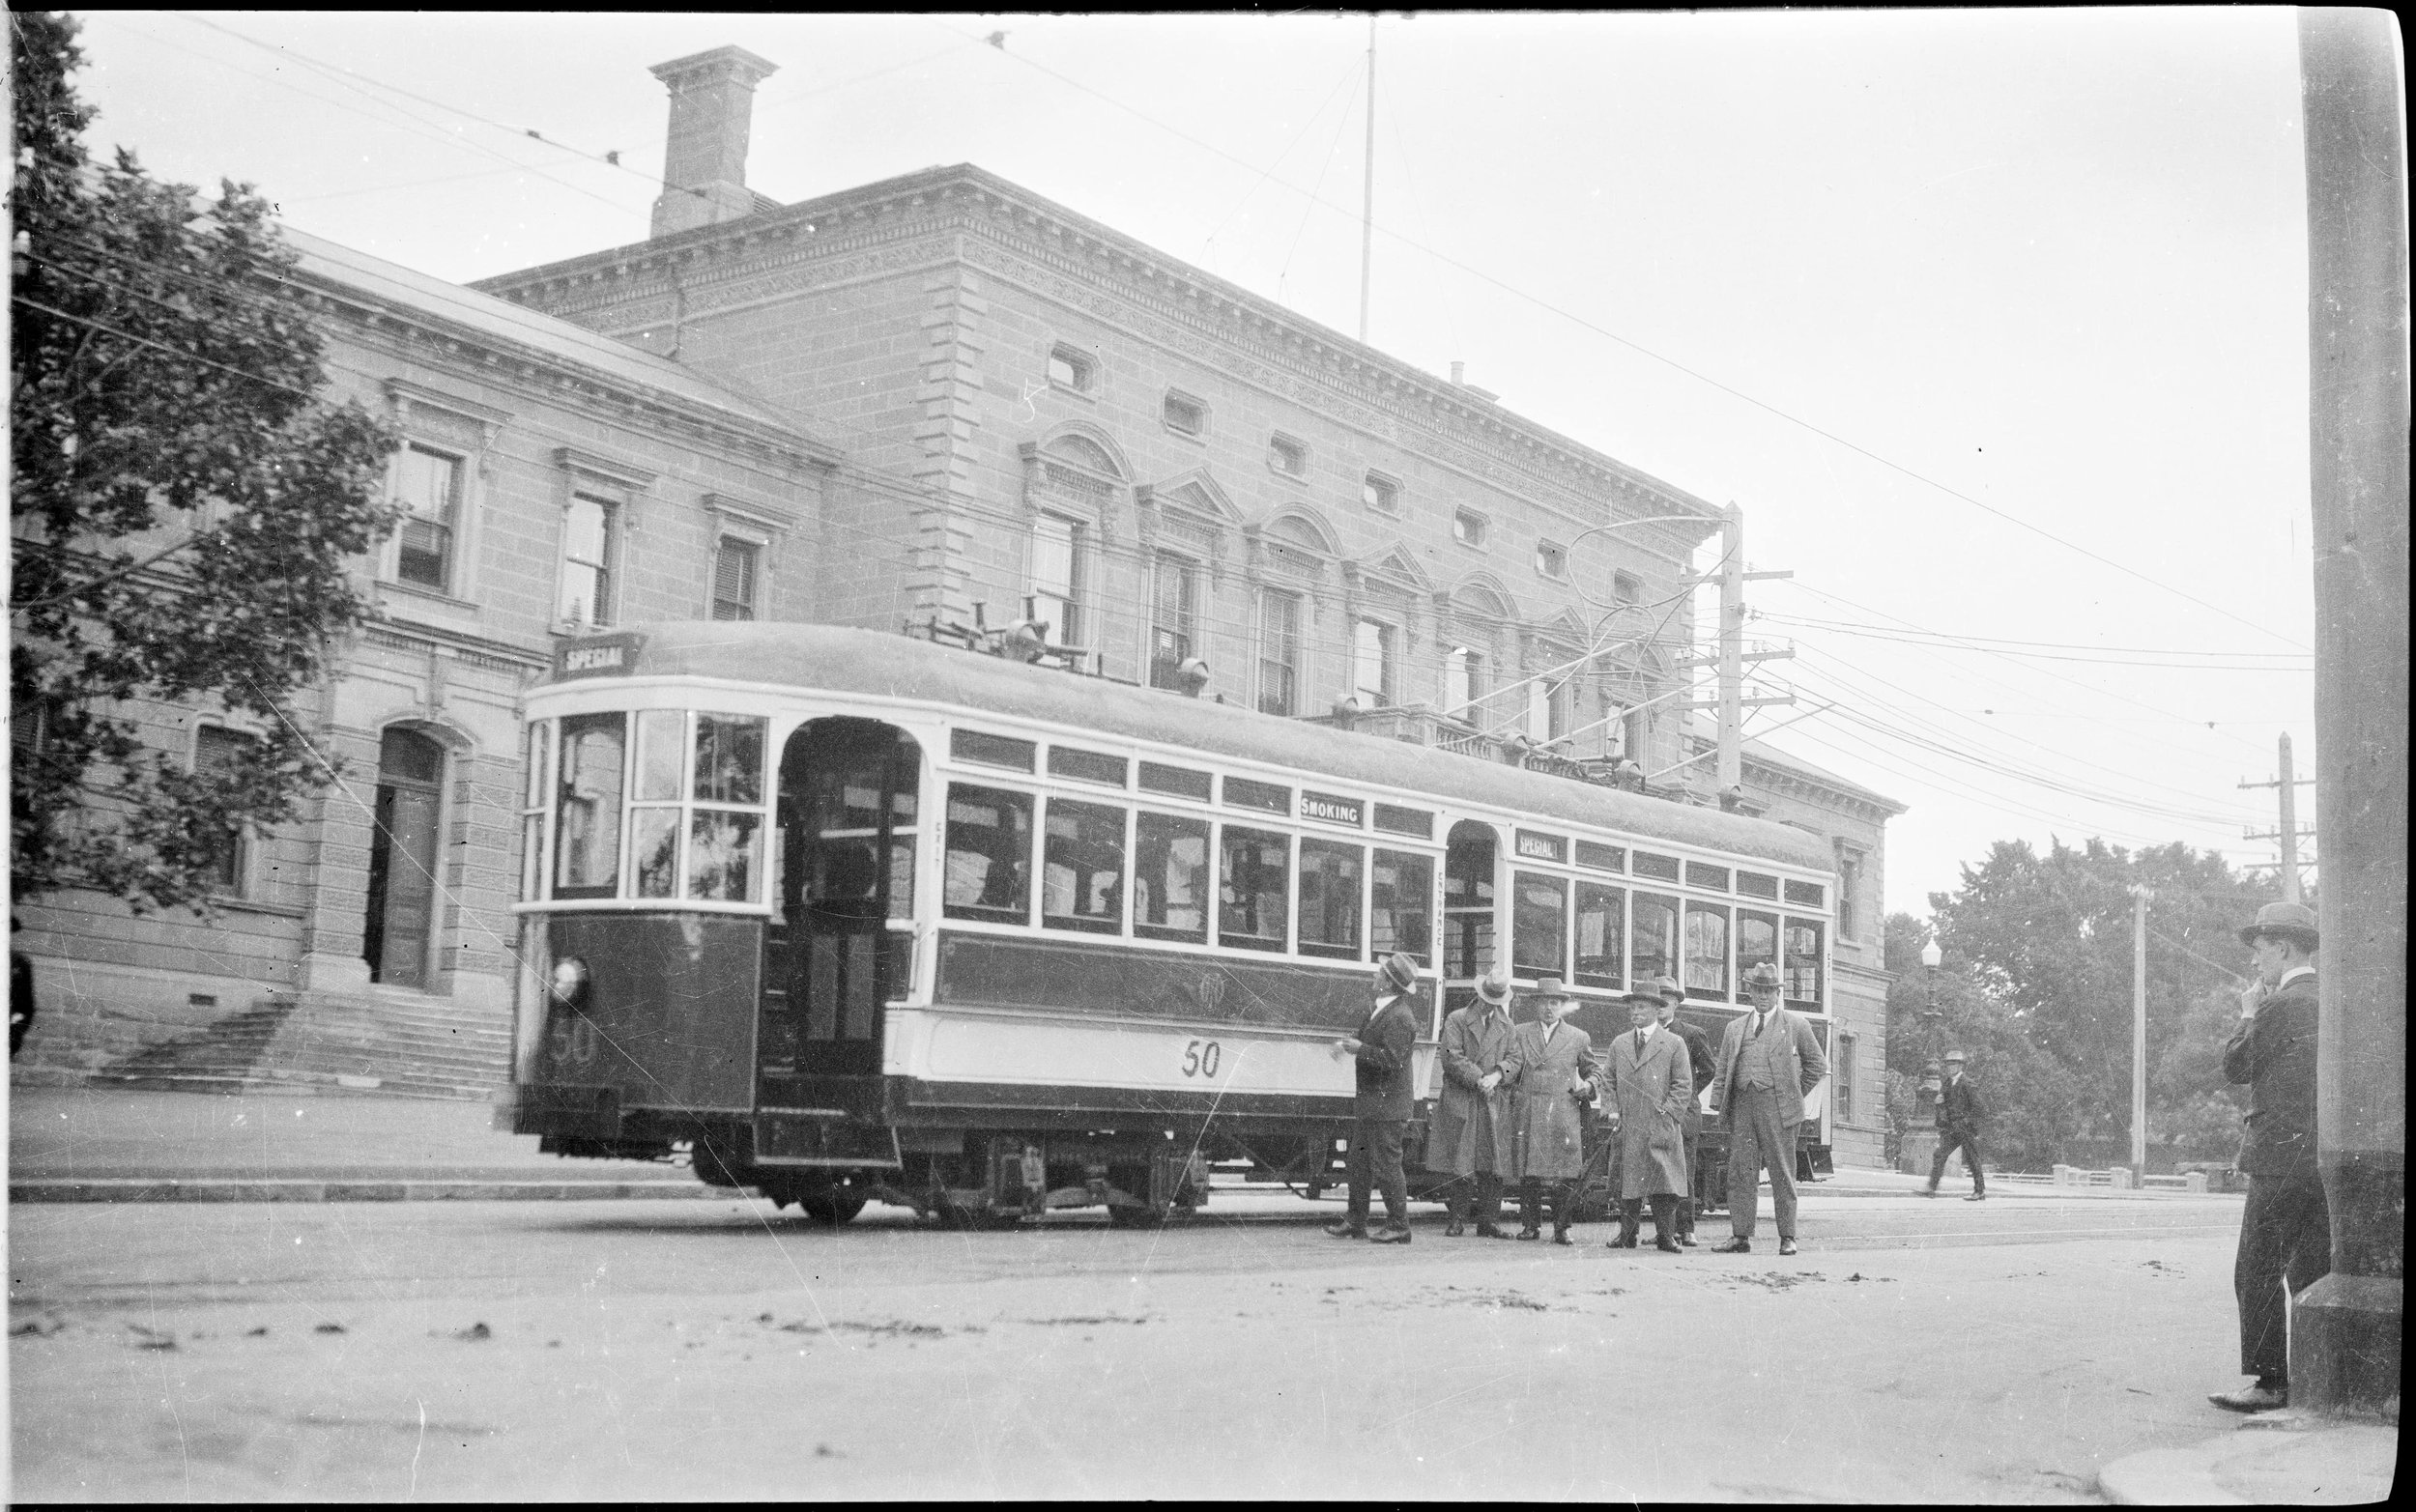
Town Hall Hobart - Tram in Macquarie Street 1930s
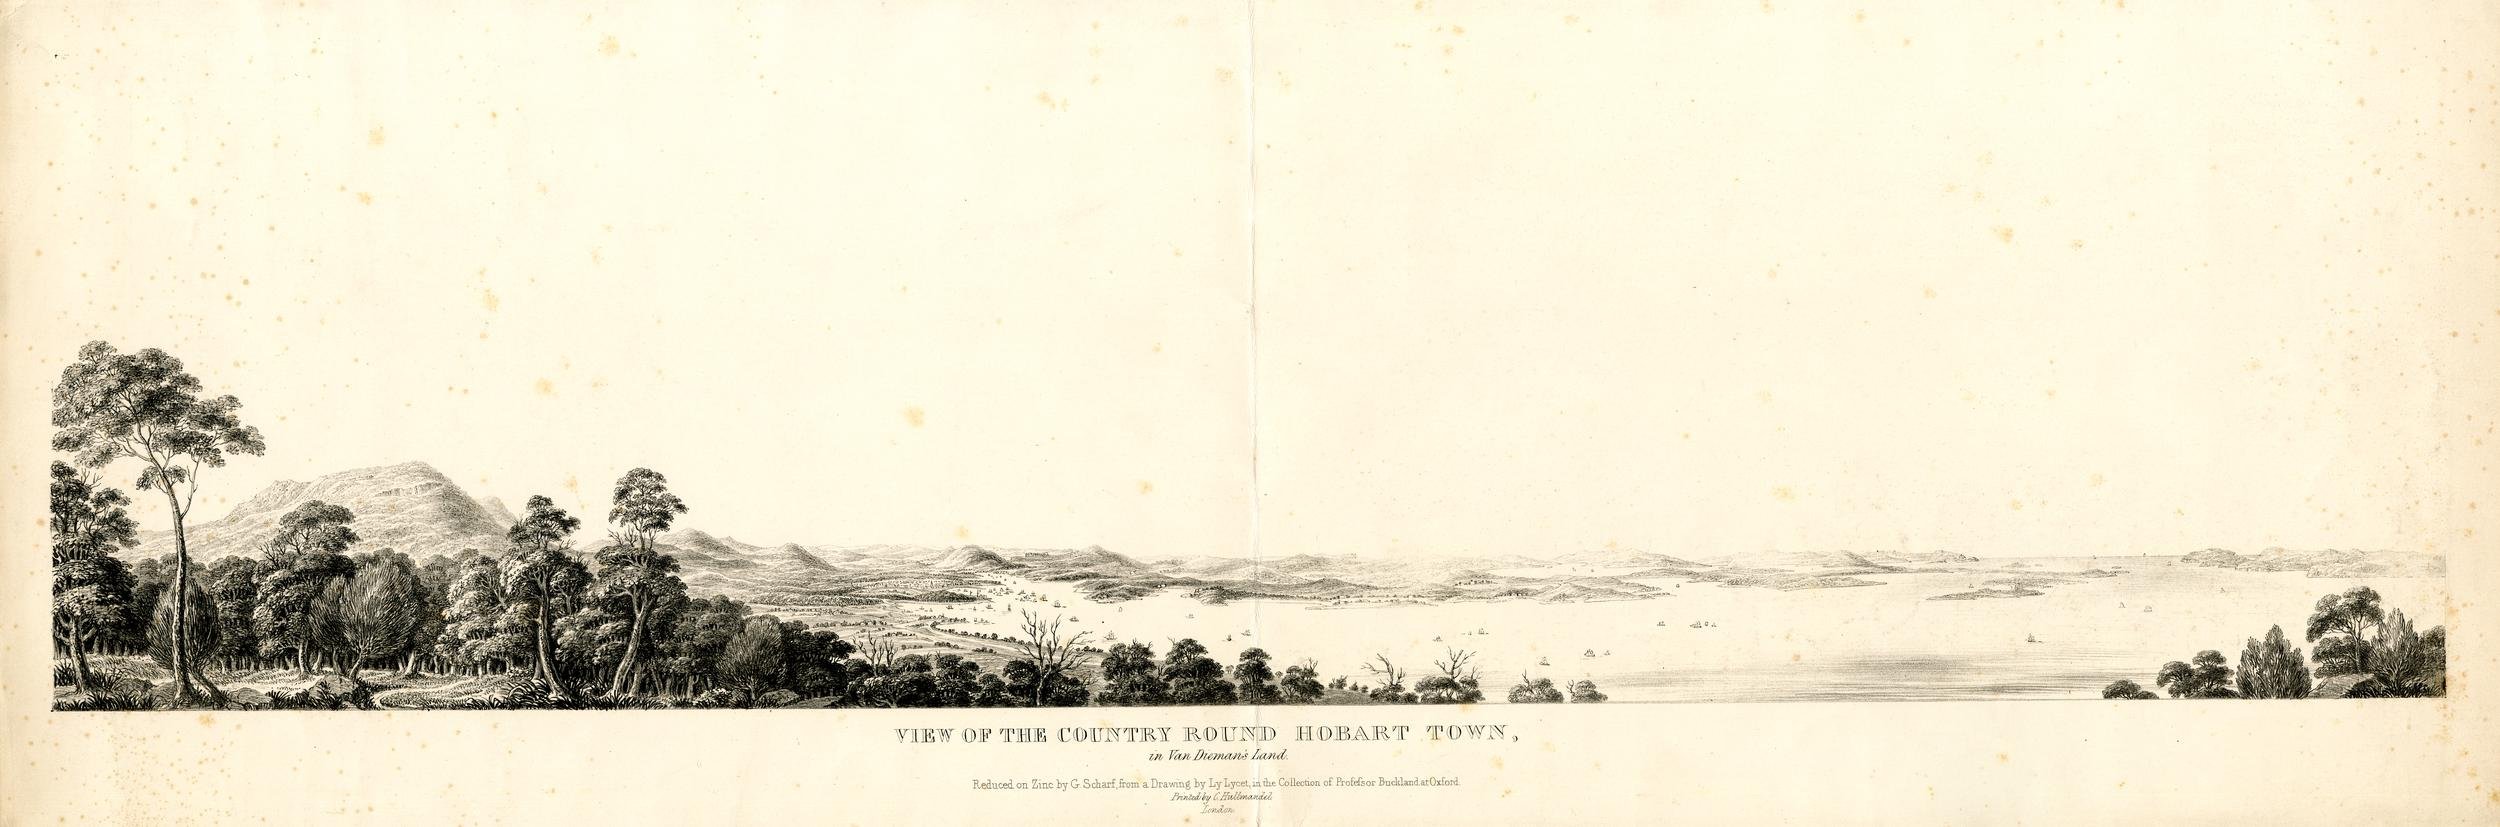
View of the Country round Hobart Town - pre1850s
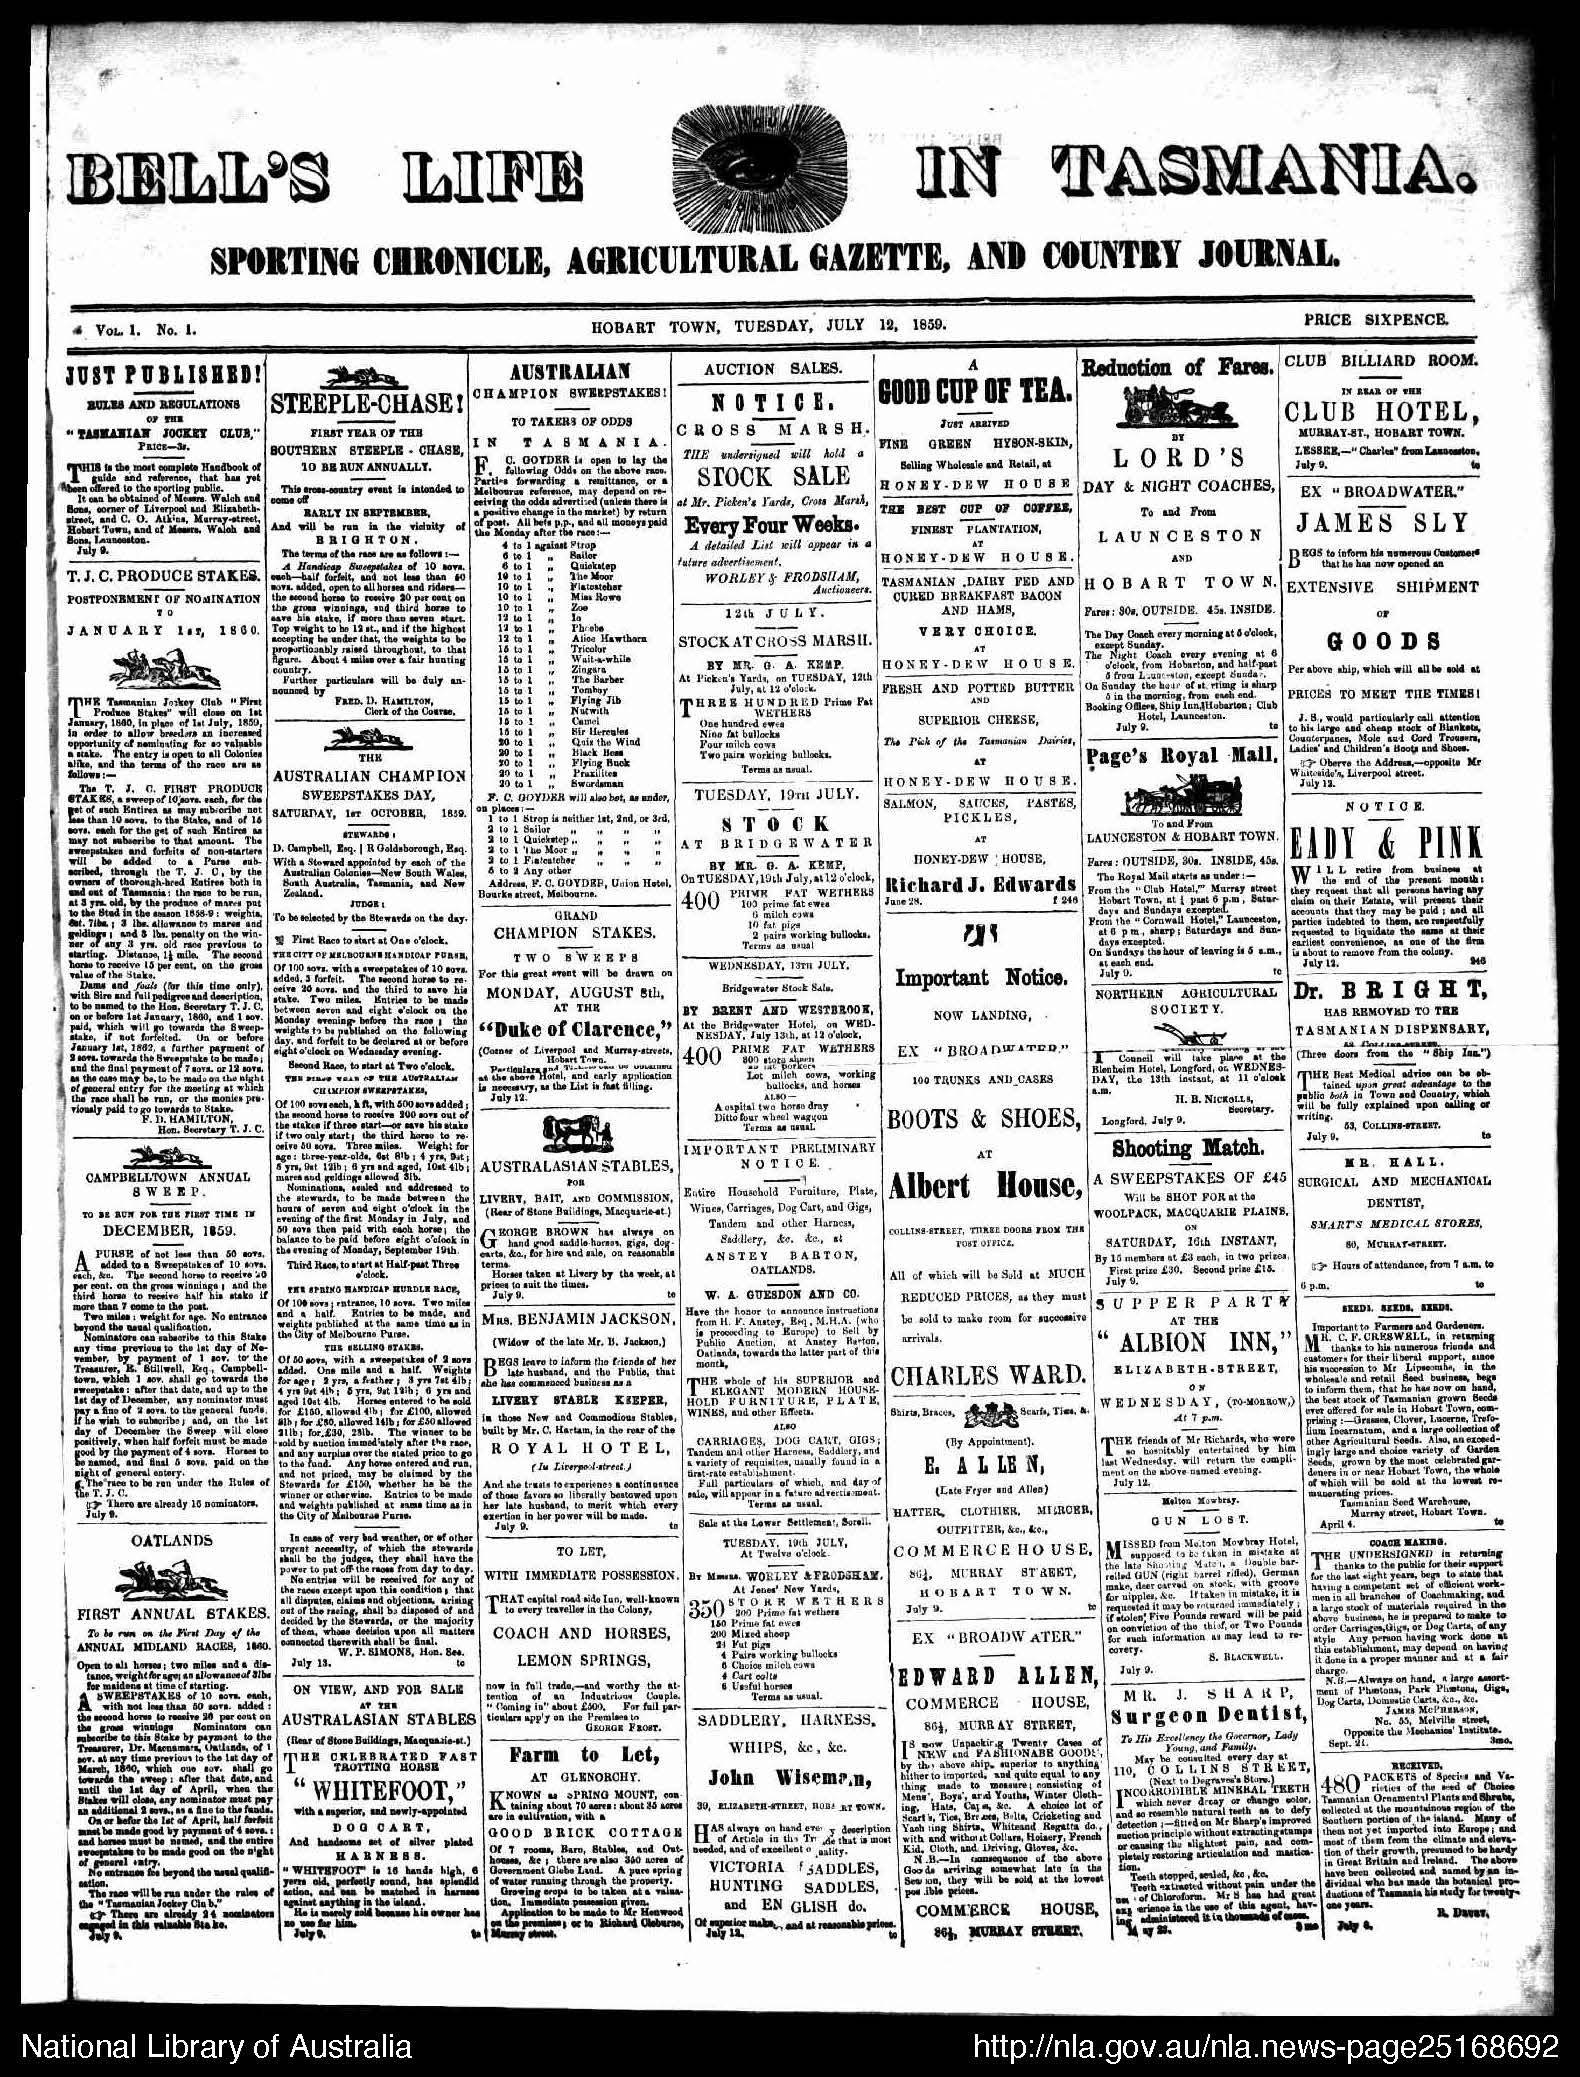
Bell's Life in Tasmania (Hobart Town, Tas 1859)
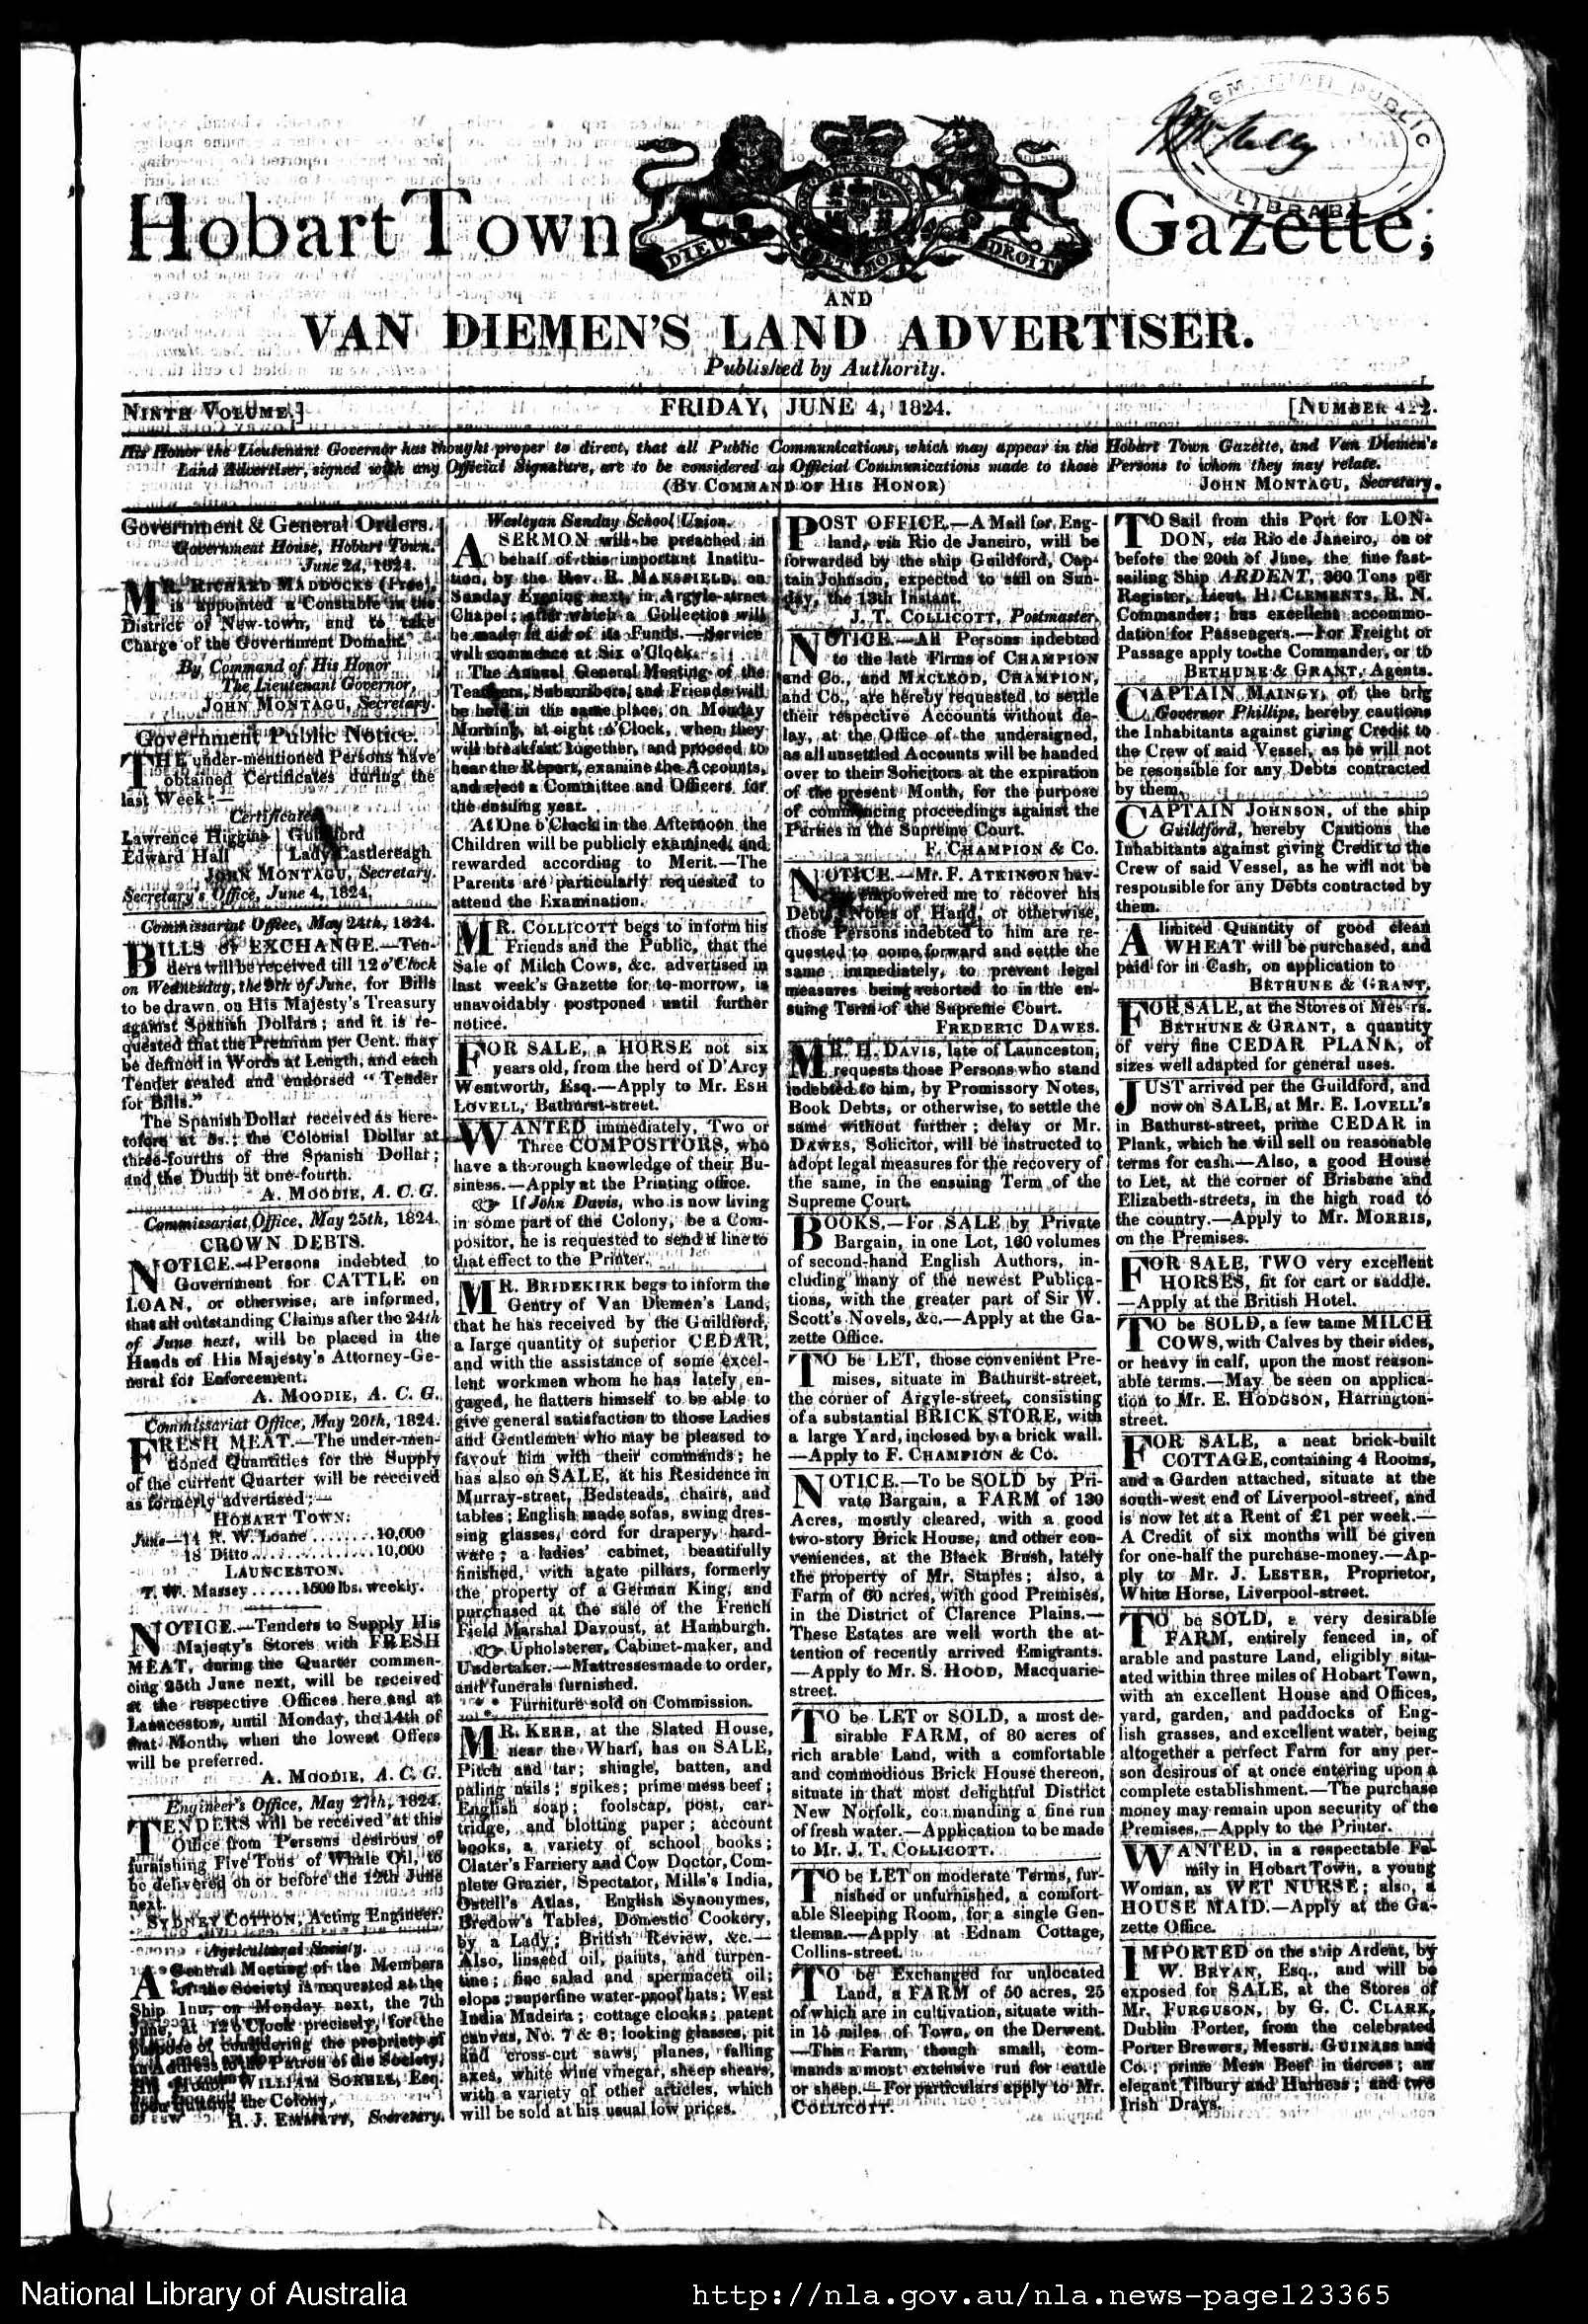
First free press edition - On 4 June 1824 Andrew Bent printed the Hobart Town Gazette without the approval of the government. This was the first time a newspaper had been published in Australia without government permission. Bent kept publishing his newspaper and was given permission to do so from the New South Wales Governor. But Van Diemen’s Land (Tasmanian) officials tried to close his newspaper, arrested him four times for stories he had published, and even imprisoned him. Despite this, the beginnings of a free press had taken root in Australia.
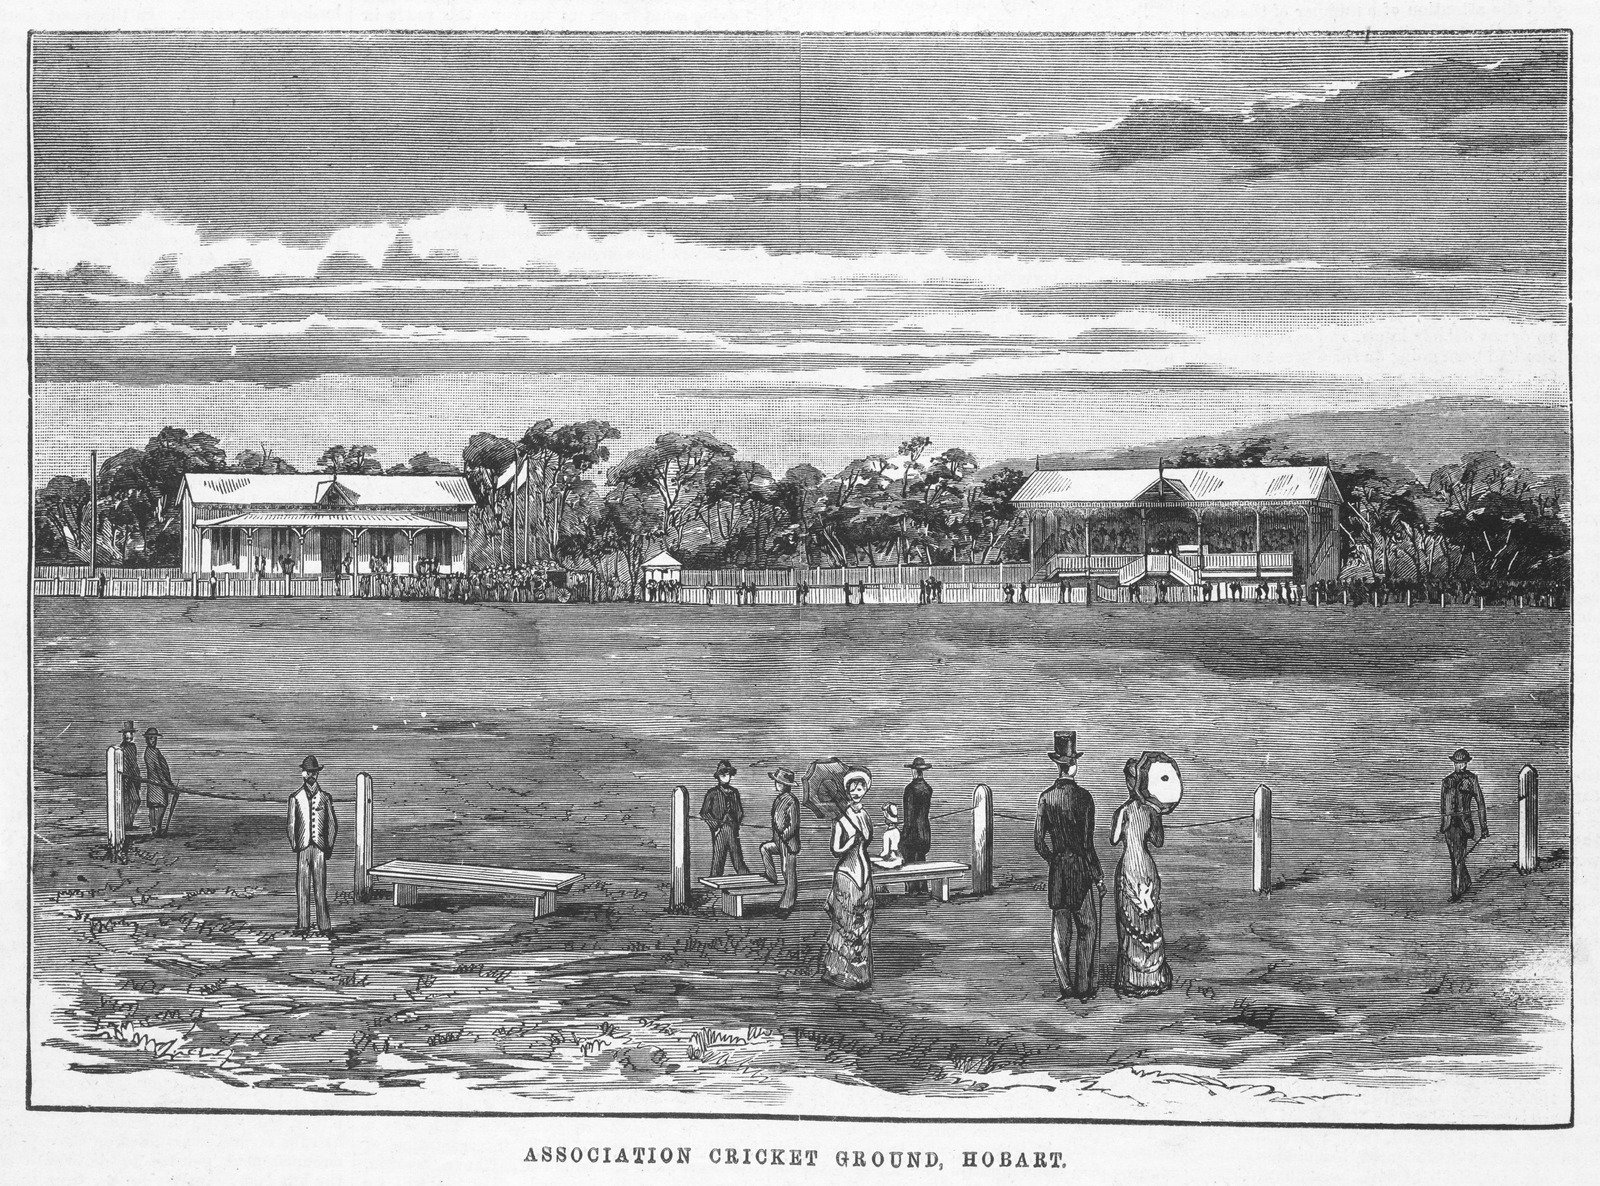
Association Cricket Ground, Hobart 1883
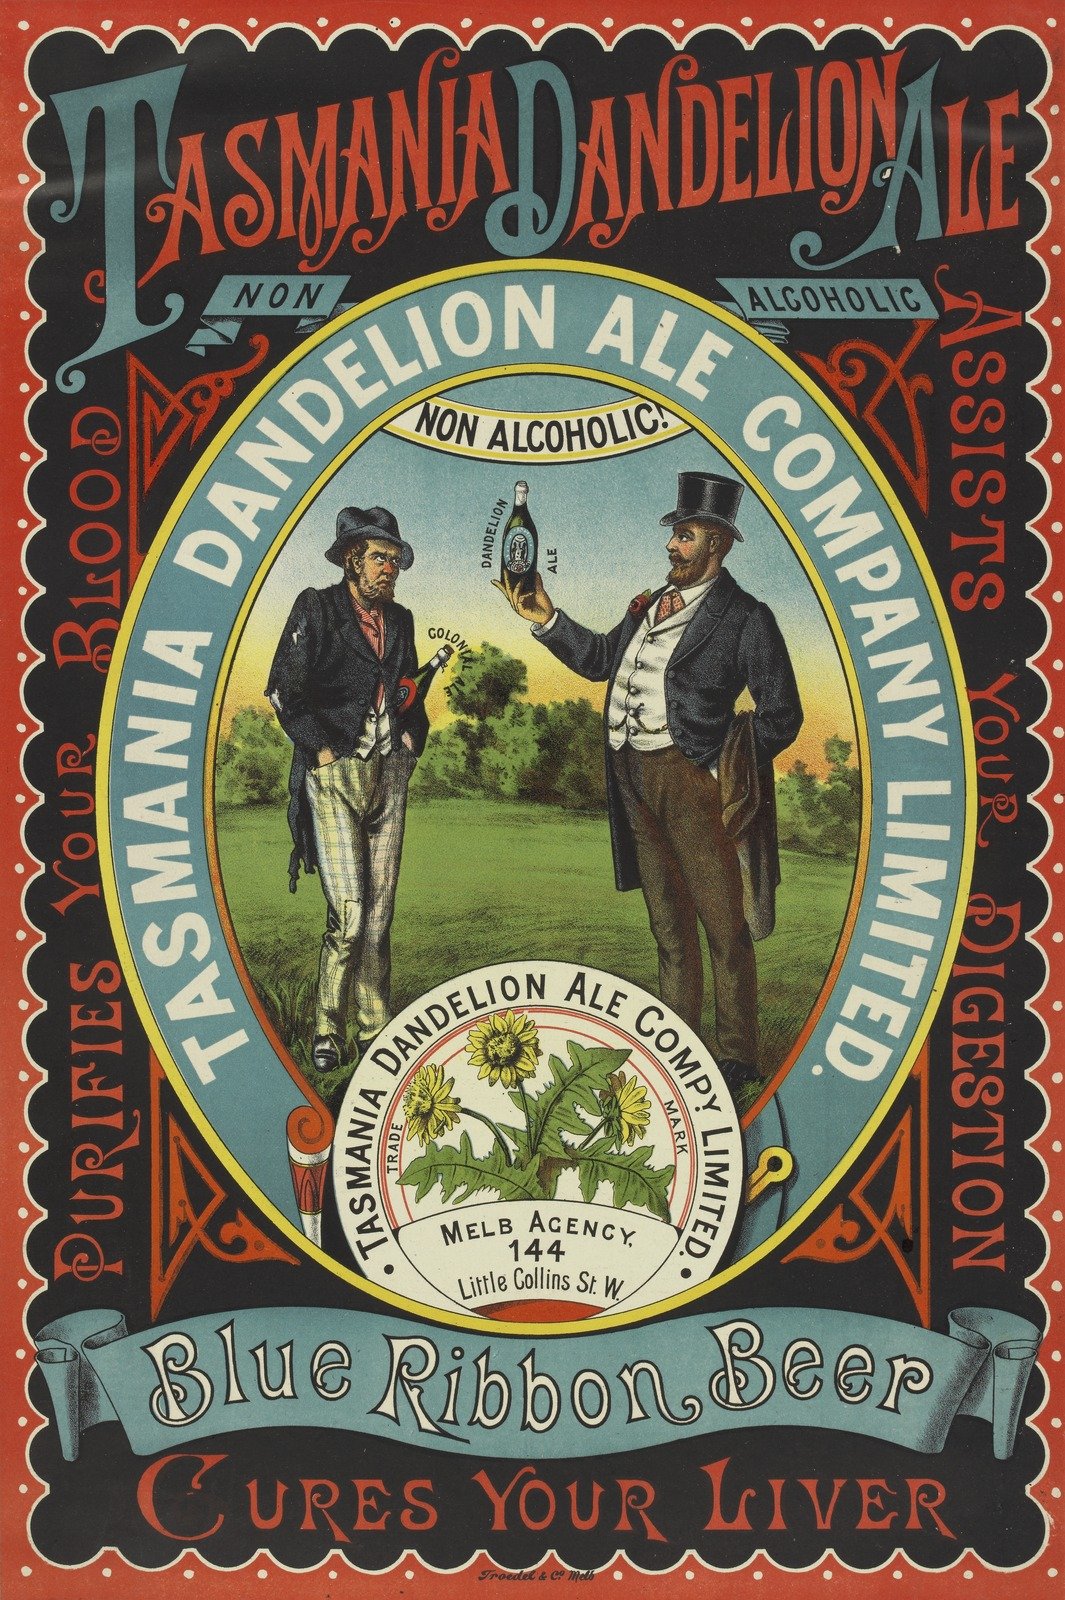
Tasmanian Dandelion Ale 1890
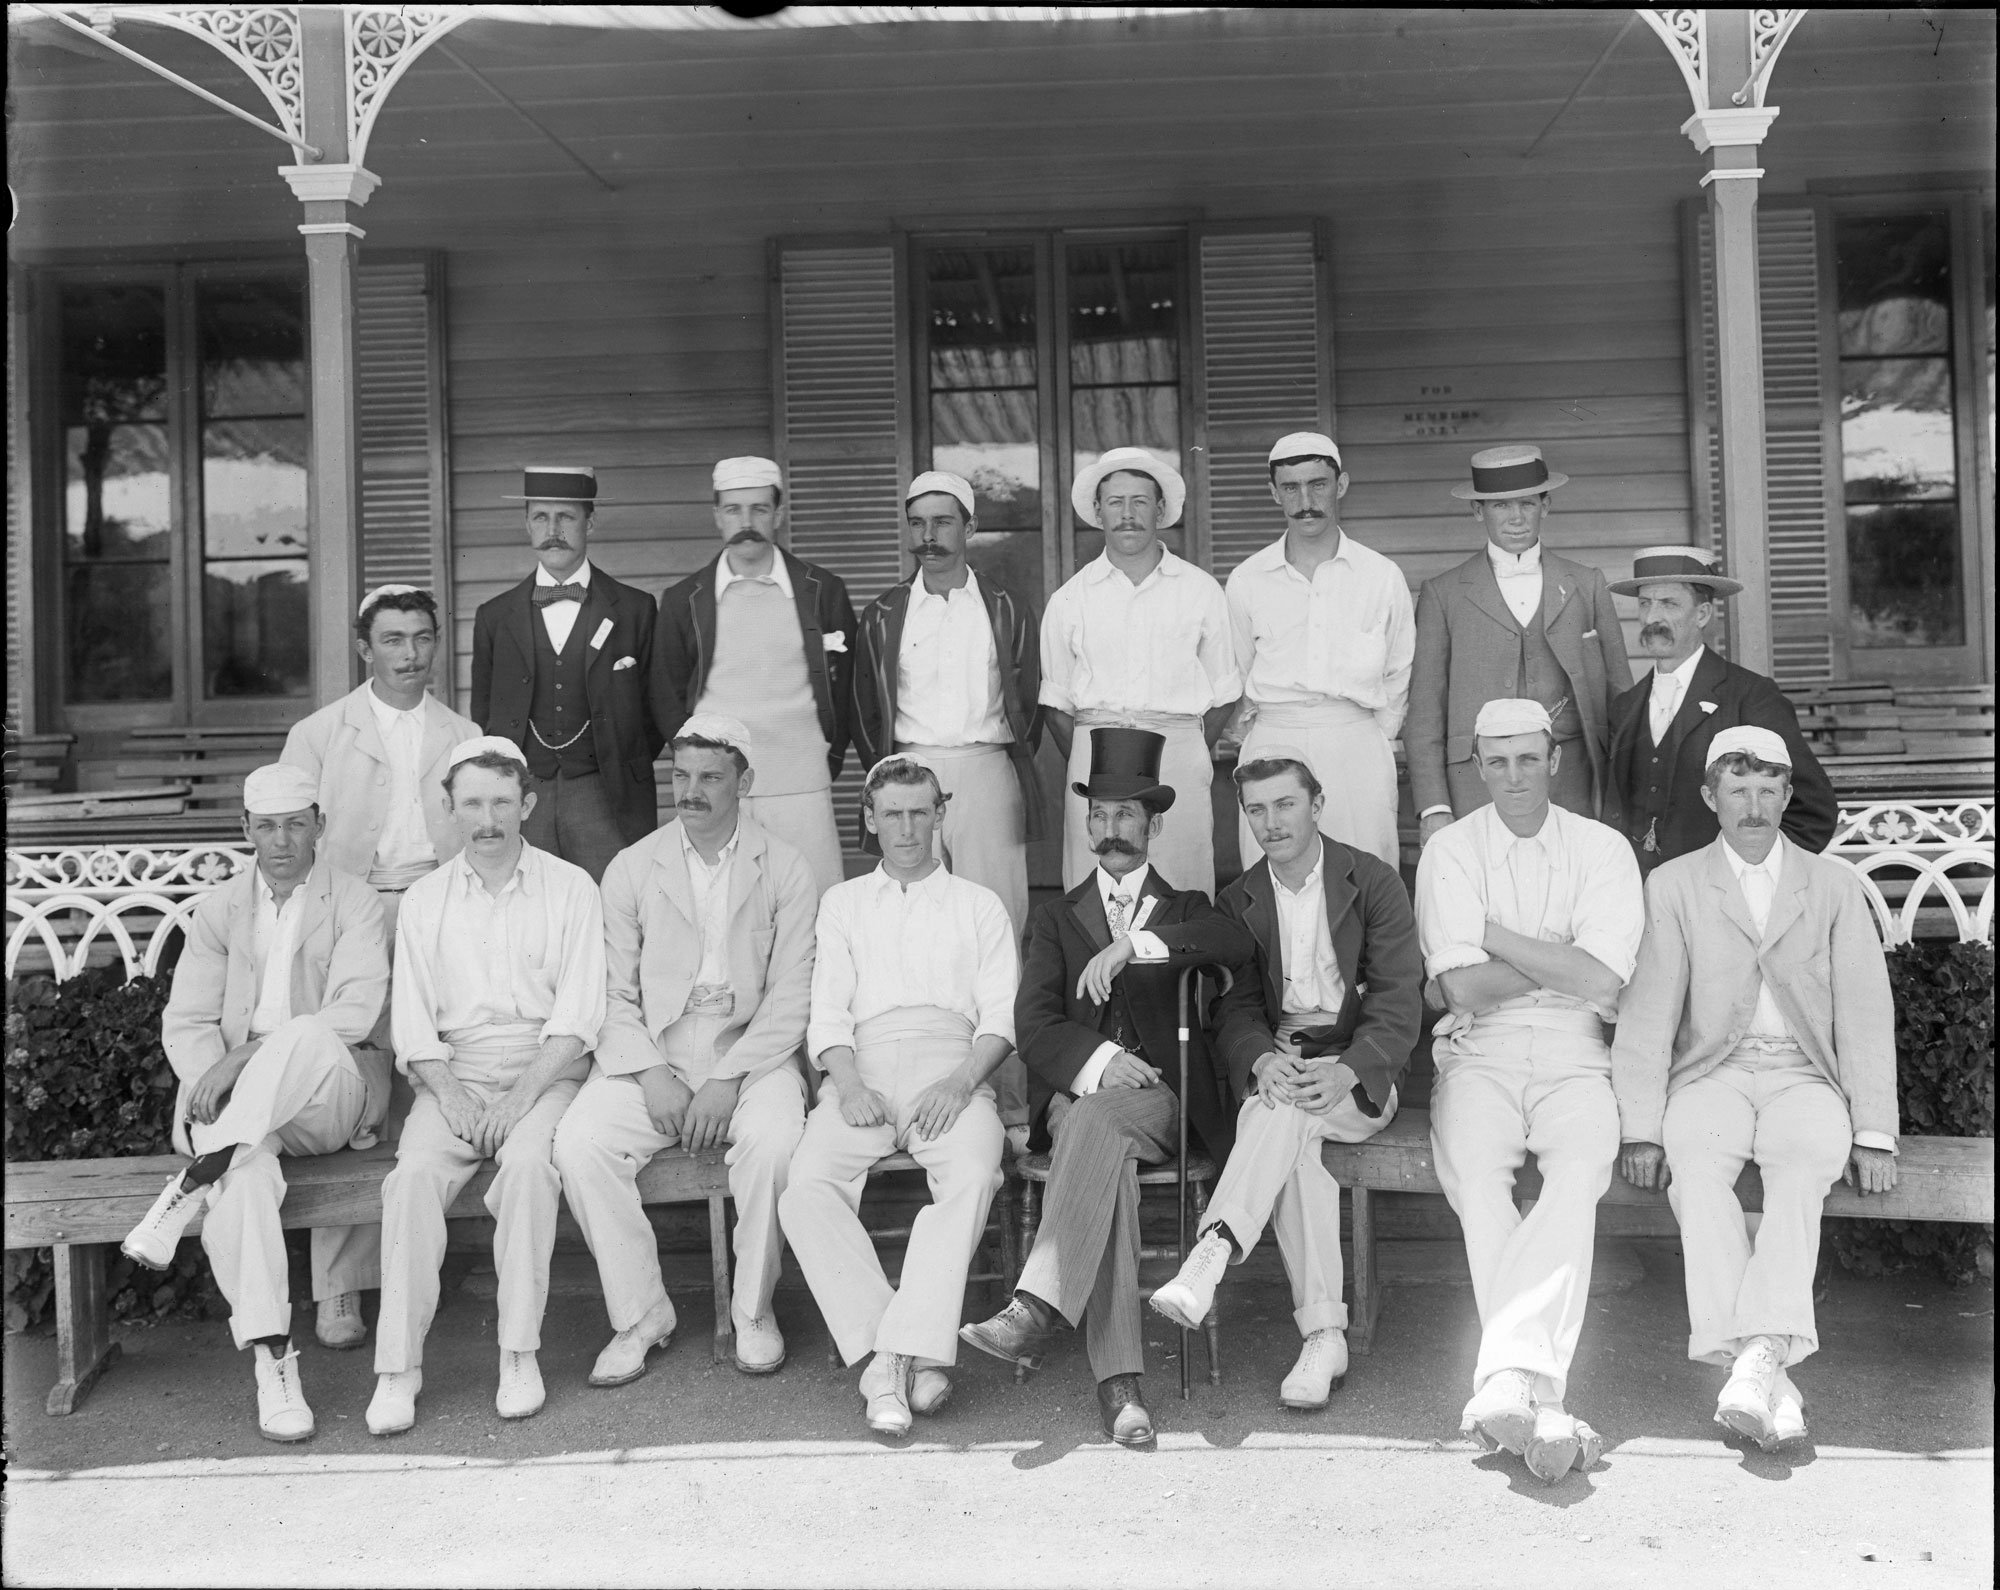
Cricket Group Hobart upto 1930
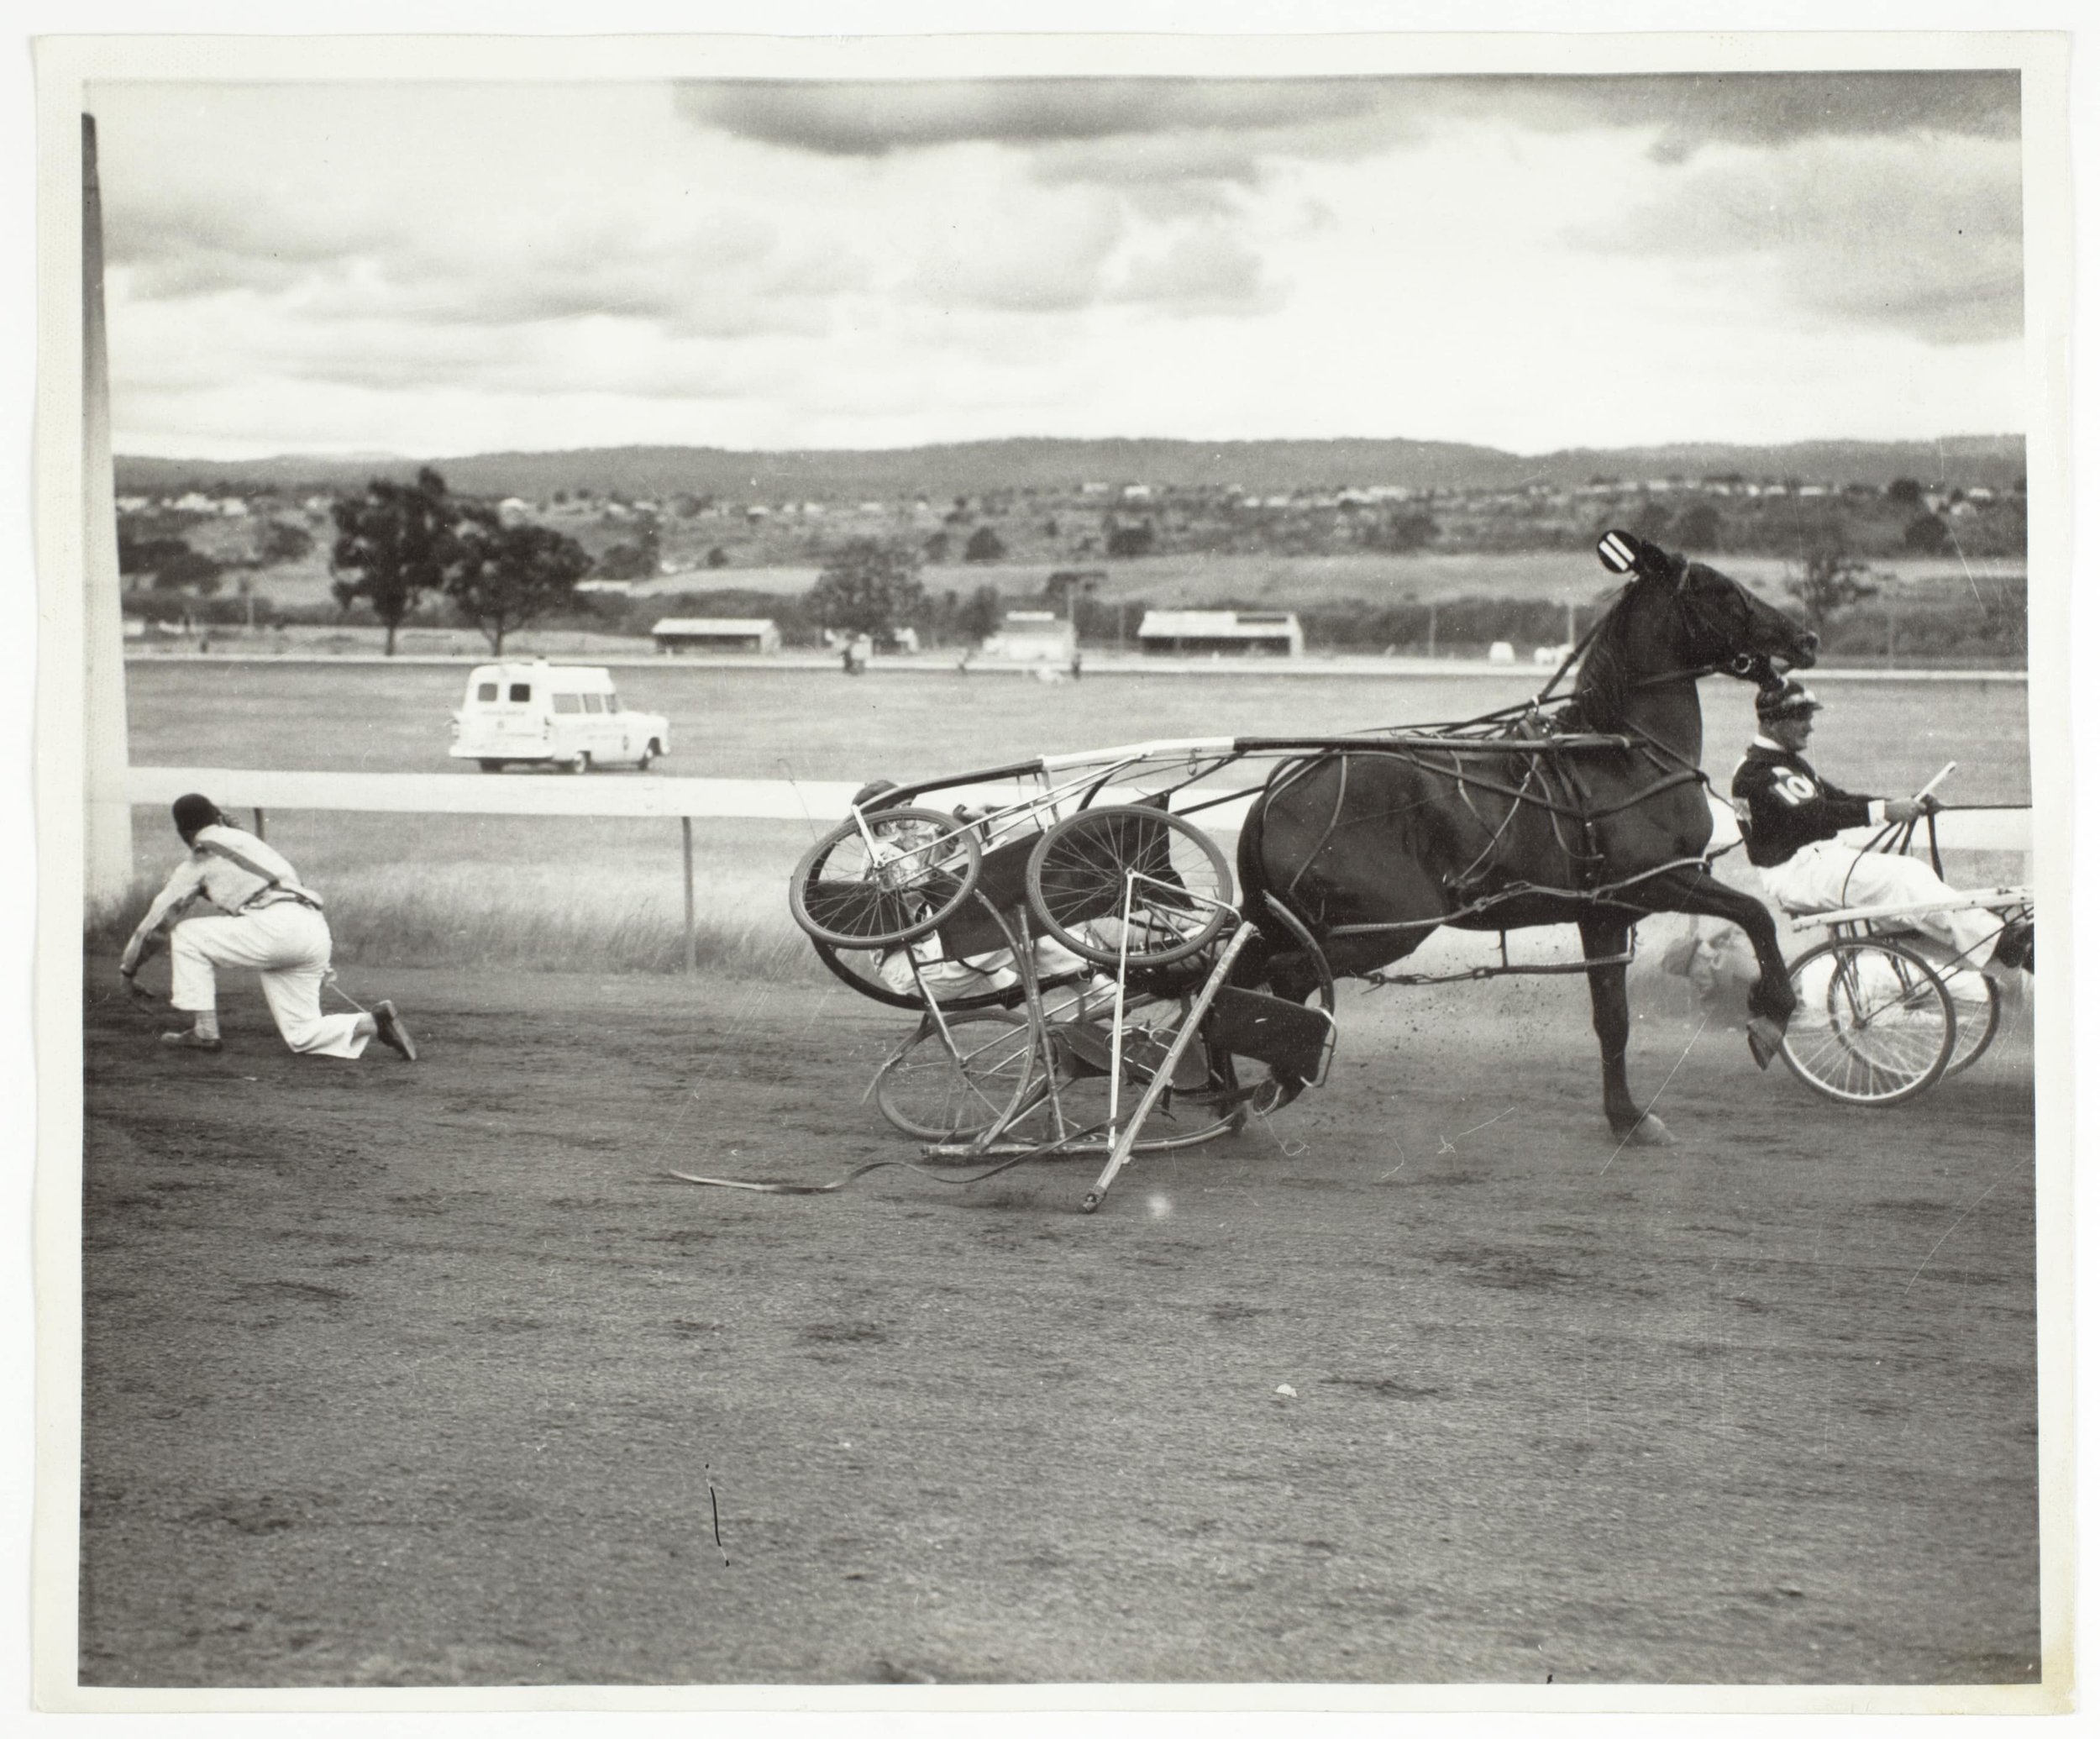
Trotting accident at Elwick 1960
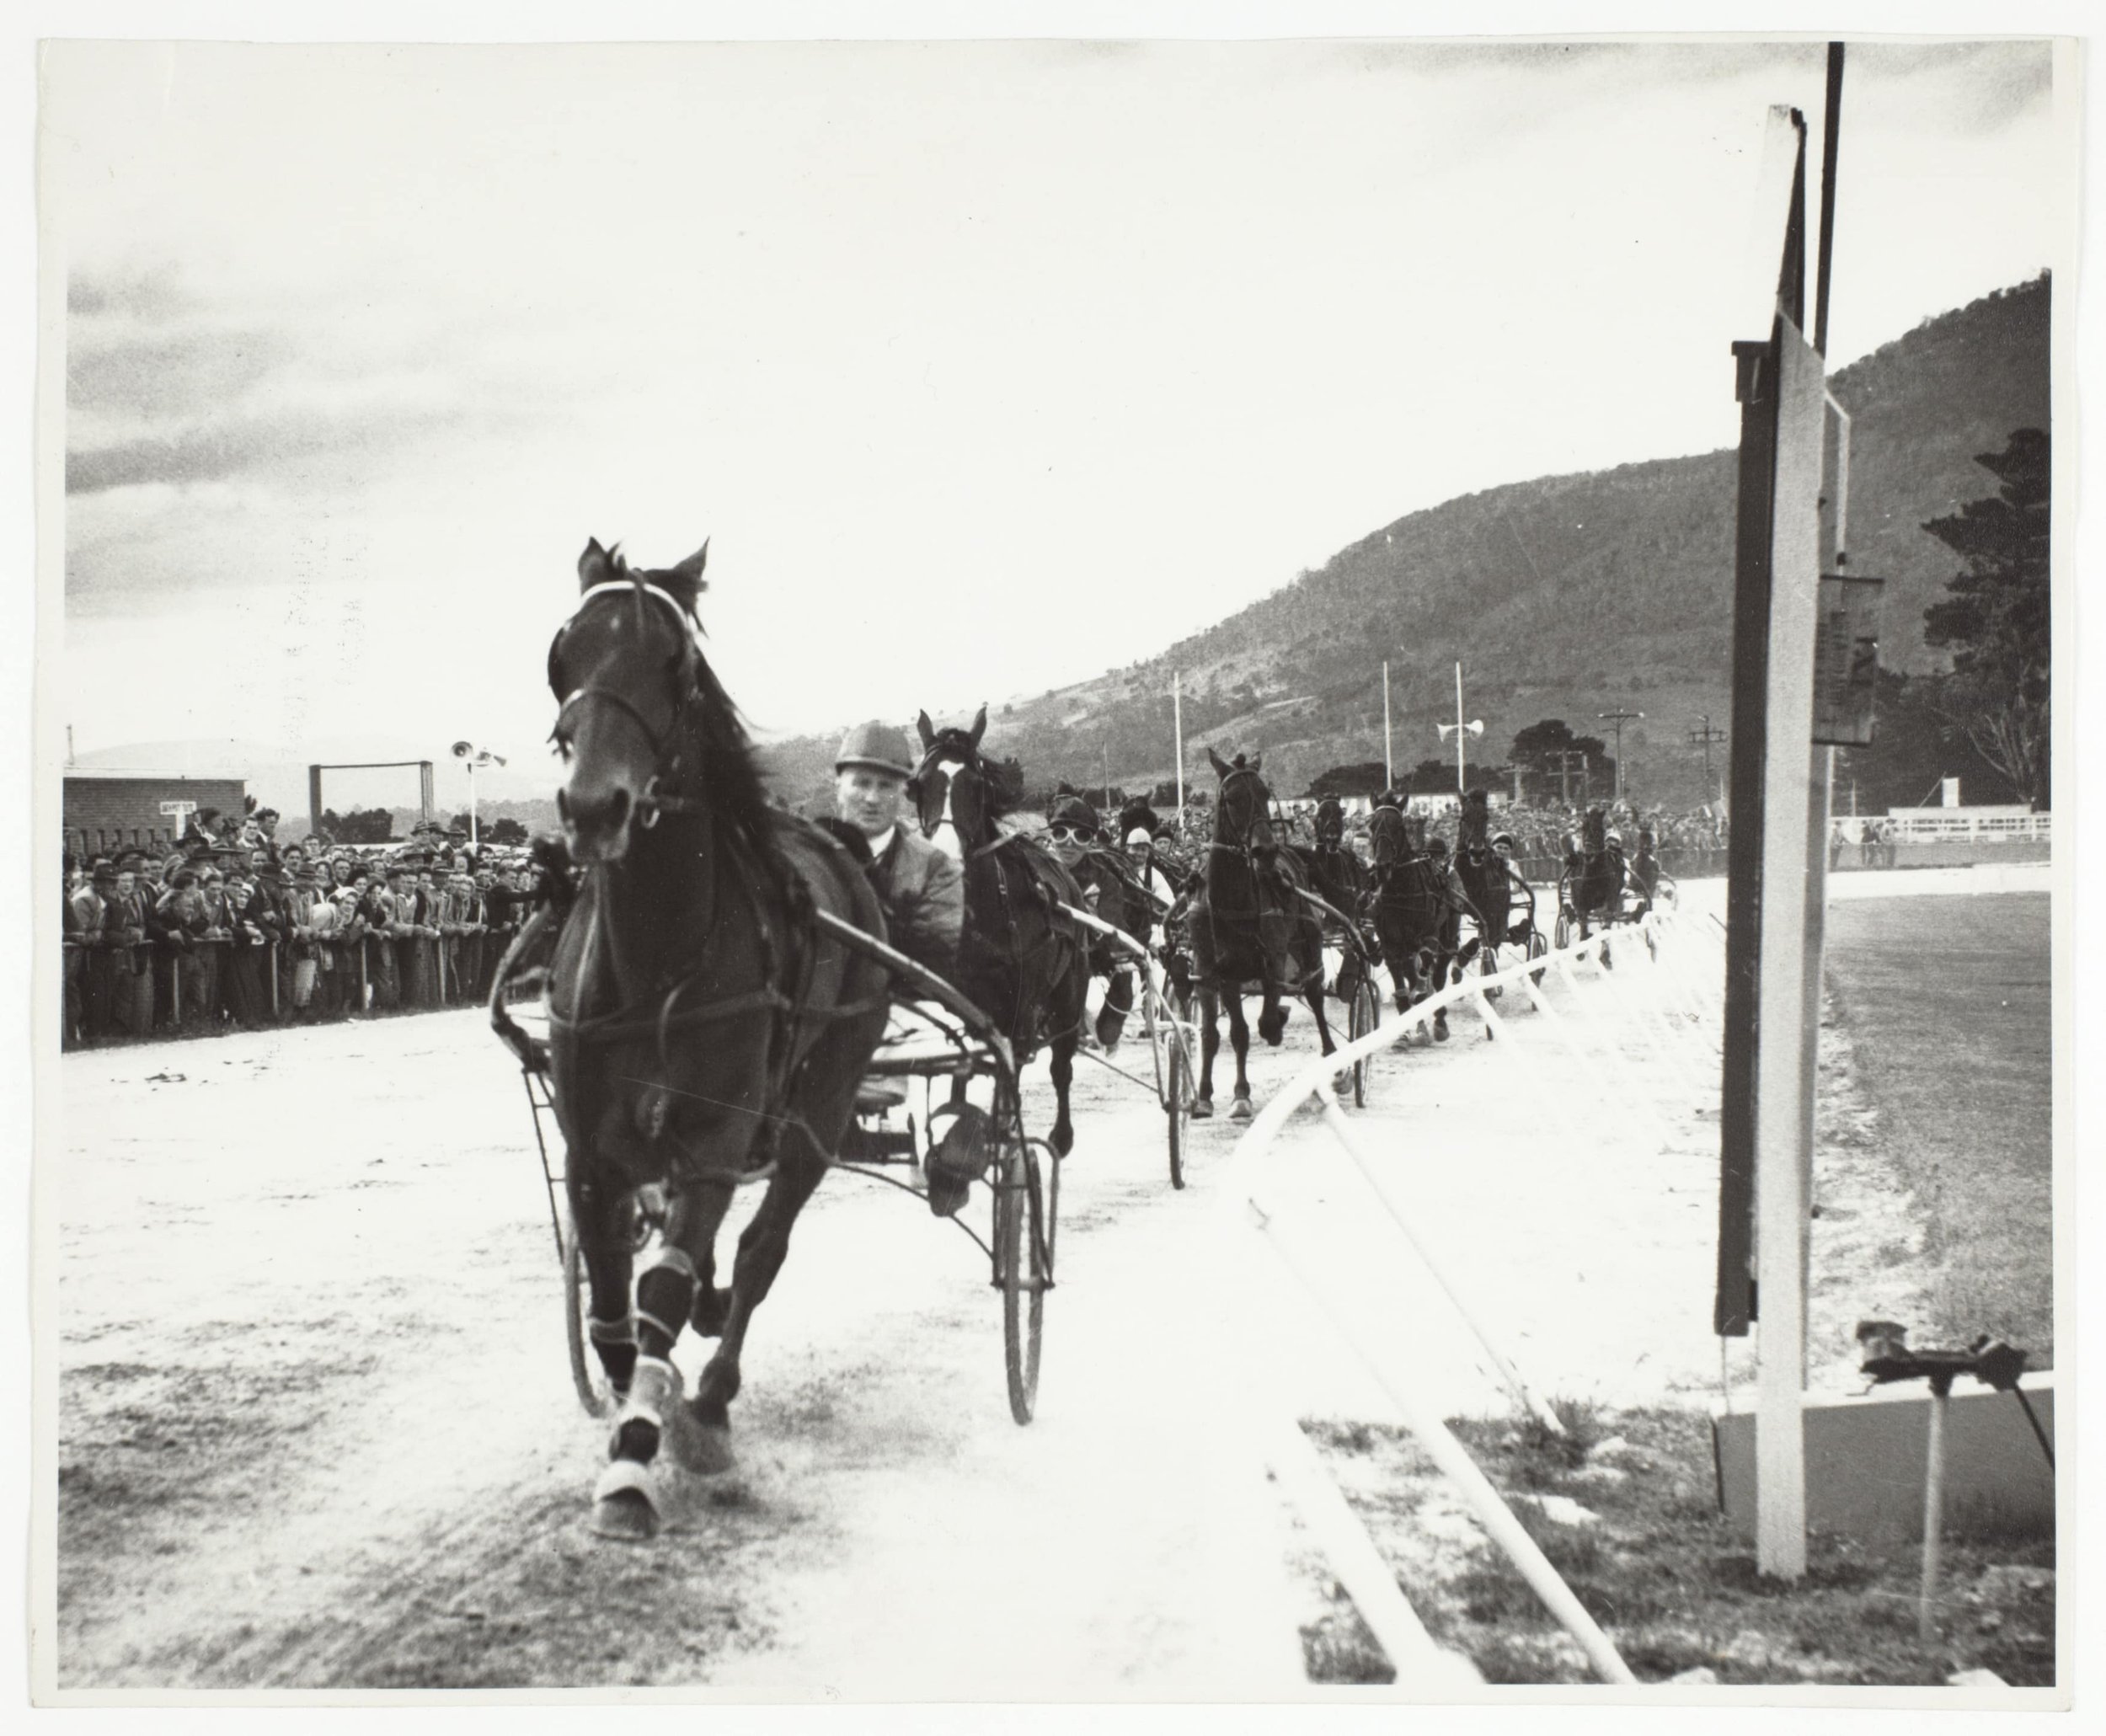
Trotting race at Elwick 1960
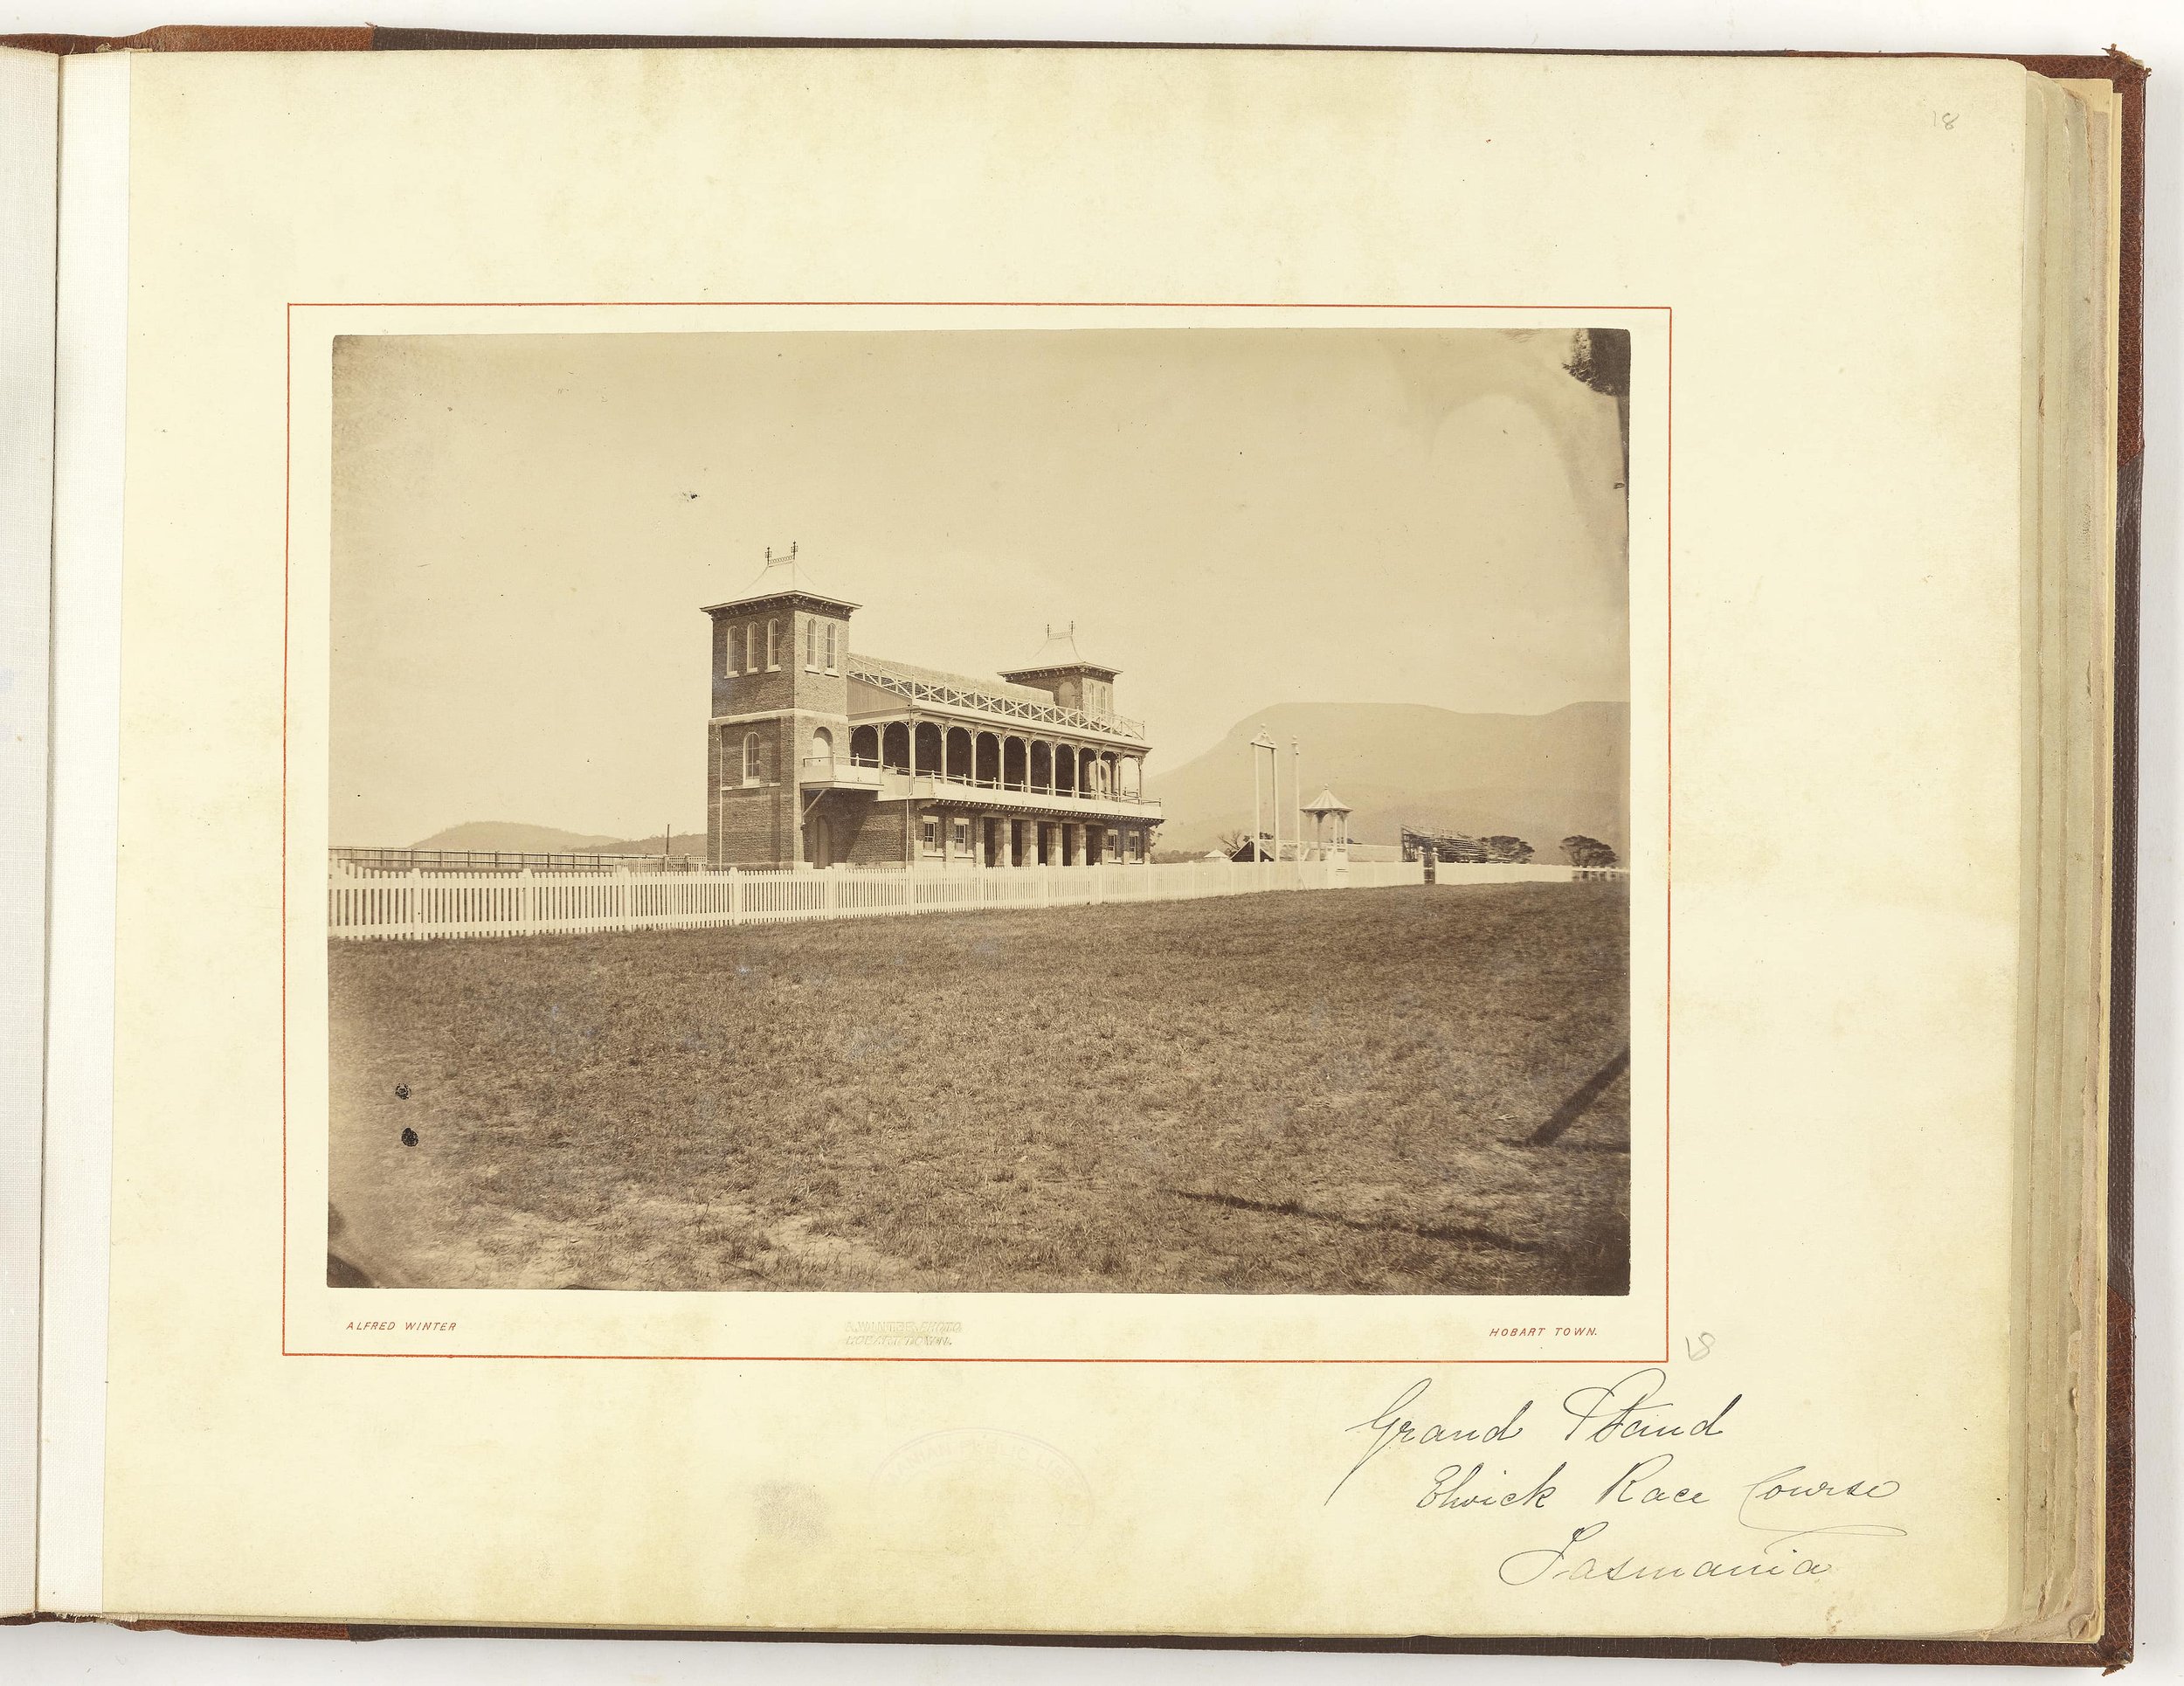
Glenorchy - Elwick Race Track - Grandstand 1870
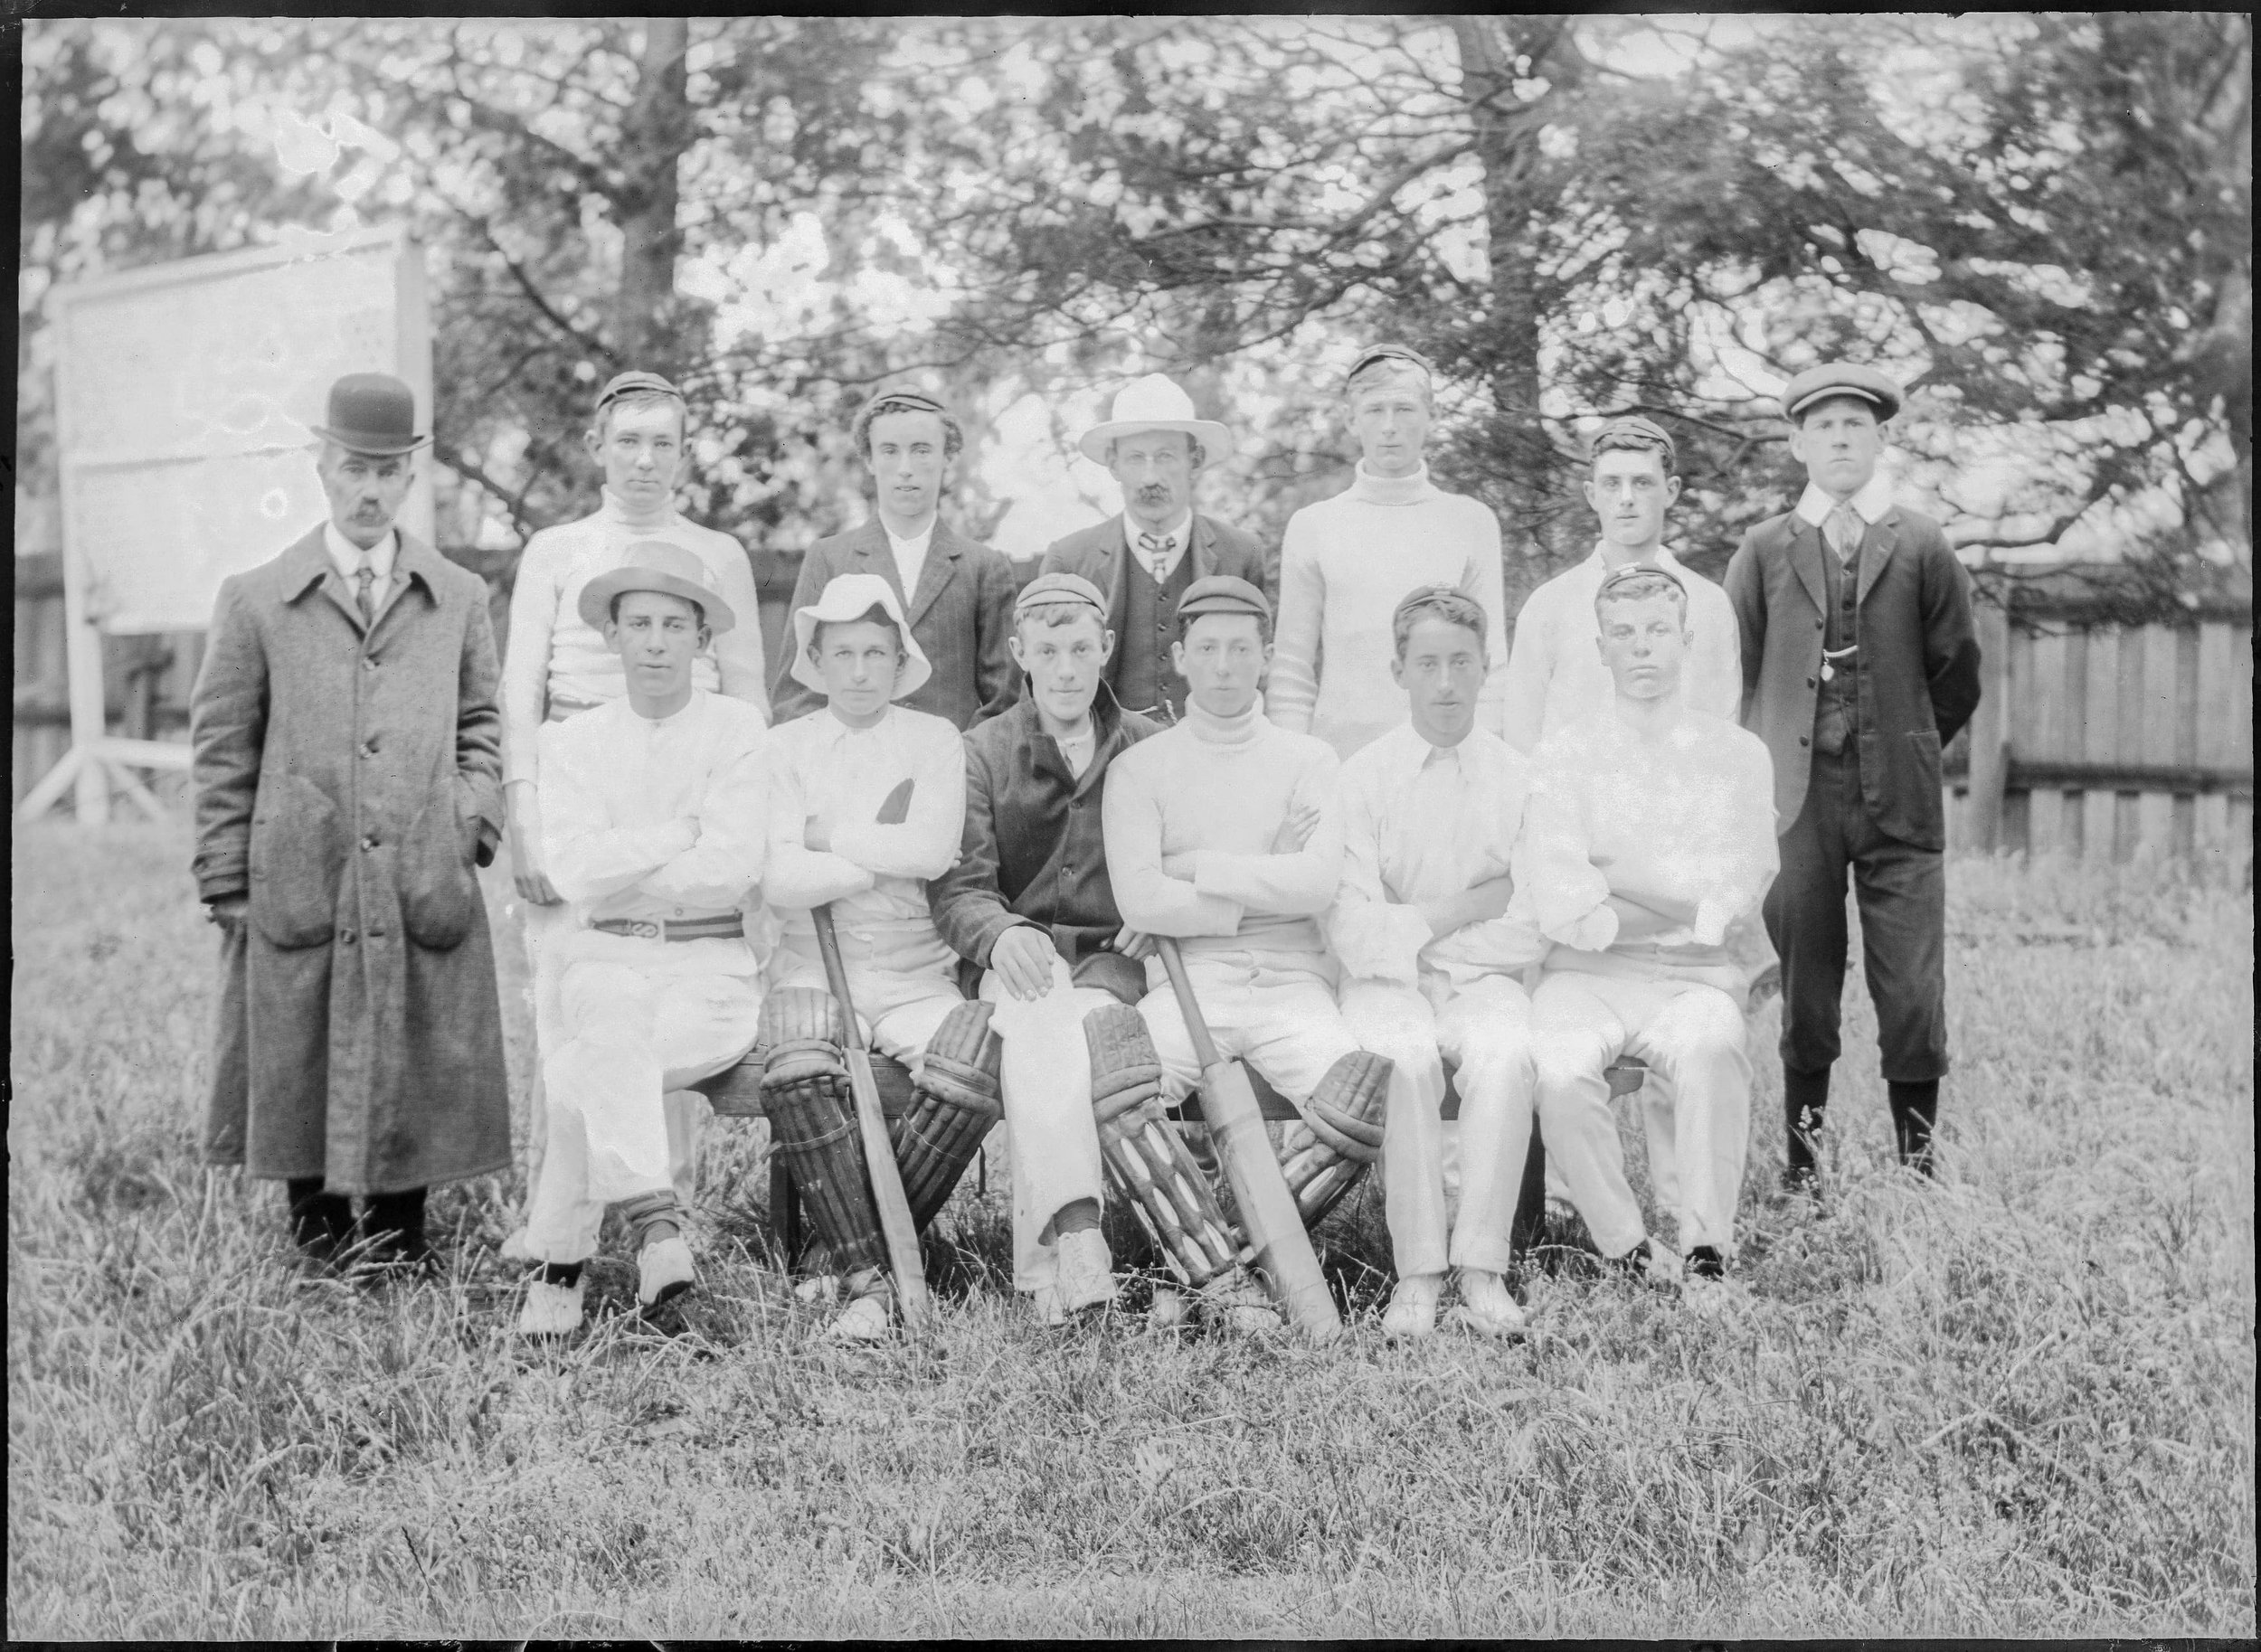
cricket group Hobart - up to 1900
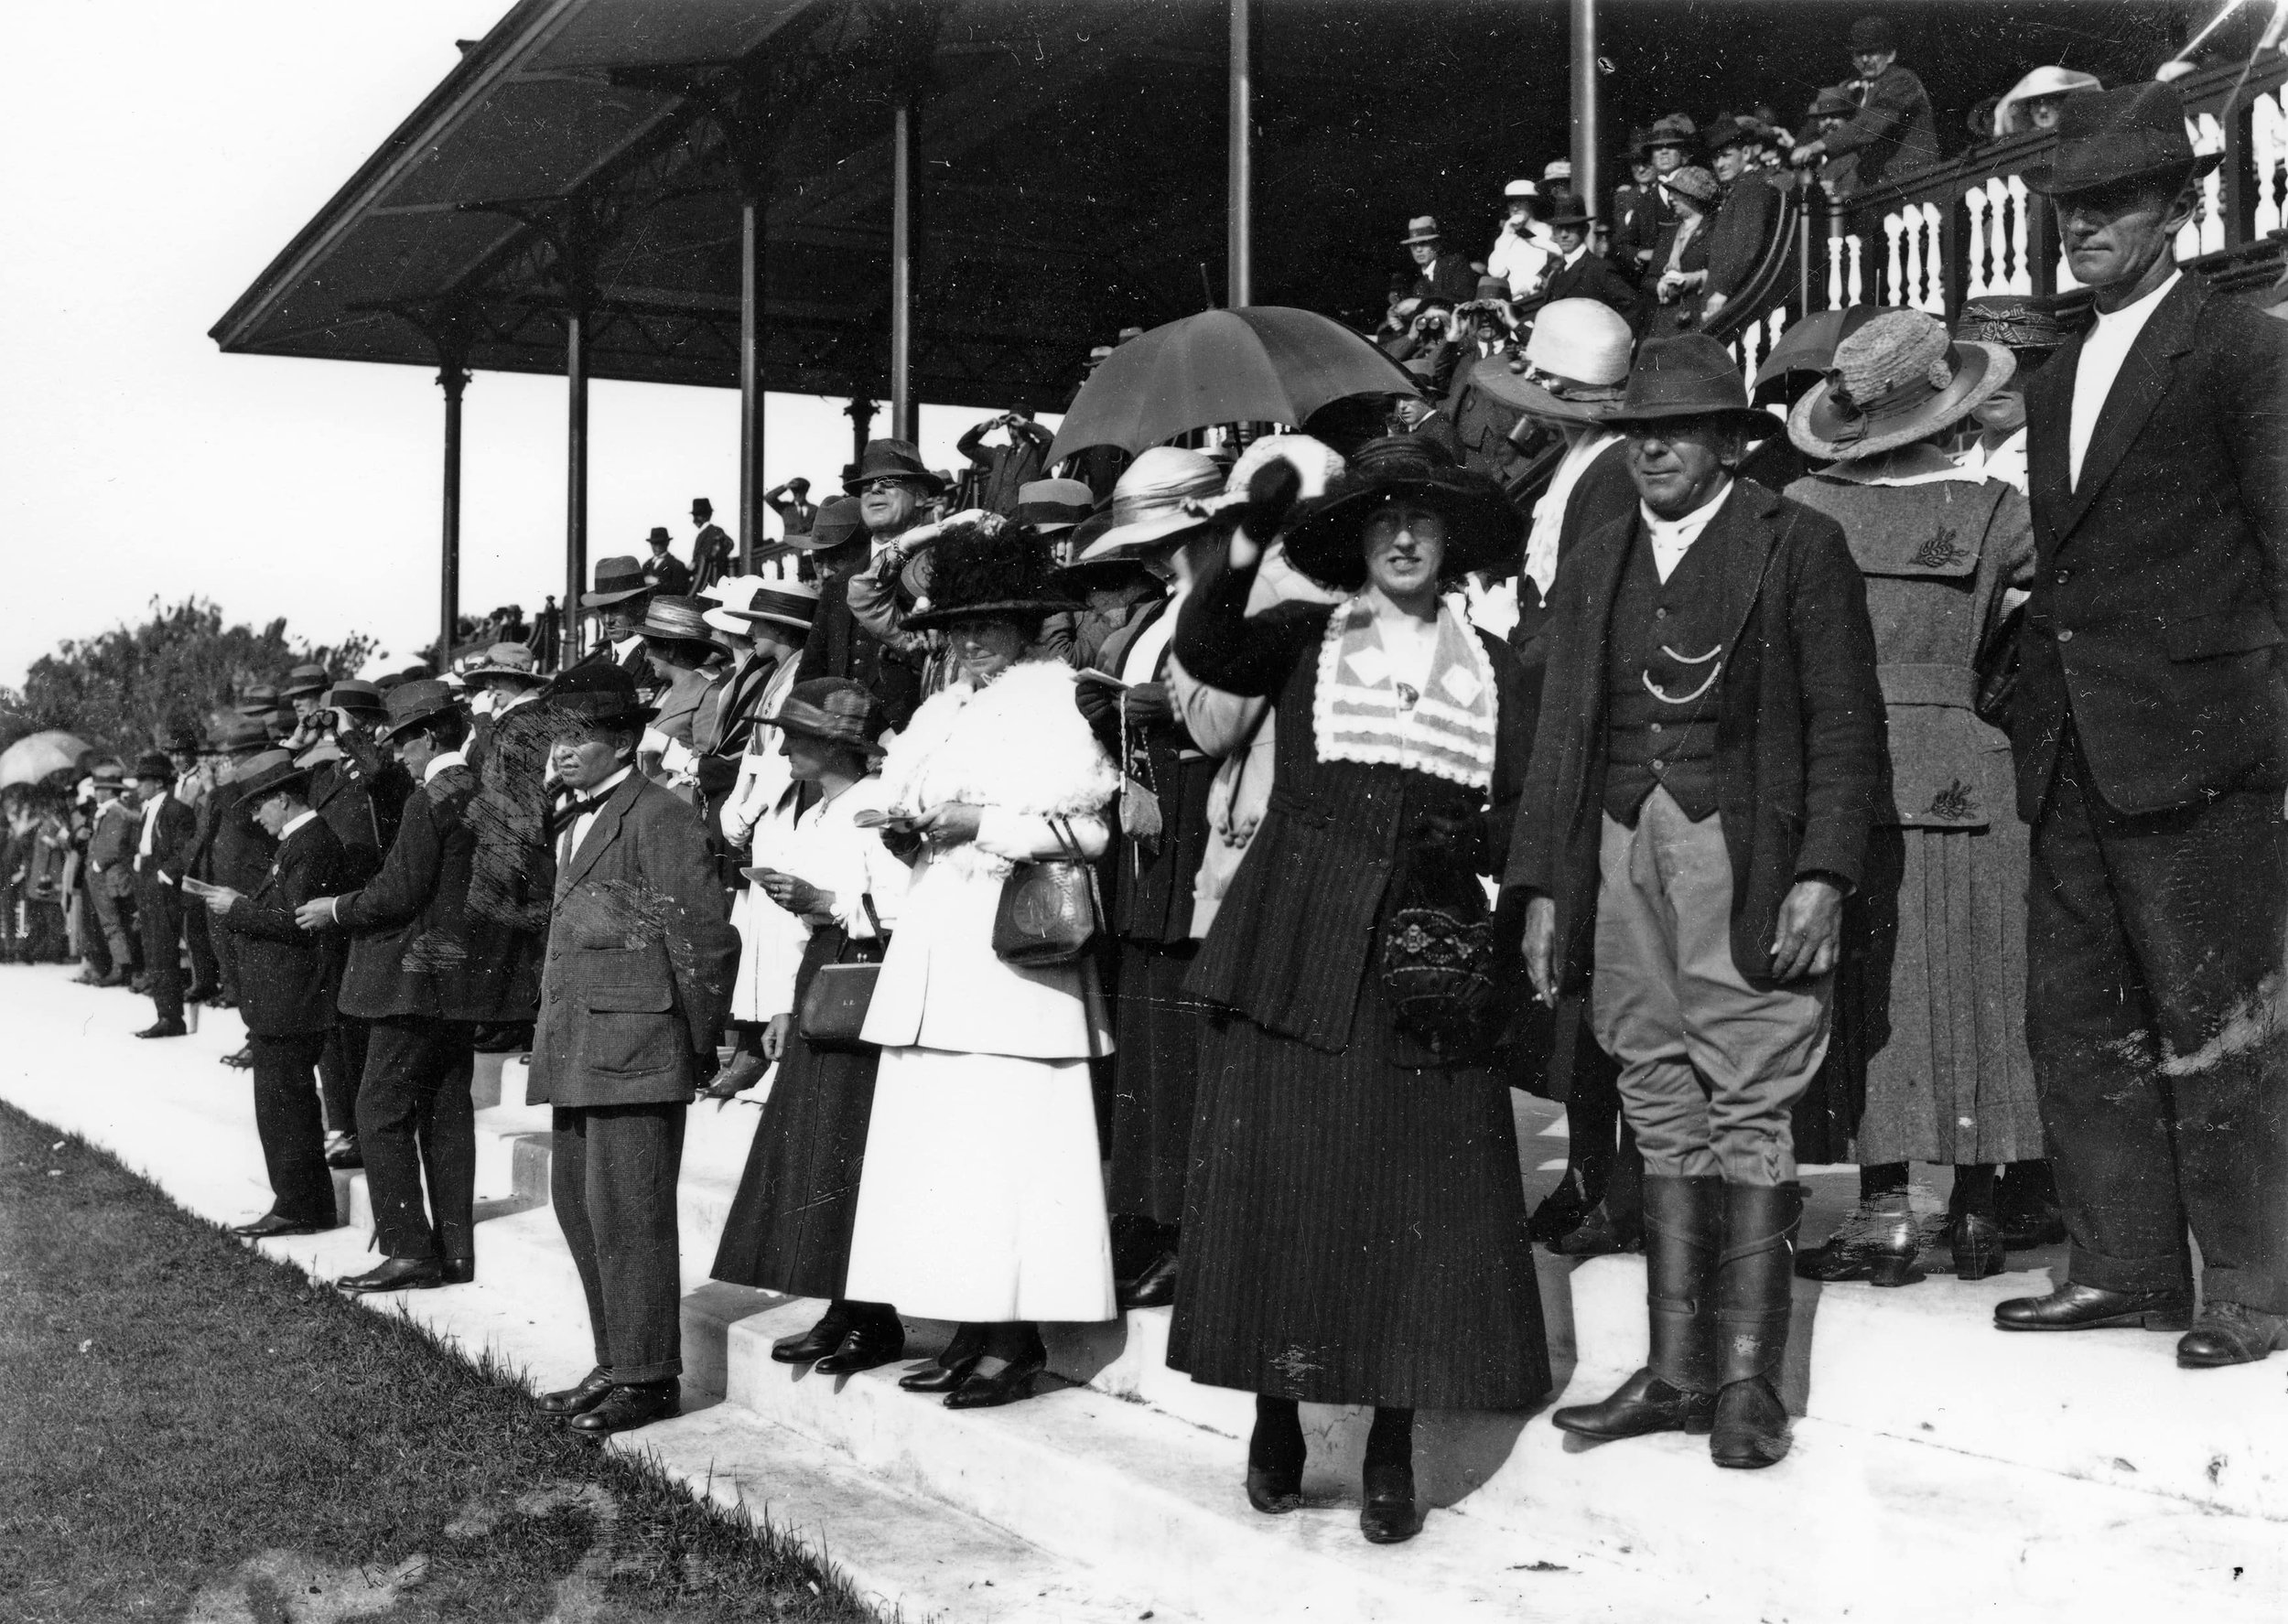
crowd in grandstand, Elwick Racecourse, Hobart 1900

Glenorchy area, Elwick racecourse and Mt. Wellington, aerial view 1970

Hobart show at Elwick, vehicles, crowds, saddle and light harness horses 1925

Post card - Waratah - crowd at oval watching cricket 1915-30
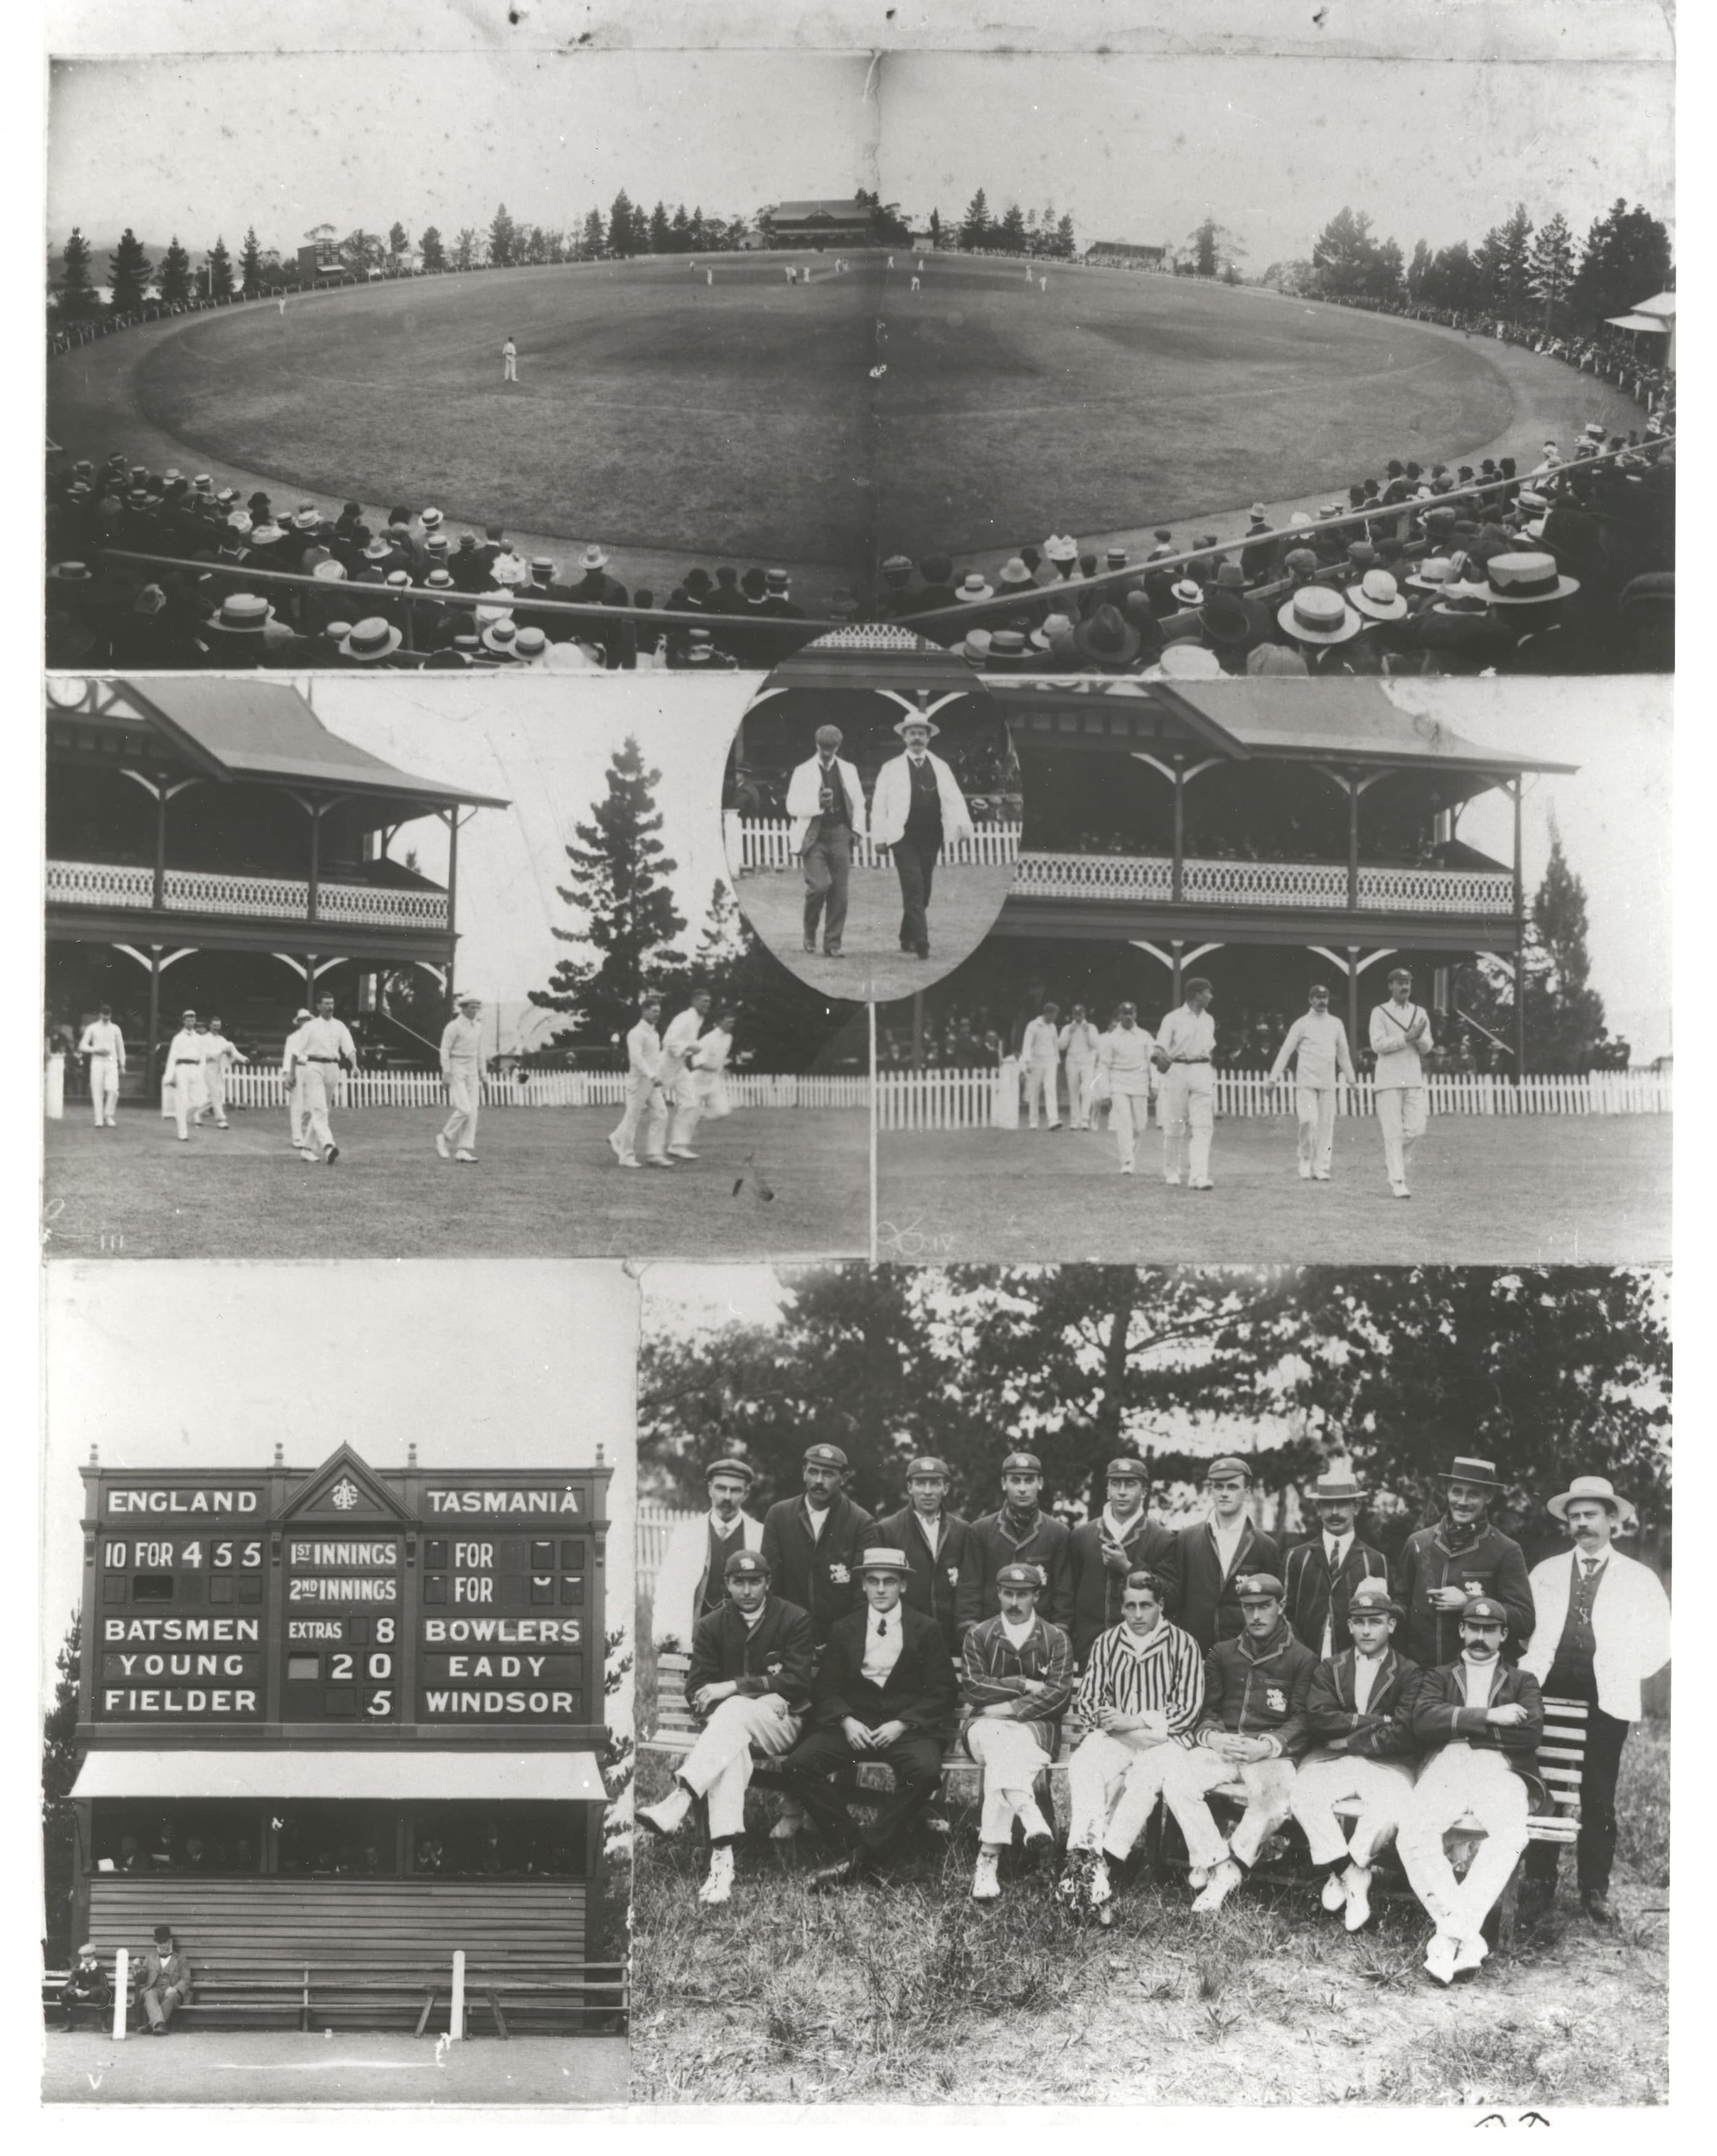
Cricket match between England and Tasmania 1900

Tasmanian Cricket Association Ground or Domain, Hobart - scenes of spectators with grandstand in background 1900-20
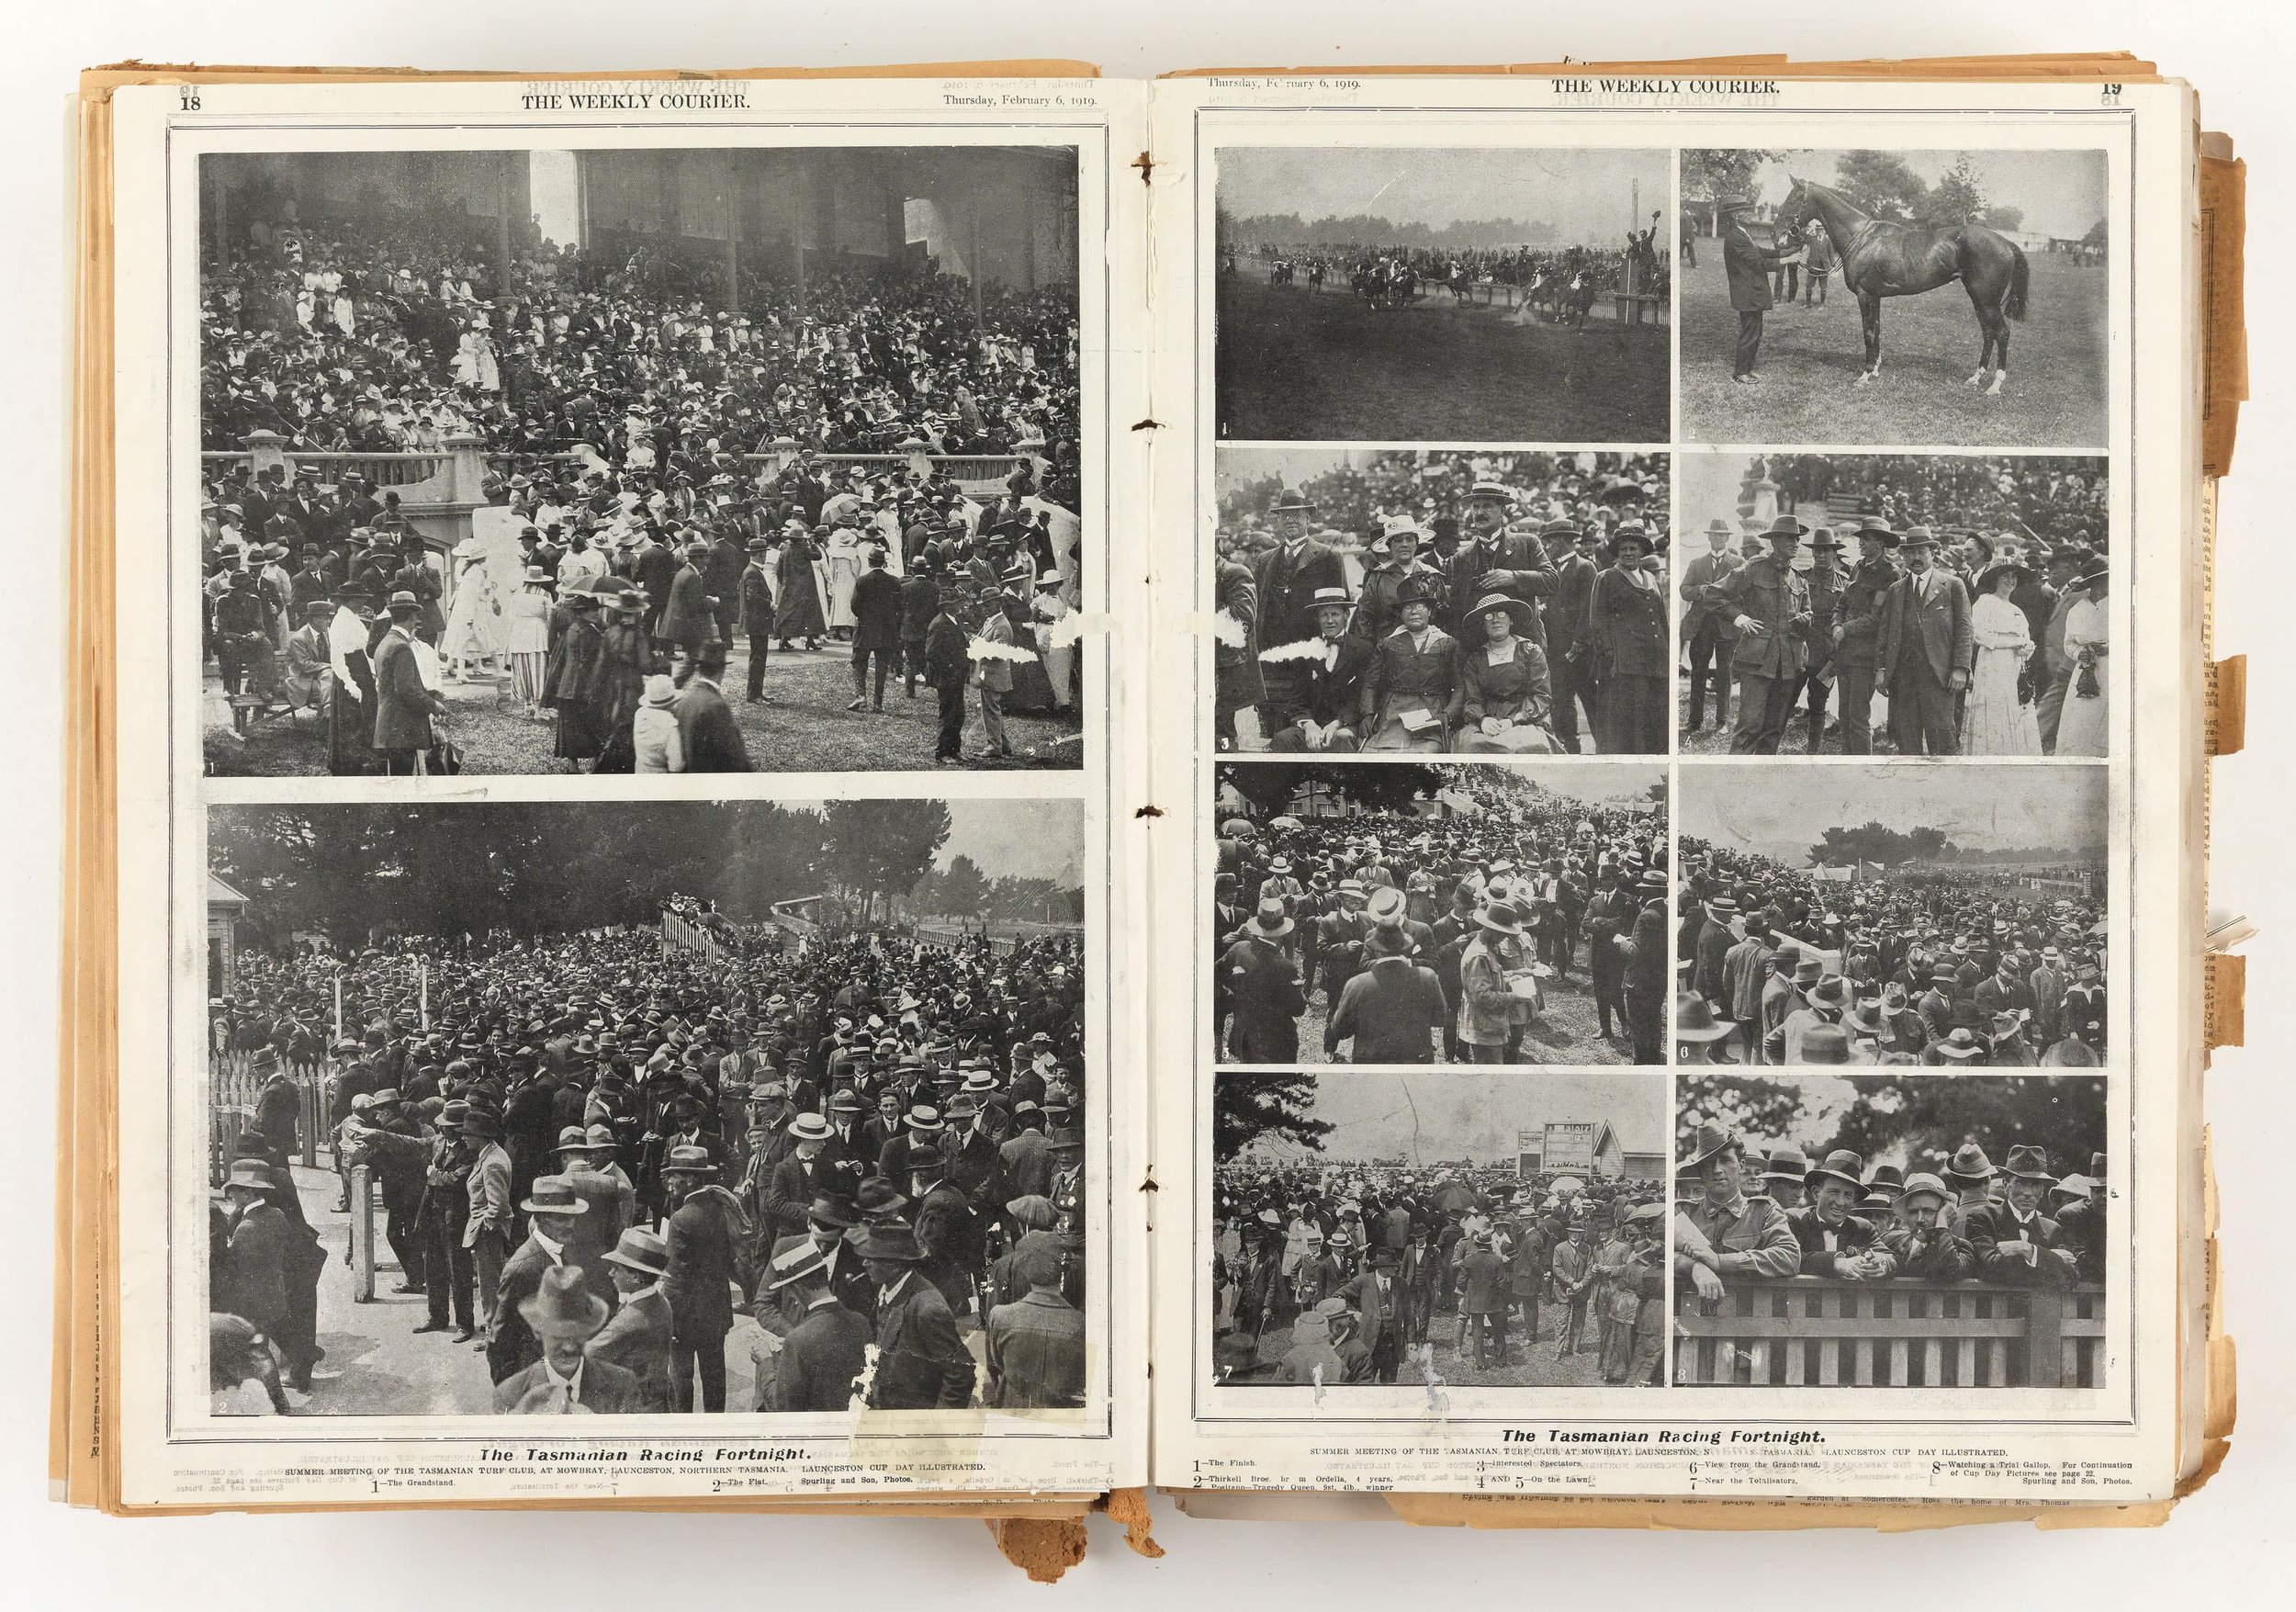
Hobart-Regatta-Newpaper-Spread-1919
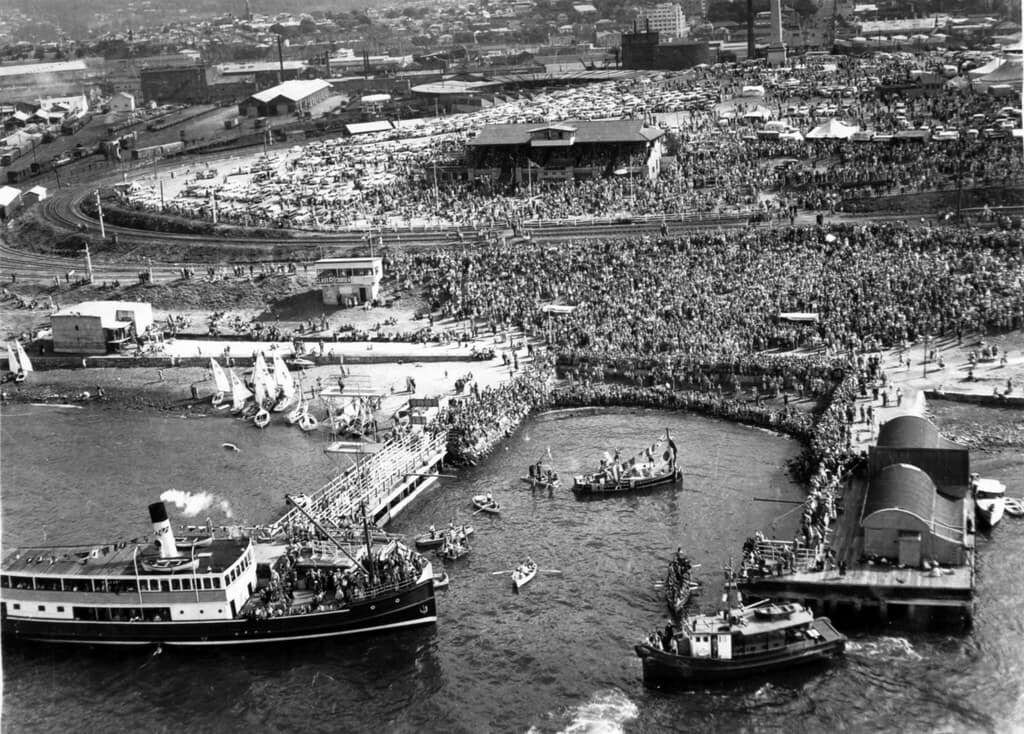
Aerial-view-of-Royal-Hobart-Regatta-ground-1900 waterside
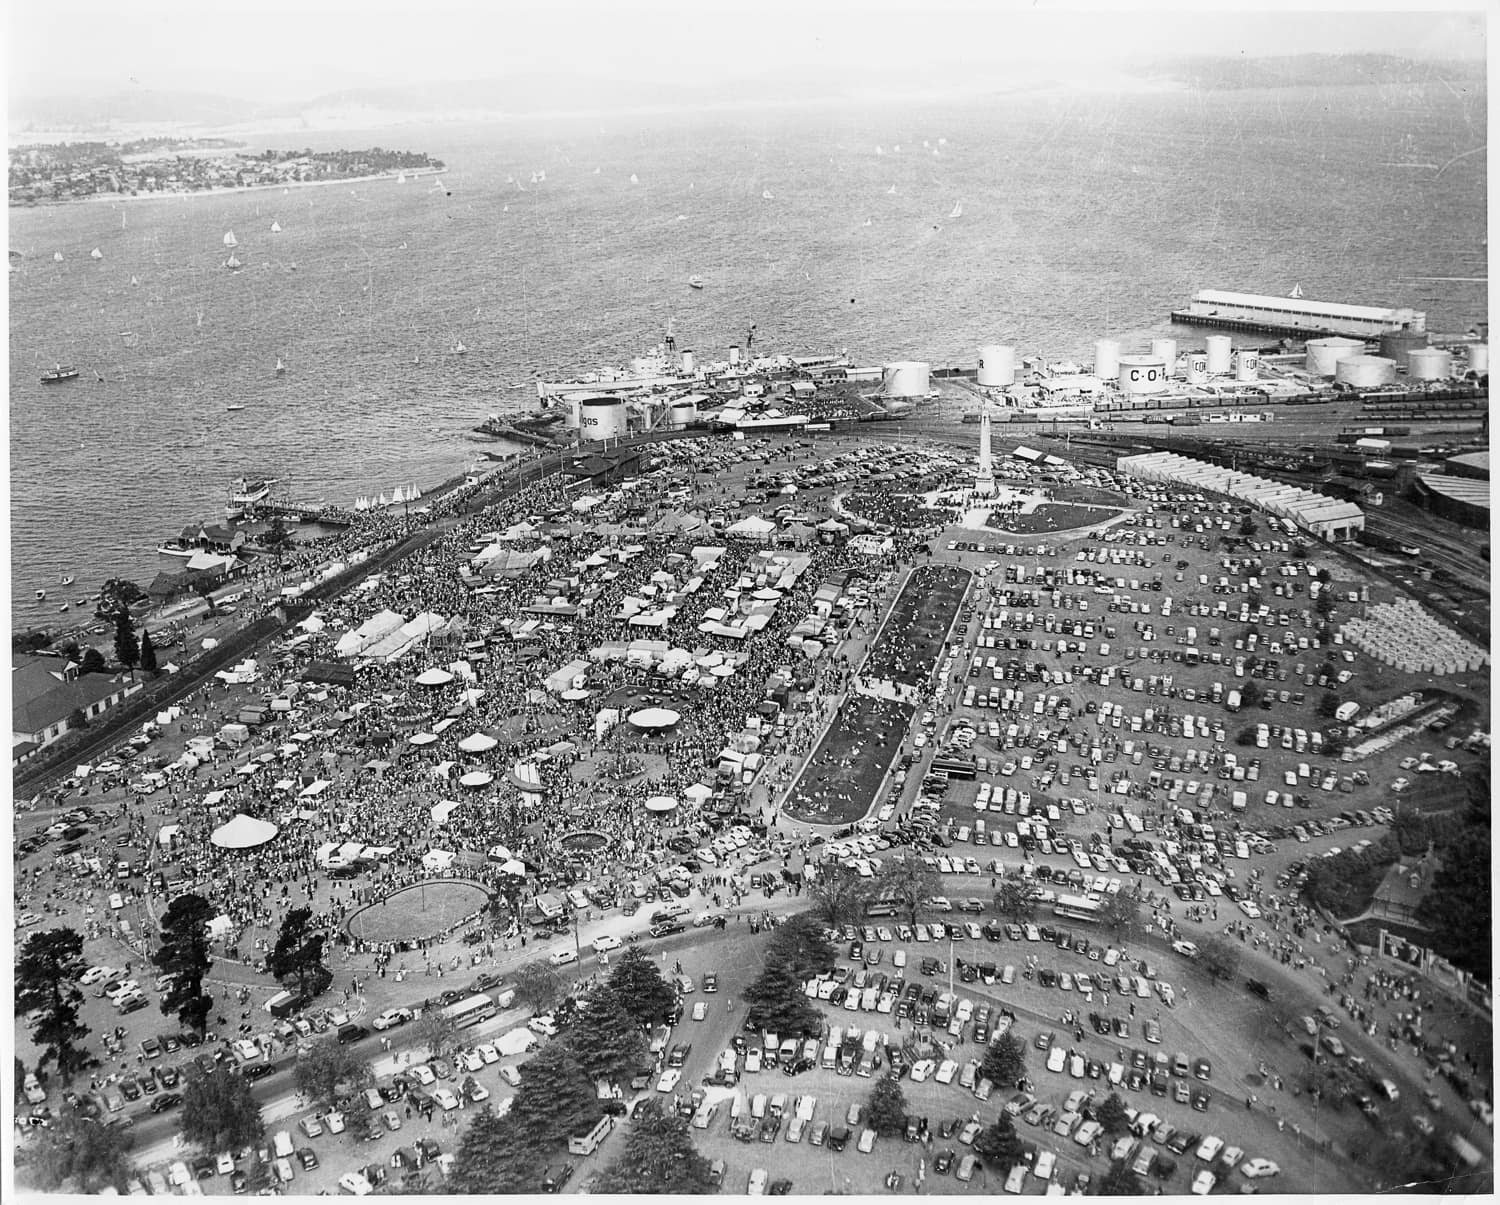
Aerial-view-of-Royal-Hobart-Regatta-ground-1900